Watch it draw itself · tap to replay
How to Draw a Plague Doctor Mask
Draw a plague doctor mask in 12 easy steps, about 9 minutes. Free, with a printable worksheet.
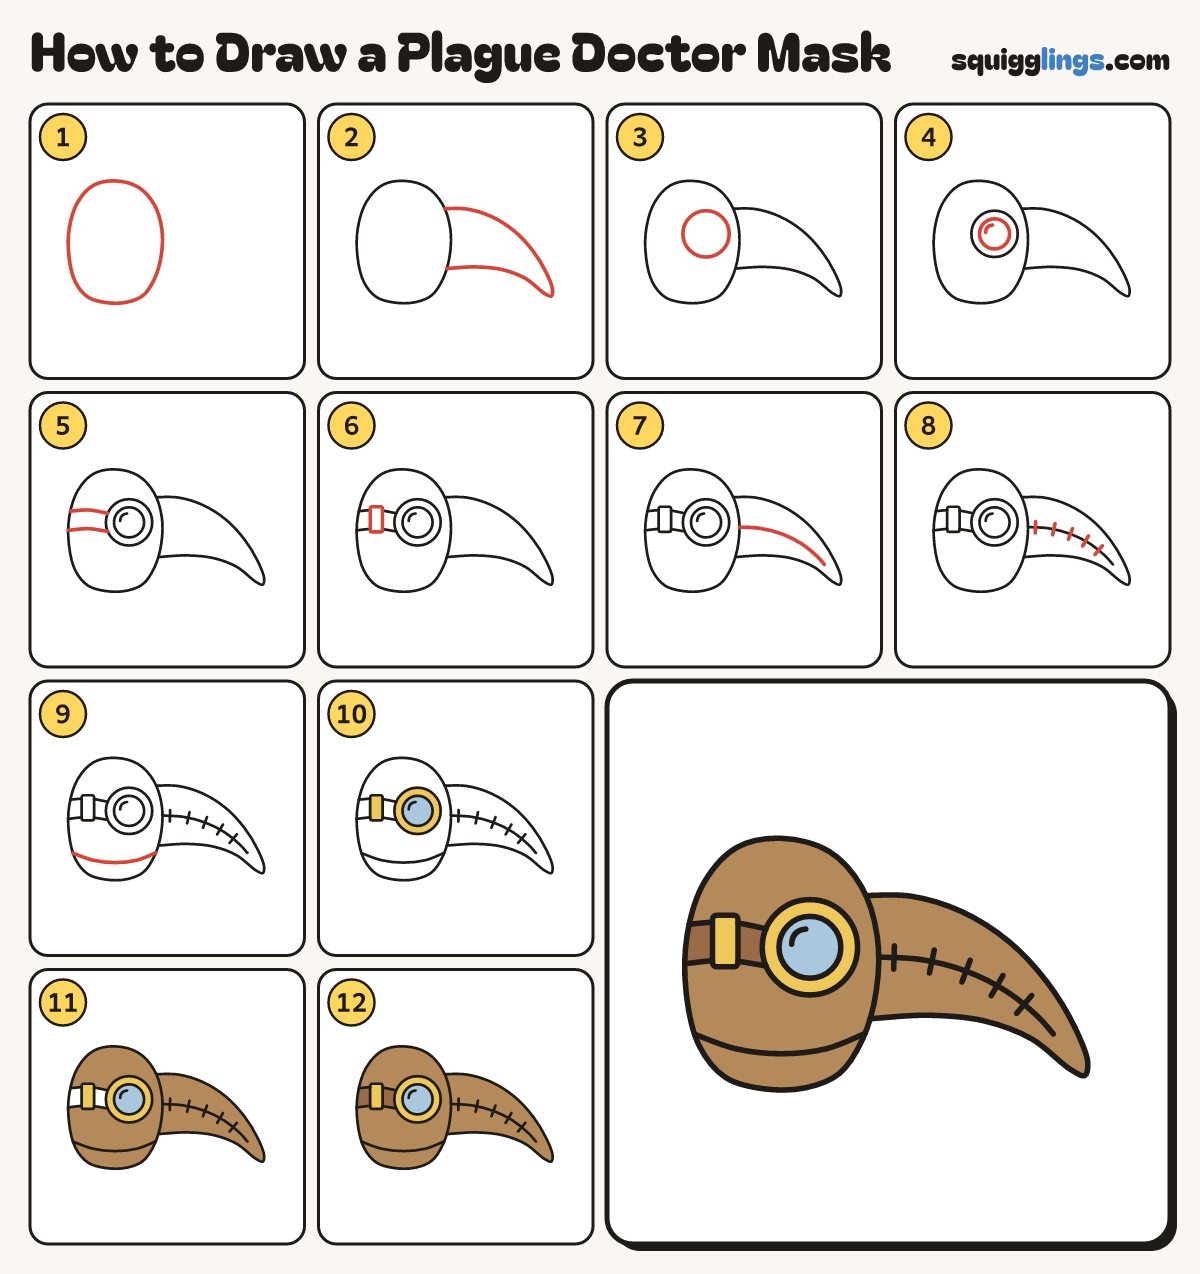
Each picture adds one red line. Draw that line, then scroll to the next picture. Rub out any dashed helper lines at the end. First up: the hood.
Step 1: The hood
On the left draw a big egg shape standing up, with a flatter bottom.
Tip Keep the egg on the left half. The beak needs the right half.
Step 2: The long beak
From the front of the egg, draw a long beak curving down to a point, then back to the egg.
Tip The beak is as long as the egg is wide, and it droops like a banana.
Step 3: Goggle ring
On the egg, next to the beak, draw a big circle.
Tip Make the circle big. It is the eye of the mask.
Step 4: Glass eye
Inside the big circle draw a smaller circle for the glass. Add a small curved shine.
Step 5: The strap
From the big circle draw 2 lines back to the edge of the egg. Stop on the edge.
Step 6: The buckle
In the middle of the strap draw a small box, a little taller than the strap.
Tip The strap lines stop at the box and carry on after it.
Step 7: Beak seam
Start on the egg where the beak joins. Draw a curved line along the beak and stop before the tip.
Step 8: Stitches
Draw 5 short stitches across the seam line, like a row of little dashes.
Tip The stitches show the mask is sewn from leather.
Step 9: Bottom hem
Near the bottom of the egg, draw a curved line from the back edge across to the front edge.
Step 10: Yellow and blue
Go over your lines. Colour the ring and the buckle yellow, and the glass light blue.
Step 11: Light brown mask
Colour the hood and the beak light brown, going around the goggle and the strap.
Step 12: Dark brown strap
Colour the strap dark brown on both sides of the buckle. Your plague doctor mask is done!
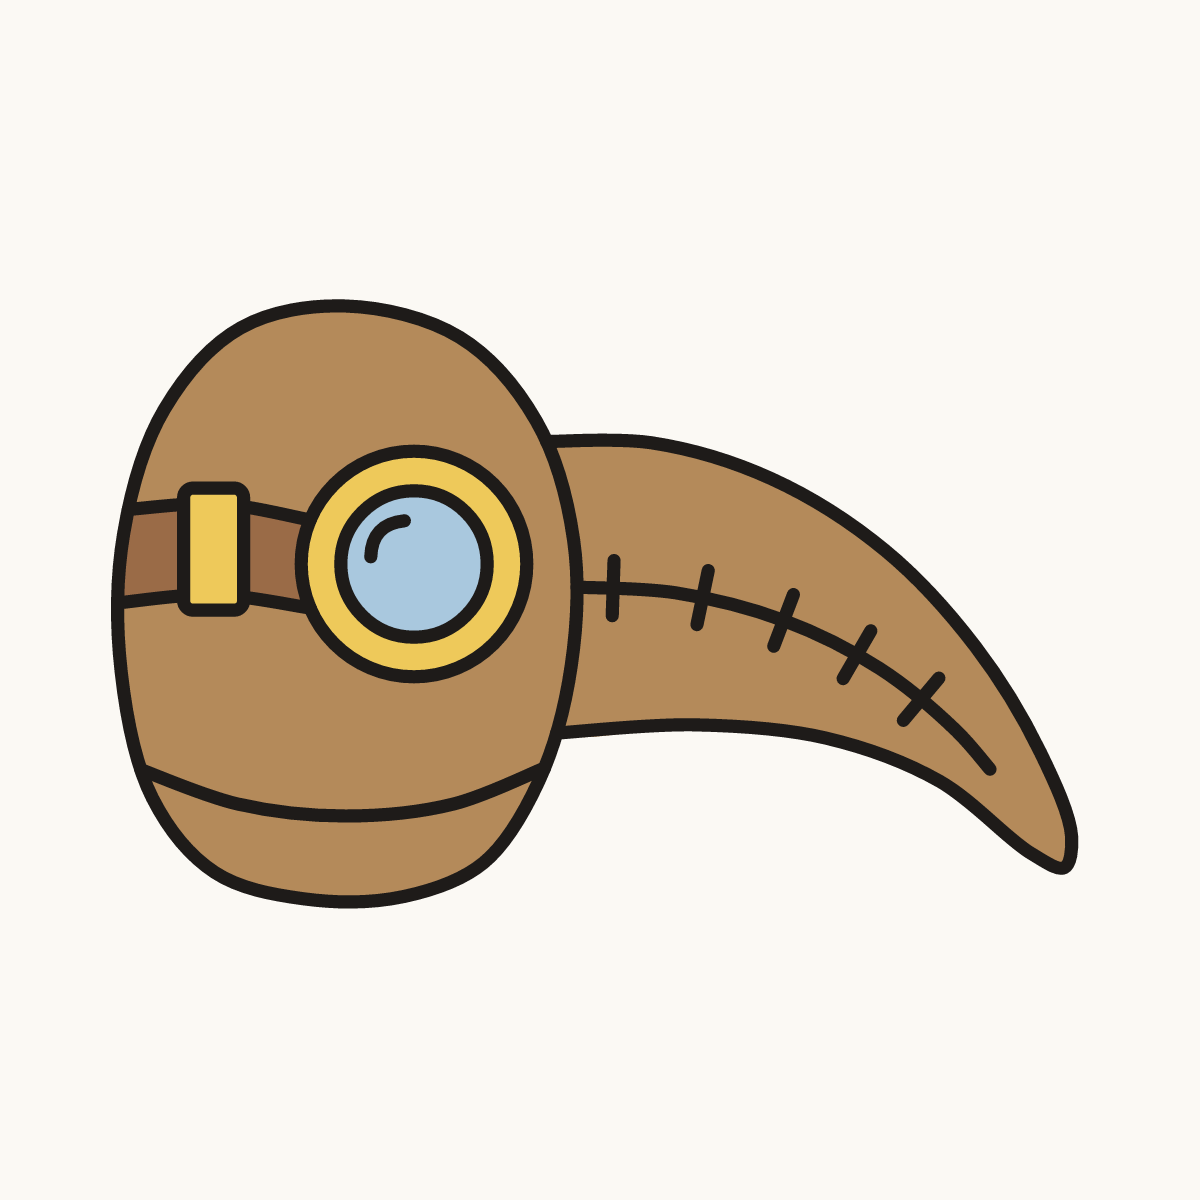
Your finished drawing
Follow the steps above and this is where you end up: a plague doctor mask, drawn by you.
Every step in one picture