Watch it draw itself · tap to replay
How to Draw a Pitcher Plant
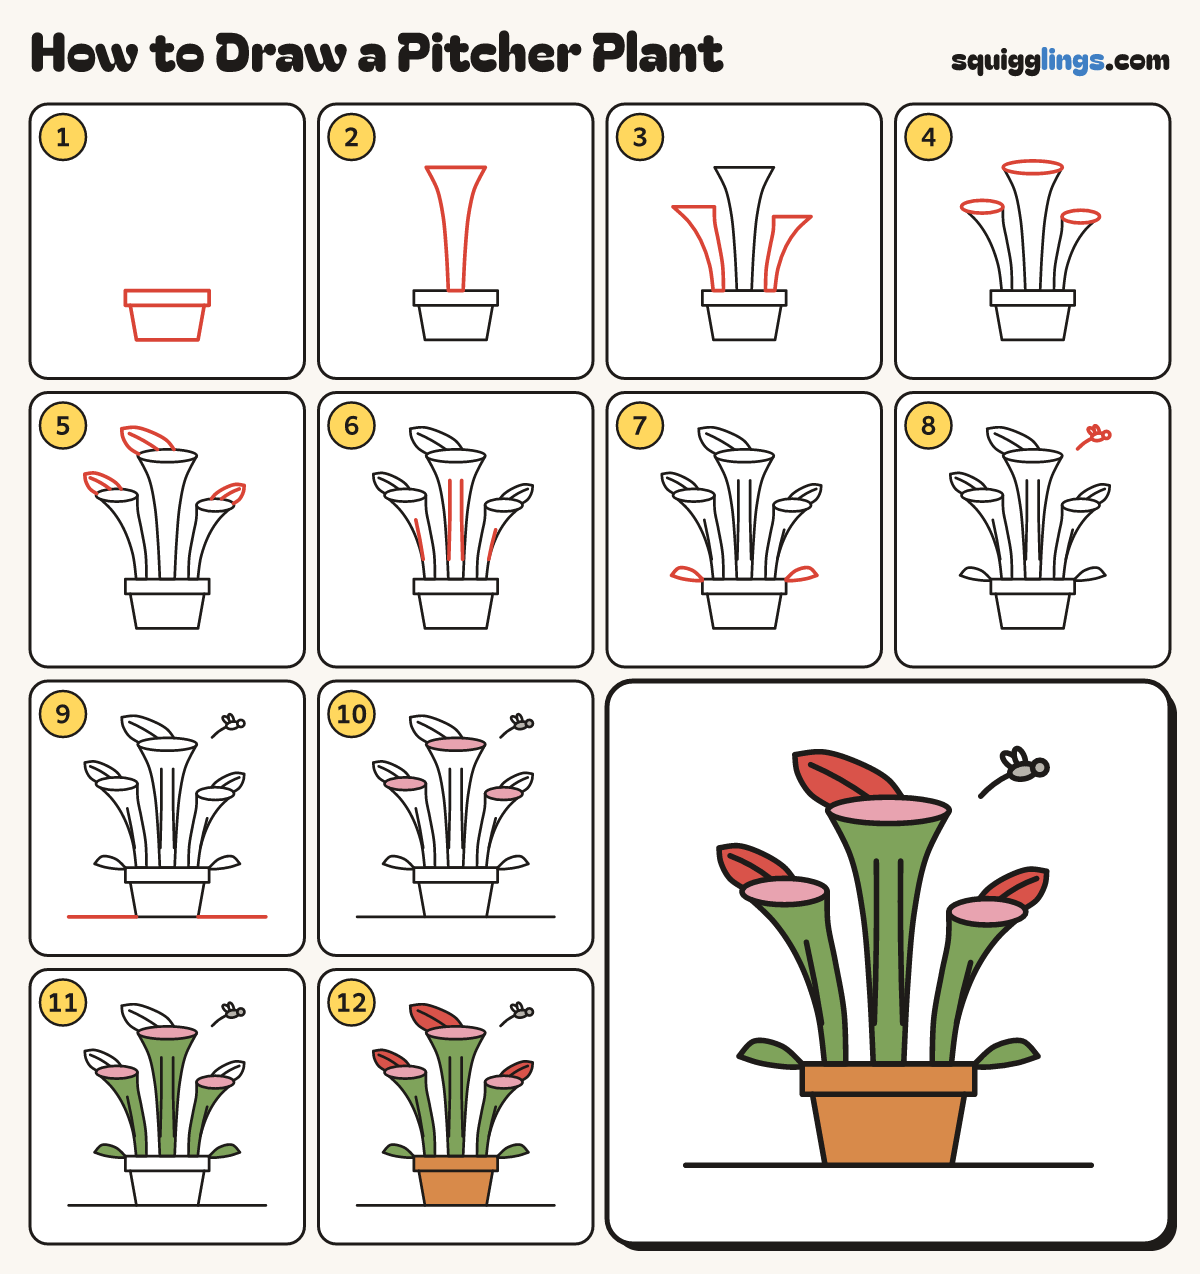
Draw a pitcher plant in 12 easy steps, about 9 minutes. Free, with a printable worksheet.
Each picture adds one red line. Draw that line, then scroll to the next picture. Rub out any dashed helper lines at the end. First up: the pot.
Step 1: The pot
Draw a flat box for the rim. From its left corner, slant down, across and up to its right corner.
Tip A little below the middle of your paper.
Step 2: The big pitcher
From the middle of the rim draw a tall trumpet: narrow foot, flaring out wide to a flat top.
Tip Narrow at the bottom, wide open at the top, no bulge in the middle.
Step 3: Two side pitchers
Each side draw a shorter trumpet from the rim, leaning outward as it goes up, the right one shorter.
Tip Keep each one on its own piece of the rim.
Step 4: Open mouths
On the flat top of each trumpet draw a wide oval mouth, so you can see into the tube.
Step 5: Leaf lids
From each mouth's outer end, curve up to a point and back down to the middle of that mouth.
Tip Start the big one at its left end so it tips left, the side ones outward. Keep each lid wide, with a vein.
Step 6: Veins
Draw 2 long curved lines down the big trumpet and one down each side trumpet, stopping below the mouths.
Step 7: Leaves
At each rim corner draw a small flat leaf lying sideways, from the corner out to a point and back.
Step 8: A fly
Up right of the big mouth draw a fly: an oval body, a head, 2 wings and a buzz curve.
Step 9: The ground
Draw the ground each side: from well left, stopping at the pot, then from the pot out to the right.
Step 10: Pink mouths
Colour the open mouths pink and the fly grey, leaving its wings white.
Step 11: Green pitchers
Colour all three trumpets leaf green, right over the veins, and the leaves too.
Step 12: Pot and lids
Colour the pot ginger and the lids red. Go over your lines and your pitcher plant is done!
Your finished drawing
Follow the steps above and this is where you end up: a pitcher plant, drawn by you.
Every step in one picture