Watch it draw itself · tap to replay
How to Draw Pierogi
Draw pierogi in 12 easy steps, about 9 minutes. Free, with a printable worksheet.
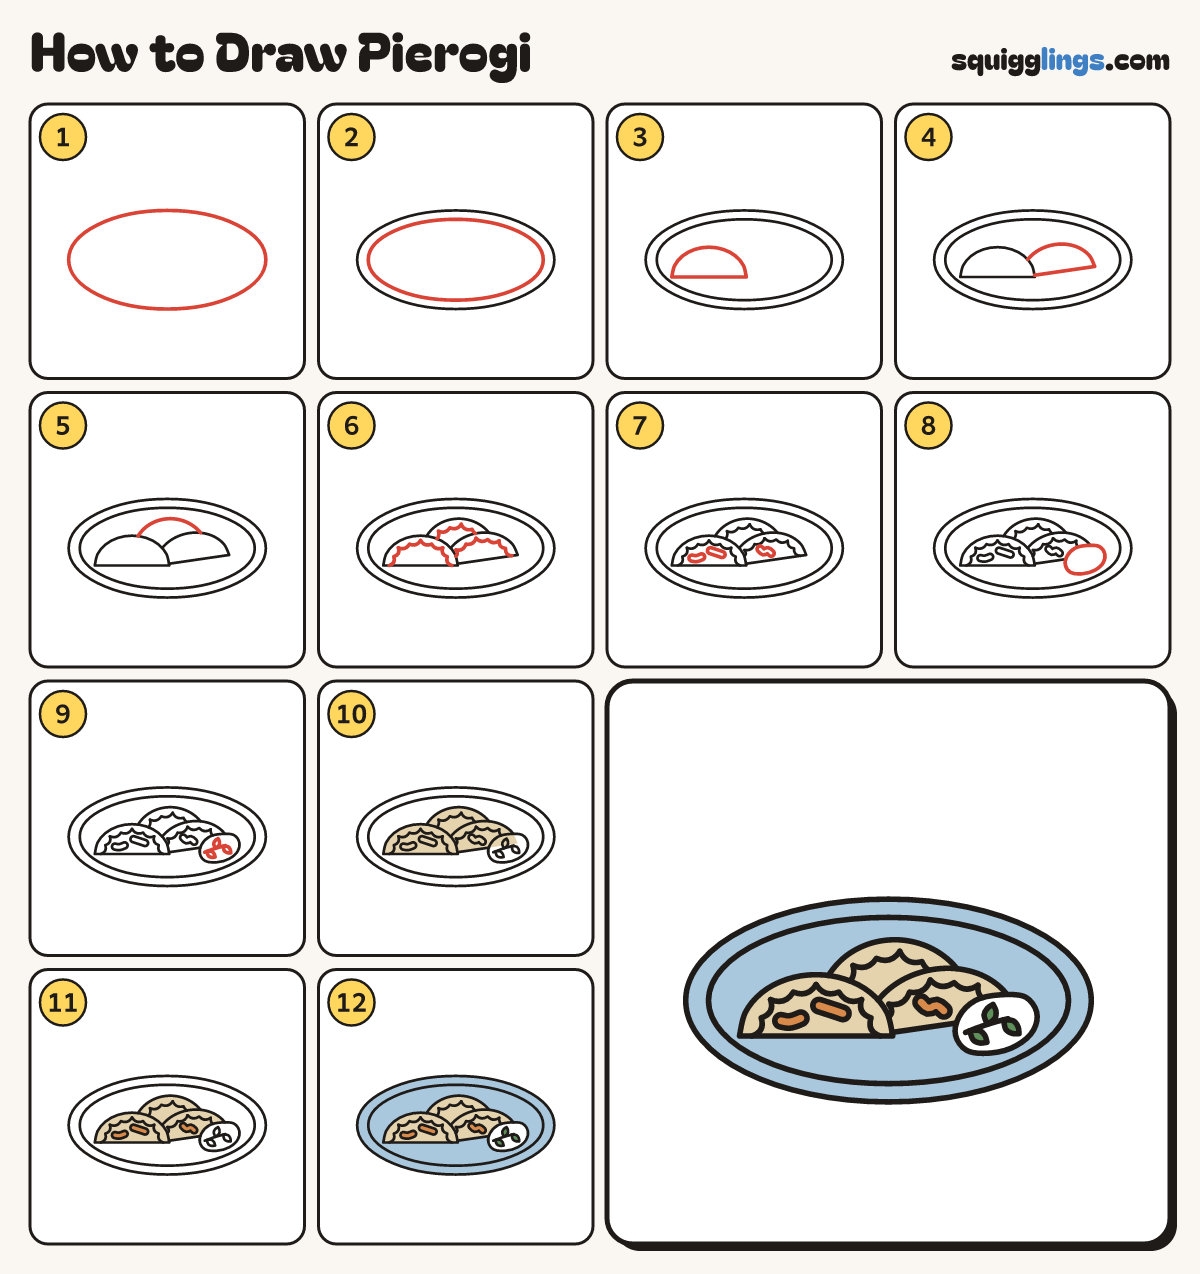
Each picture adds one red line. Draw that line, then scroll to the next picture. Rub out any dashed helper lines at the end. First up: a plate.
Step 1: A plate
A little below the middle draw a big flat oval plate, as wide as your hand.
Step 2: The rim
Draw a second oval a finger inside the plate, all the way round, for the rim.
Step 3: The first pierogi
On the left of the plate draw a fat half-moon lying on its flat side, about 3 fingers wide.
Tip A pierogi is a little dumpling folded in half.
Step 4: A second one
To the right draw another half-moon, tilted a little and tucked behind the first.
Step 5: One at the back
Behind and between them draw the top of a third half-moon, peeking up over the front two.
Step 6: Pinched edges
Along the curved edge of each pierogi, a finger inside, draw a bumpy line of little pinches.
Tip The pinches keep the filling in.
Step 7: Fried onions
Draw 3 little curved strips of fried onion on the 2 front pierogi, round at the ends.
Step 8: Sour cream
Over the right end of the second pierogi draw a wobbly blob of sour cream.
Step 9: Dill
Across the sour cream draw a thin dill stem with 3 slim pointed leaves sticking off it.
Step 10: Sandy dough
Go over your lines, then colour the pierogi sand, going around the onion strips.
Step 11: Orange onions, white cream
Colour the onion strips orange and leave the sour cream white.
Step 12: Green dill, blue plate
Colour the dill green and the plate sky blue, going around the pierogi and the cream.
Your finished drawing
Follow the steps above and this is where you end up: pierogi, drawn by you.
Every step in one picture