Watch it draw itself · tap to replay
How to Draw a Picnic
Draw a picnic in 14 easy steps, about 11 minutes. Free, with a printable worksheet.
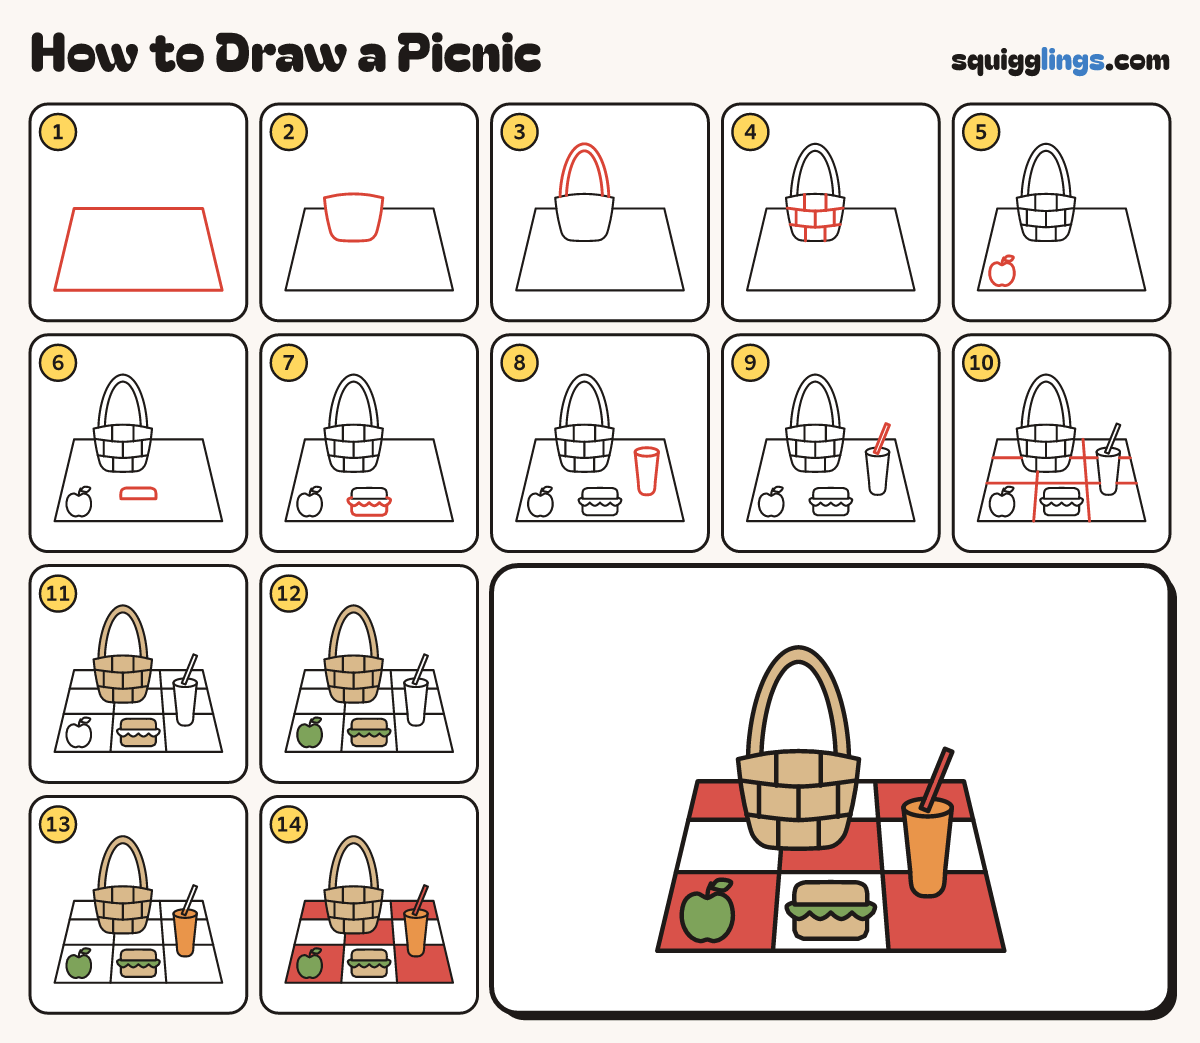
Each picture adds one red line. Draw that line, then scroll to the next picture. Rub out any dashed helper lines at the end. First up: the blanket.
Step 1: The blanket
Draw a big blanket: a short line on top, a longer line below, and 2 sides leaning out.
Tip It lies flat on the grass, so the far edge looks shorter.
Step 2: The basket
On the left draw a basket tub: a low hill on top, sides leaning in, a rounded bottom.
Tip Keep the 2 sides matching, like a flower pot.
Step 3: The handle
Start on top of the basket. Draw a tall arch and stop on top. Add a thinner arch inside.
Step 4: Basket weave
Draw 2 smile lines across the basket. Add short upright lines between them, like bricks.
Tip Put each short line between the 2 above it.
Step 5: An apple
In the front left corner draw a round apple with a dip on top, a stem and a leaf.
Step 6: A bread slice
In the front middle draw a slice of bread lying flat: a low box with round top corners.
Tip Leave room under it for the filling.
Step 7: Lettuce and bread
Under it draw a wavy lettuce edge poking out each side, then a bottom slice the same size.
Step 8: A glass
On the right draw a flat oval. Start at one end, draw a tall U, stop at the other.
Step 9: A straw
From the middle of the oval draw a thin straw leaning up to the right.
Tip A straw is 2 lines close together, closed at both ends.
Step 10: Big checks
Draw 2 lines across the blanket and 2 lines down it, skipping everything on top.
Tip The lines down lean out a little, like the sides.
Step 11: Tan basket and bread
Go over your lines. Colour the basket, its handle and the 2 bread slices tan.
Step 12: Green apple, lettuce
Colour the apple, its leaf and the lettuce green.
Step 13: Orange juice
Colour the glass of juice orange, top and sides.
Step 14: Red checks
Colour the straw red. Colour the 4 corner squares and the middle square red, around the picnic.
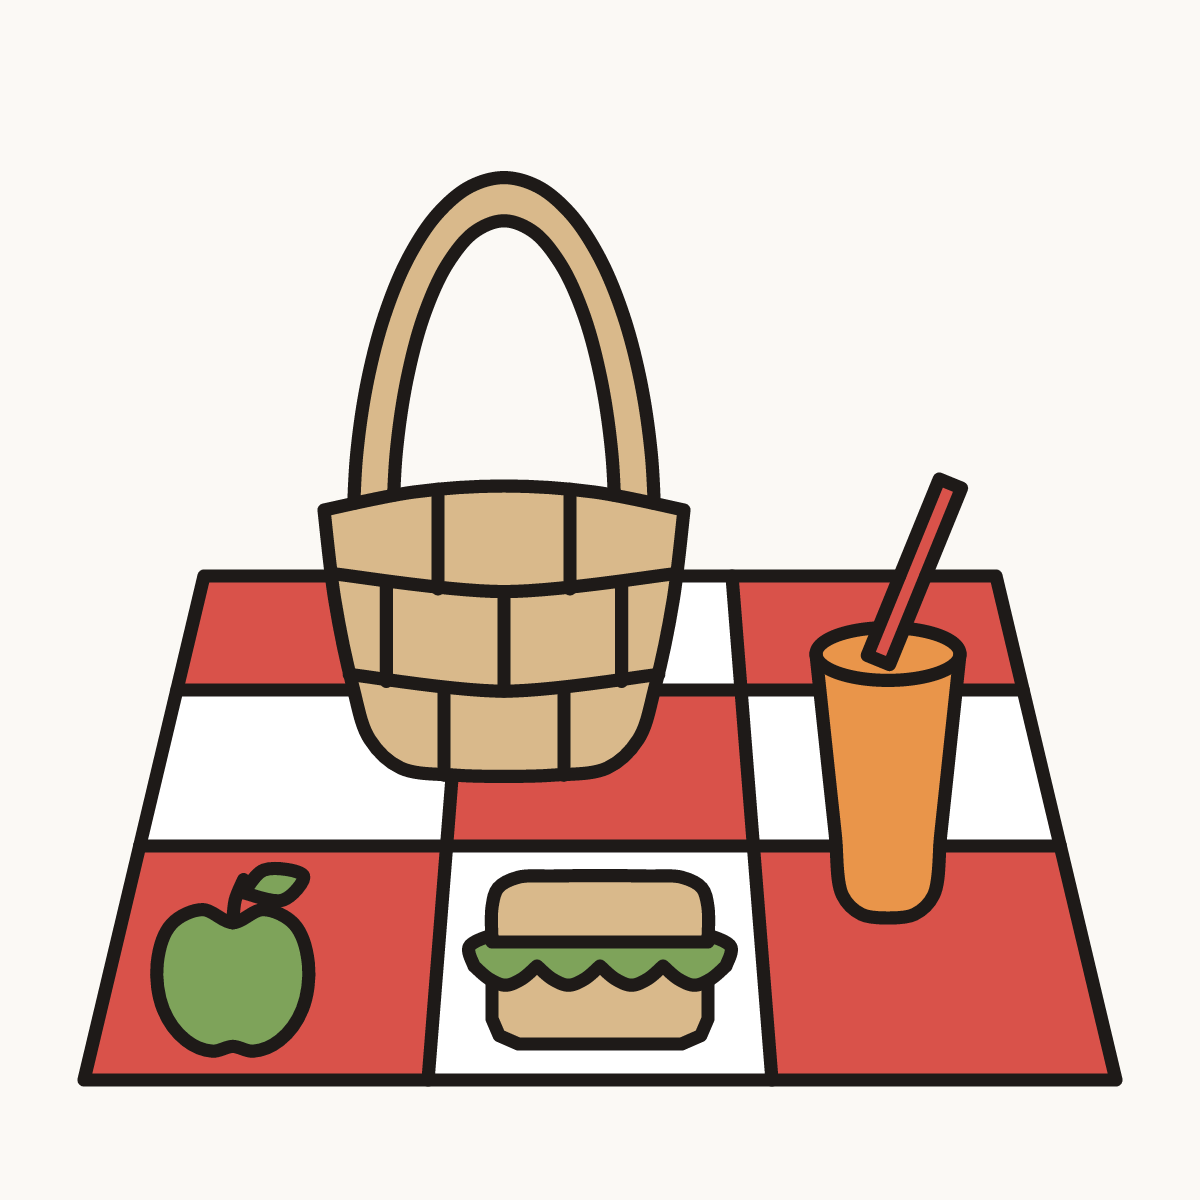
Your finished drawing
Follow the steps above and this is where you end up: a picnic, drawn by you.
Every step in one picture