Watch it draw itself · tap to replay
How to Draw an Elderberry Cluster
Draw an elderberry cluster in 10 easy steps, about 8 minutes. Free, with a printable worksheet.
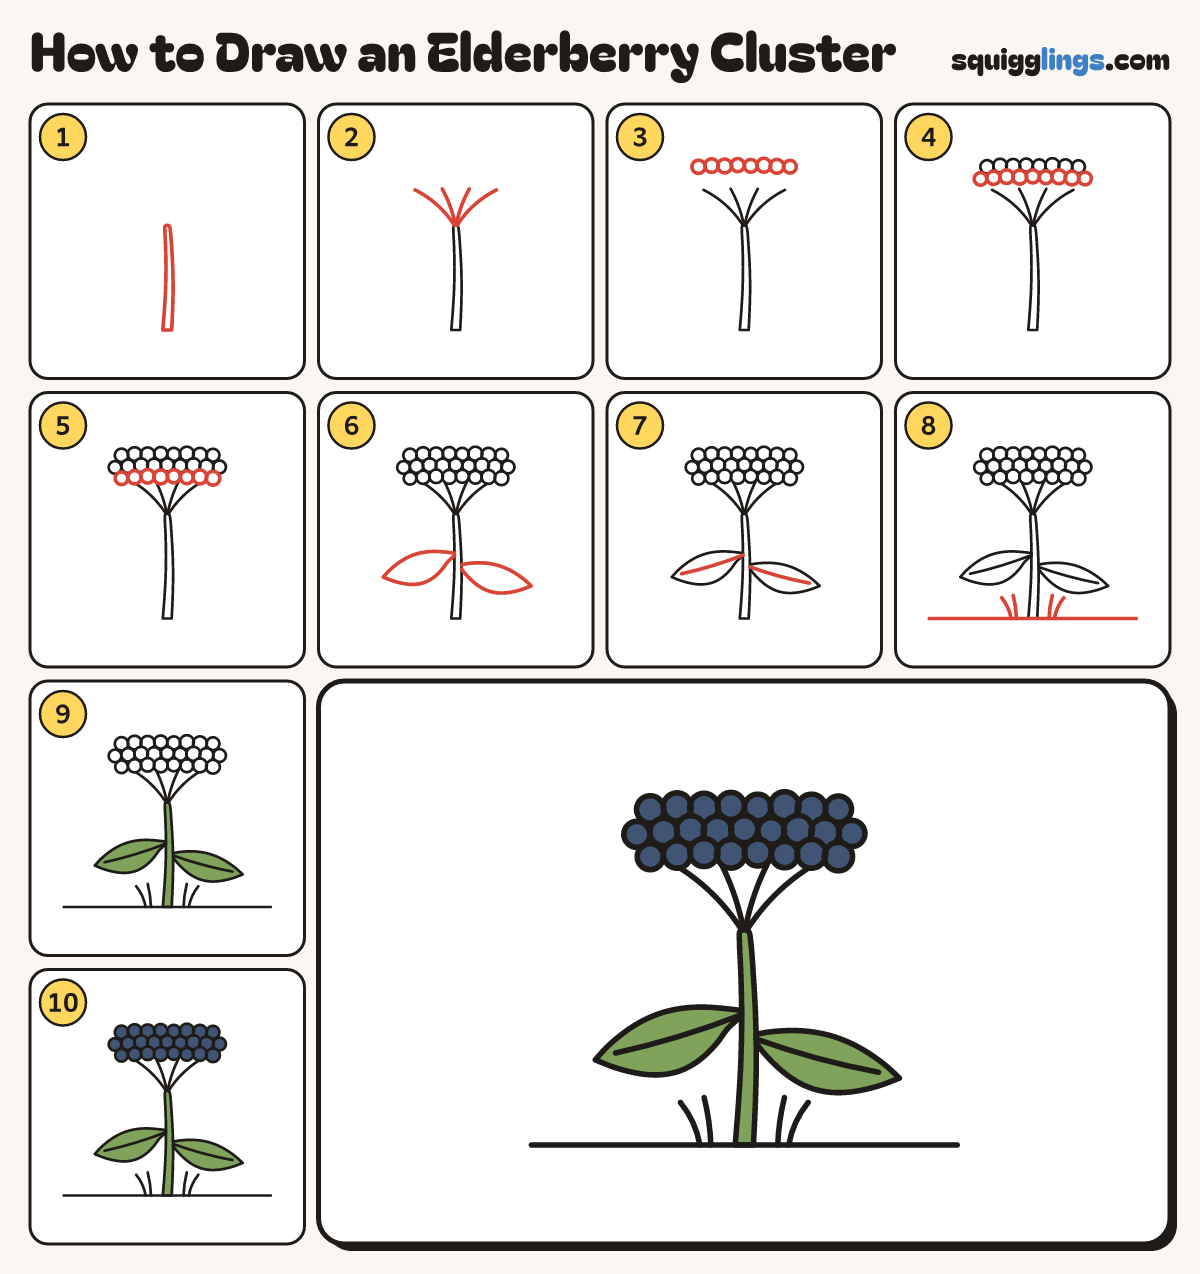
Each picture adds one red line. Draw that line, then scroll to the next picture. Rub out any dashed helper lines at the end. First up: the stem.
Step 1: The stem
From the bottom middle draw a thin stem up with a gentle bend, narrower at the top, stopping above the middle.
Tip Elderberries grow in flat clouds of dozens of tiny berries, all packed together.
Step 2: 4 thin stalks
Start all 4 stalks at the middle of the stem top. Fan them up and out, stopping a finger higher.
Step 3: Top row
Above the stalks draw a row of 8 tiny round berries side by side, touching, almost flat.
Step 4: Middle row
Under that row draw 9 berries tucked into the gaps, a little wider, so the ends stick out.
Step 5: Bottom row
Under those draw 8 more berries in the gaps, covering the tips of the stalks.
Step 6: 2 leaves
Halfway down the stem draw a long pointed leaf drooping left, and a second one right, a little lower.
Step 7: Leaf veins
Start on the stem end of each leaf. Draw 1 curved vein, stopping near the tip.
Step 8: Ground and grass
Draw a long ground line through the bottom of the stem, and flick 2 grass blades up each side.
Step 9: Green leaves and stem
Go over your lines, then colour the 2 leaves and the stem green.
Step 10: Dark berries
Colour every berry navy blue, and your elderberries are done!
Your finished drawing
Follow the steps above and this is where you end up: an elderberry cluster, drawn by you.
Every step in one picture