Watch it draw itself · tap to replay
How to Draw a Pedal Car
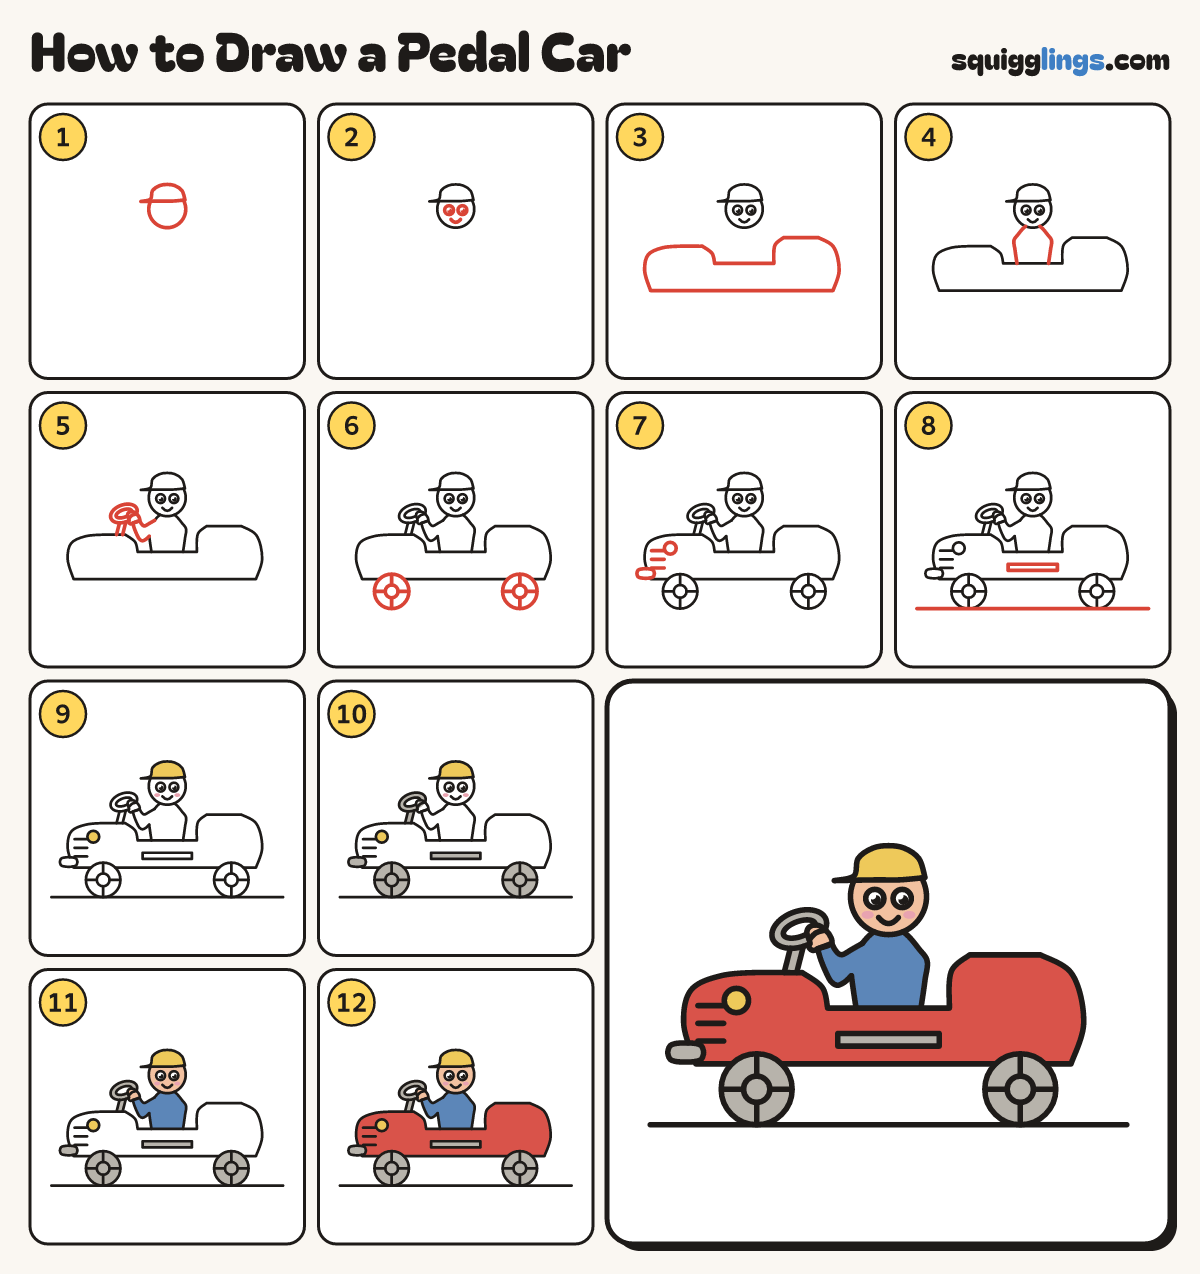
Draw a pedal car in 12 easy steps, about 9 minutes. Free, with a printable worksheet.
Each picture adds one red line. Draw that line, then scroll to the next picture. Rub out any dashed helper lines at the end. First up: head and cap.
Step 1: Head and cap
A little above the middle draw a round head. On top draw a cap with a peak sticking out left.
Step 2: Eyes and smile
In the head draw 2 round eyes with black dots, and a small smile under them.
Step 3: Little car
Under the kid draw the car: round nose, flat bonnet, a dip for the seat, raised back.
Tip A pedal car is an open little tub with no roof.
Step 4: Body in the seat
Start on the seat edge left of the head. Draw a shirt up over the shoulders. Stop on the seat.
Step 5: Steering wheel and arm
Draw a stick up to a ring. From the shoulder bend an arm to a fist, stop on the shirt.
Tip Give the ring an oval hole. Wrap the fist over the rim. Rub out the shirt line inside the sleeve.
Step 6: Two wheels
Under the nose and the tail draw a round wheel on the ground. Add a hub and 4 spokes.
Step 7: Grille, lamp and bumper
On the nose draw 3 short lines. Add a small round headlamp above and a bumper in front.
Step 8: Stripe and road
Along the side under the seat draw a long thin stripe. Draw a road line under both wheels.
Step 9: Yellow cap, pink cheeks
Colour the headlamp and the cap yellow. Give the kid 2 little pink cheeks.
Step 10: Grey wheels and bumper
Colour the wheels, the steering wheel and its stick, the bumper and the stripe grey.
Step 11: Blue shirt, peach face
Colour the shirt and sleeve blue. Colour the face and fist peach around the pink cheeks. Leave the eyes white.
Step 12: Red car
Go over your lines, then colour the car red around the stripe, lamp, bumper and wheels. Ready to roll!
Your finished drawing
Follow the steps above and this is where you end up: a pedal car, drawn by you.
Every step in one picture