Watch it draw itself · tap to replay
How to Draw a Palm Tree Silhouette
Draw a palm tree silhouette in 10 easy steps, about 8 minutes. Free, with a printable worksheet.
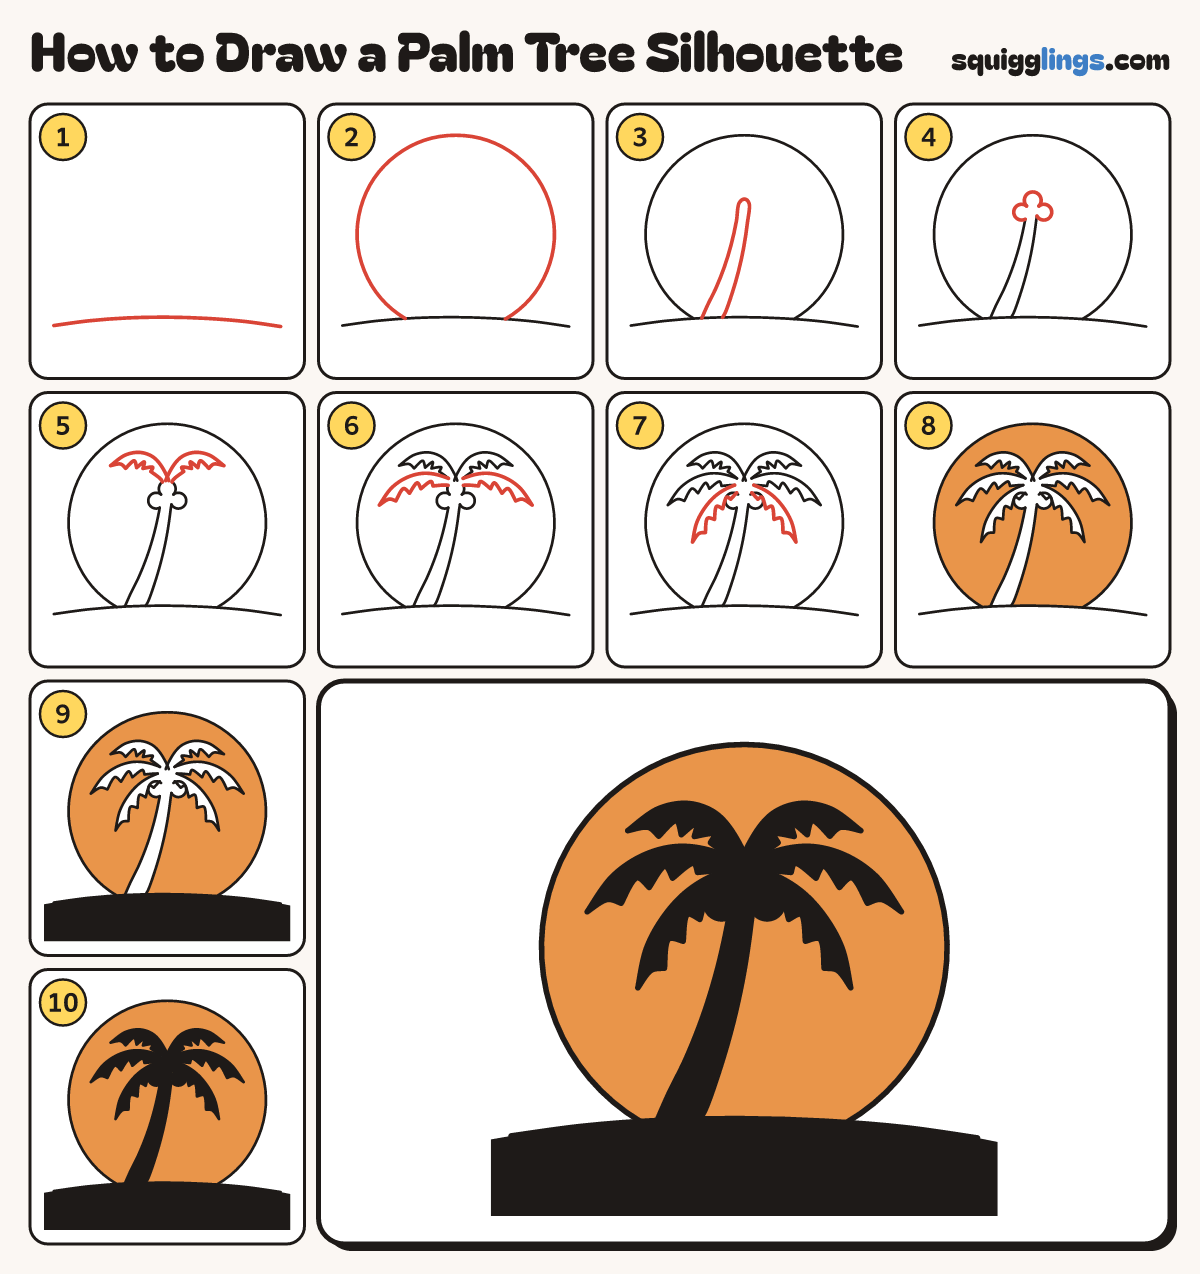
Each picture adds one red line. Draw that line, then scroll to the next picture. Rub out any dashed helper lines at the end. First up: low hill.
Step 1: Low hill
Start near the left edge. Draw a long, low hill across the bottom of your paper to the right edge.
Tip Keep it gentle, like a wide smile turned upside down.
Step 2: Setting sun
Start on the hill at the left. Draw a huge round sun up and over. Stop on the hill.
Tip Go slowly so it stays round.
Step 3: Curved trunk
Start on the hill. Draw 2 lines that lean and curve up. Stop where they almost meet, near the top.
Tip The trunk bends like a banana and gets thinner as it climbs.
Step 4: Coconut bunch
At the top of the trunk draw 3 small round coconuts: one on top, one on each side.
Step 5: Top leaves
From the top of the trunk draw 2 long leaves that arch up and out. Zigzag back underneath.
Tip Each leaf is a rainbow line on top with 4 hanging points below.
Step 6: Side leaves
Draw 2 longer leaves that reach out sideways and droop at the tips, with hanging points below.
Step 7: Drooping leaves
Draw 2 leaves that hang down beside the trunk, with their points on the inner side.
Tip Rub out the lines where the leaves cross, so the crown is one shape.
Step 8: Orange sun
Colour the sun orange. Go carefully around the trunk and the leaves, and stop at the hill.
Step 9: Black hill
Colour the hill black, right across the bottom of your paper.
Step 10: Solid black palm
Colour the trunk, the coconuts and every leaf black. No details inside.
Tip A silhouette is a solid dark shape, like a shadow.
Your finished drawing
Follow the steps above and this is where you end up: a palm tree silhouette, drawn by you.
Every step in one picture