Watch it draw itself · tap to replay
How to Draw a Paint Splatter
Draw a paint splatter in 10 easy steps, about 8 minutes. Free, with a printable worksheet.
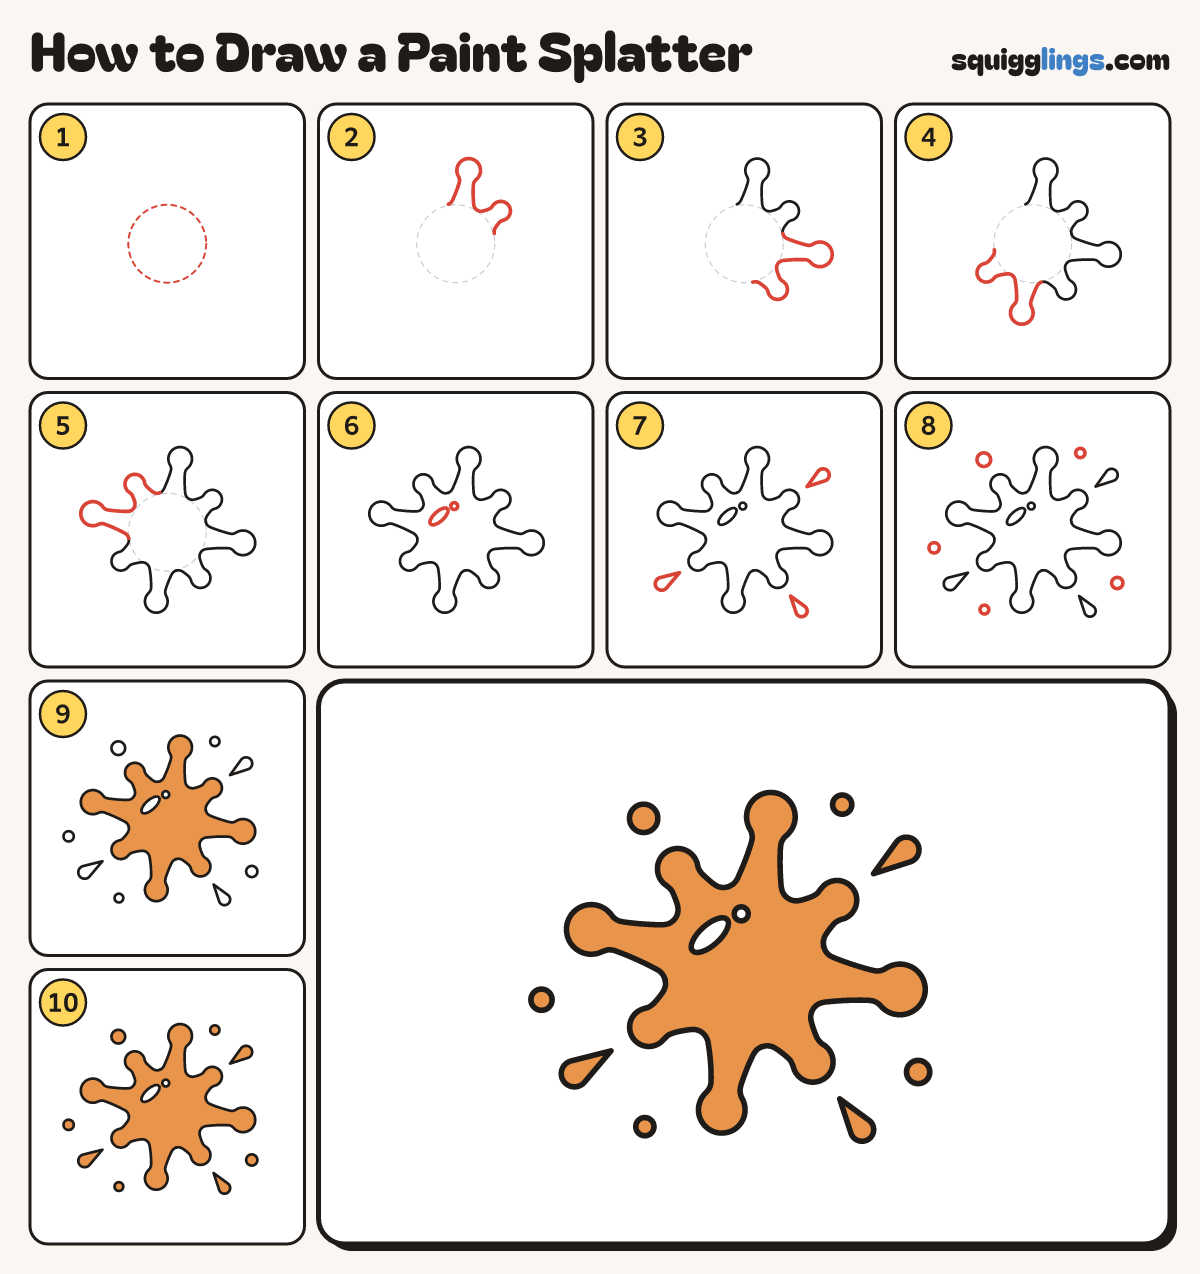
Each picture adds one red line. Draw that line, then scroll to the next picture. Rub out any dashed helper lines at the end. First up: a light circle.
Step 1: A light circle
In the middle of your paper lightly draw a circle, about a third as wide as the page.
Step 2: Top arms
Start on the circle's top. Draw a long arm and a short arm with round ends. Stop on the circle.
Tip Each arm starts wide at the circle, gets thinner, then swells into a round blob at the end.
Step 3: Right arms
Start where you stopped. Draw another long arm and short arm round the right side. Stop on the circle.
Step 4: Bottom arms
Start where you stopped. Draw a long arm and a short arm under the circle. Stop on the circle.
Step 5: Left arms
Start where you stopped. Draw the last 2 arms on the left and join back to the first arm.
Step 6: A wet shine
Rub out the circle. Up on the left of the middle draw a bean and a dot for shine.
Step 7: Flying drops
Past 3 of the short arms draw a drop flying away: round at the far end, pointed near the splat.
Step 8: Tiny dots
Draw 5 tiny round dots of paint further out, in the gaps. Make them different sizes.
Step 9: Orange splat
Colour the big splat orange. Leave the bean and the dot white, so the paint looks wet.
Step 10: Orange drops
Colour every drop and dot orange too. Go over your lines and your paint splatter is done!
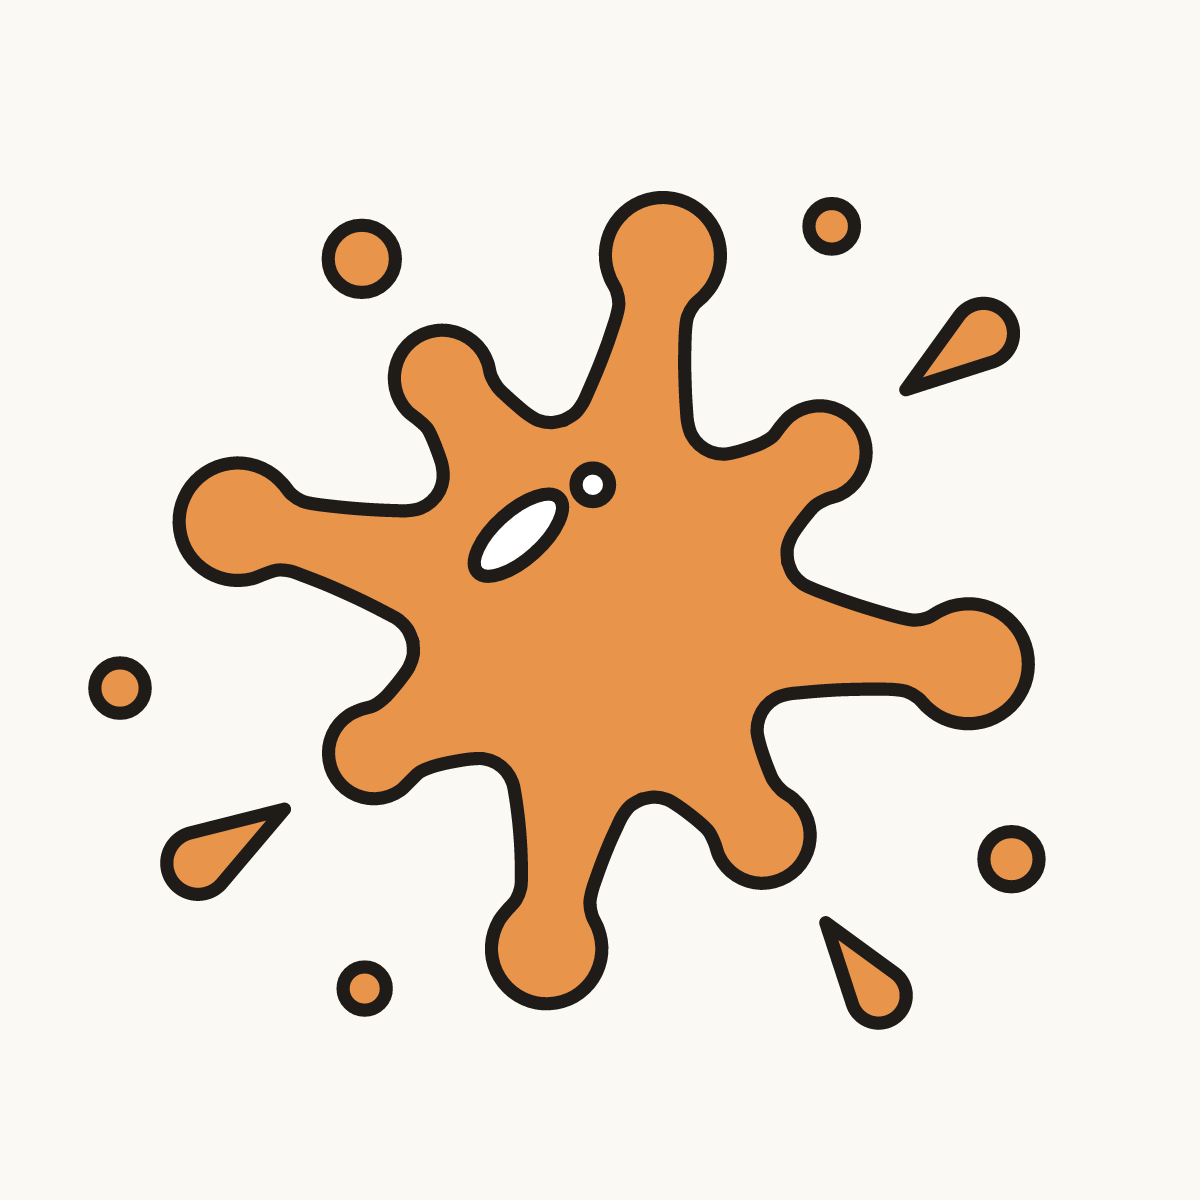
Your finished drawing
Follow the steps above and this is where you end up: a paint splatter, drawn by you.
Every step in one picture