Watch it draw itself · tap to replay
How to Draw a One Point Perspective
Draw a one point perspective in 11 easy steps, about 8 minutes. Free, with a printable worksheet.
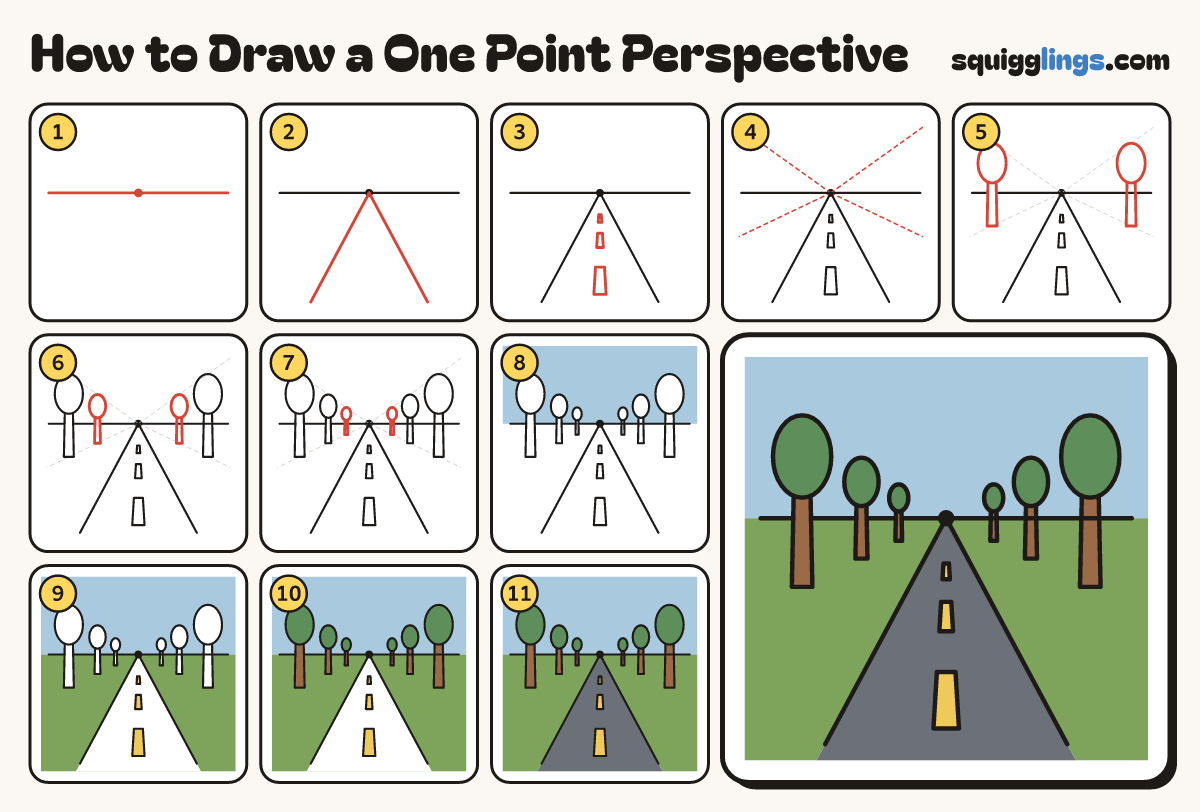
Each picture adds one red line. Draw that line, then scroll to the next picture. Rub out any dashed helper lines at the end. First up: line and dot.
Step 1: Line and dot
Draw a straight line across your paper, a little above the middle. Put a dot in the middle of it.
Tip The dot is the vanishing point. Every slanted line in this drawing aims at it.
Step 2: The road
Start at the dot. Draw a straight line down to the bottom on each side, spreading wide apart.
Tip Use a ruler if you have one.
Step 3: Middle dashes
Down the middle of the road draw 3 dashes. Make each one smaller as the road goes away.
Step 4: Light guide lines
From the dot draw 2 light lines out to each side: one slanting up, one slanting down.
Step 5: Nearest trees
Near each side draw a tall tree that just fits between the light lines: an oval top on a trunk.
Step 6: Middle trees
Closer to the dot draw a smaller tree on each side, fitting between the same light lines.
Step 7: Far trees
Closest to the dot draw the smallest tree on each side. Things look smaller as they get further away.
Step 8: Blue sky
Rub out the light lines. Colour the sky light blue above the line, around the trees.
Step 9: Yellow and green
Colour the dashes yellow. Colour the grass light green on both sides of the road, around the trunks.
Step 10: Green and brown
Colour the 6 tree tops dark green and the trunks brown.
Step 11: Grey road
Colour the road dark grey, around the yellow dashes. Your road runs far away to the dot!
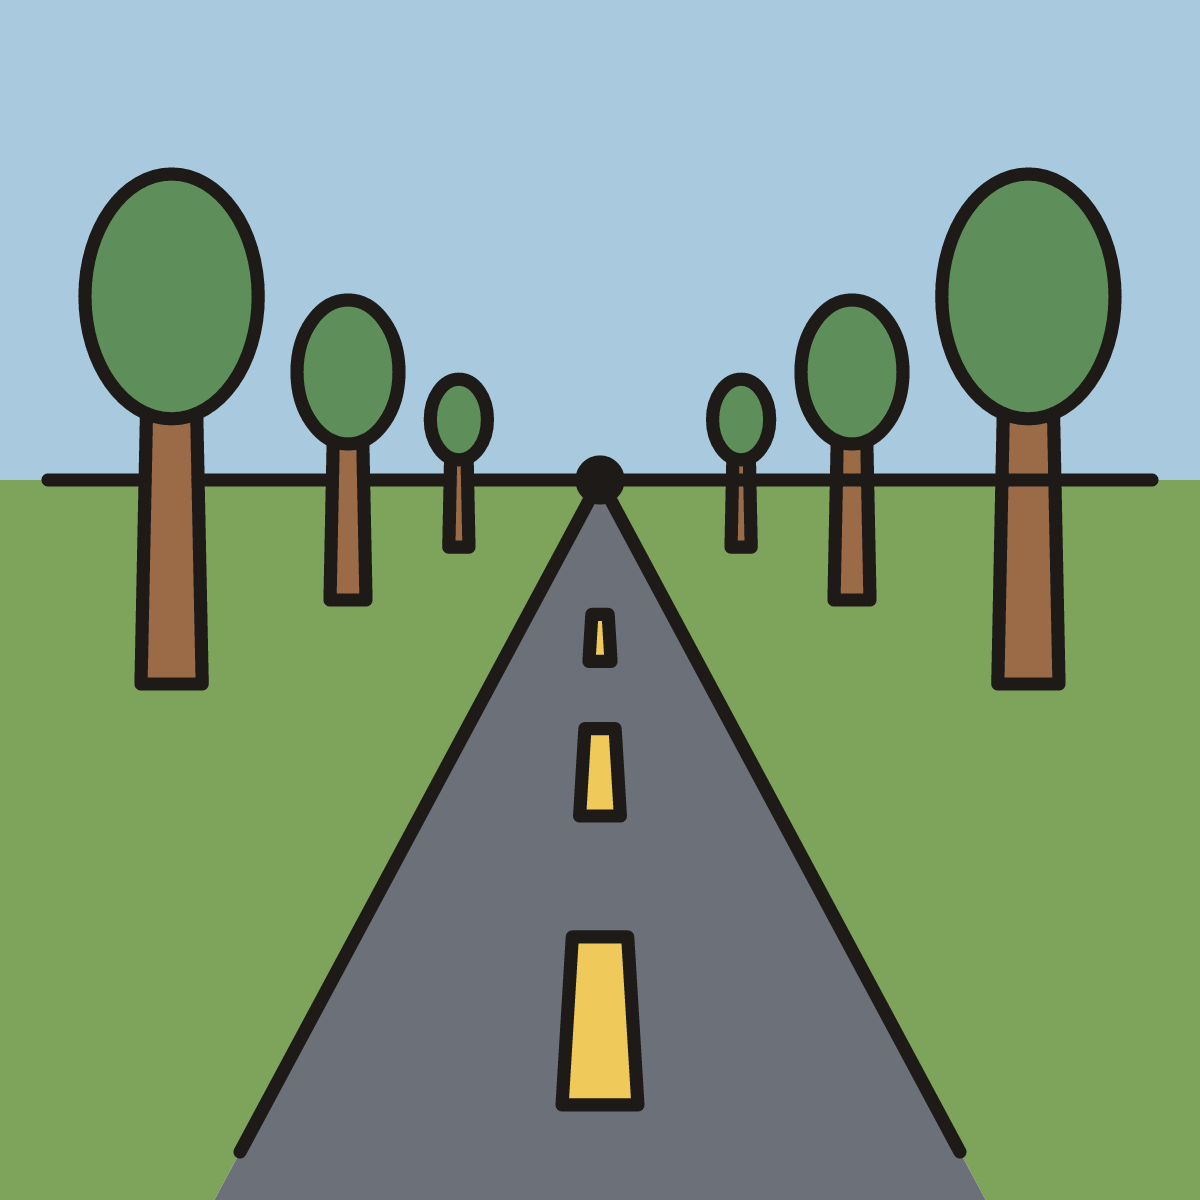
Your finished drawing
Follow the steps above and this is where you end up: a one point perspective, drawn by you.
Every step in one picture