Watch it draw itself · tap to replay
How to Draw an Om Symbol
Draw an om symbol in 10 easy steps, about 8 minutes. Free, with a printable worksheet.
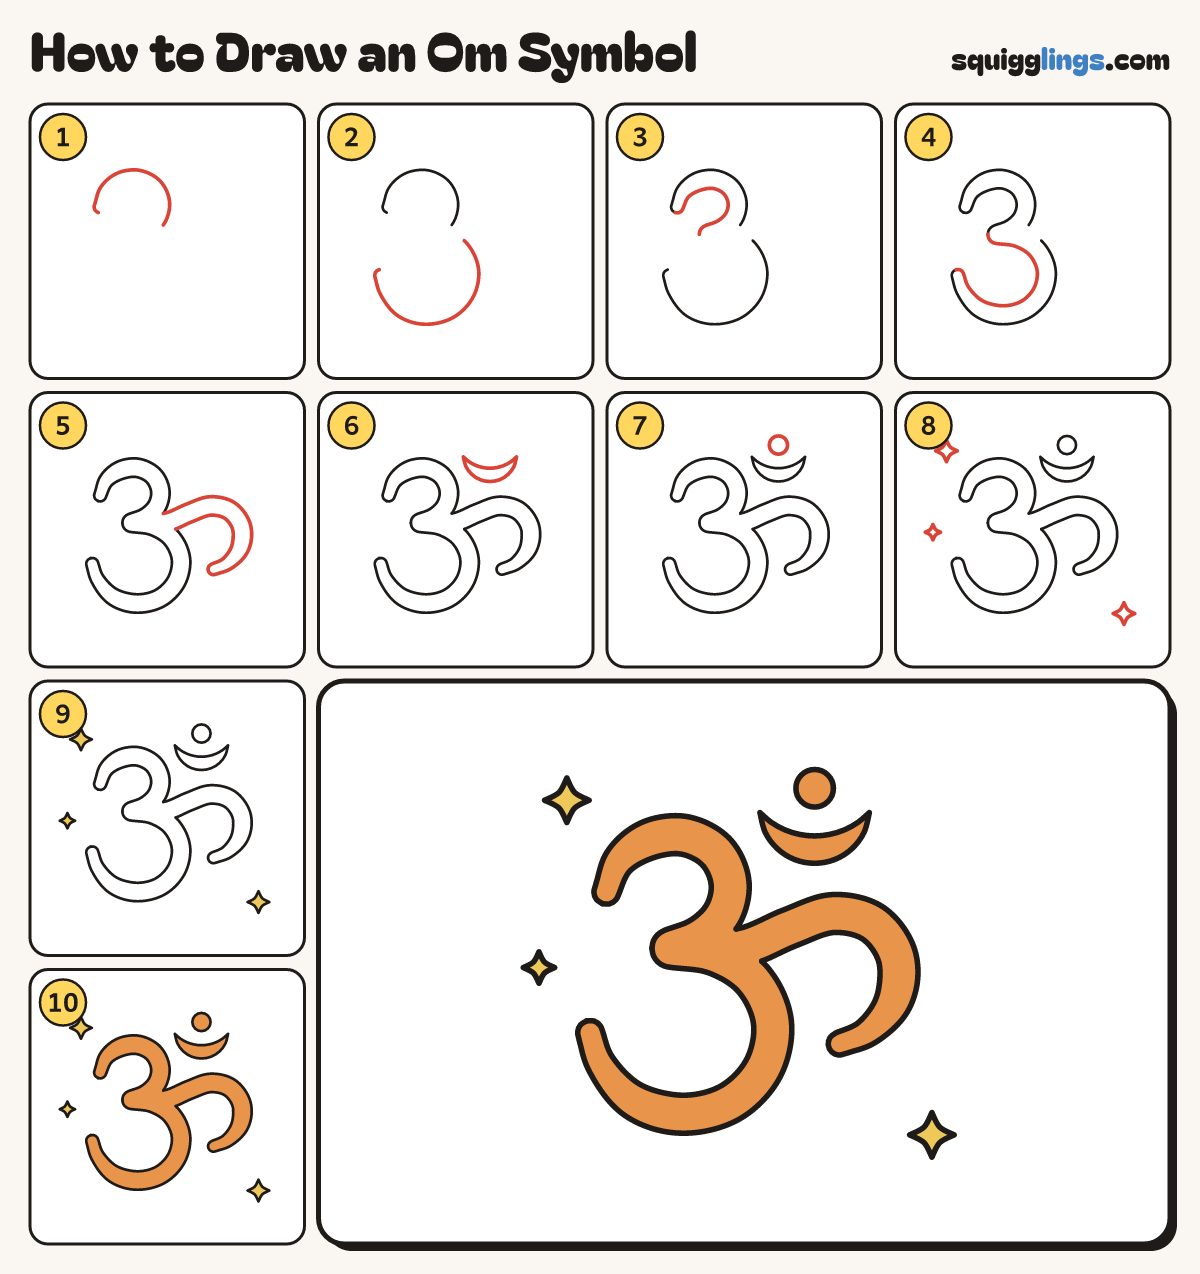
Each picture adds one red line. Draw that line, then scroll to the next picture. Rub out any dashed helper lines at the end. First up: top of the 3.
Step 1: Top of the 3
Start left of the middle. Draw a hump up, over to the right and back in. Stop near the middle.
Tip It is the top half of a big number 3.
Step 2: Bottom of the 3
Leave a small gap. Start just below and draw a bigger hump, round and under, up to the left.
Tip The bottom hump is bigger than the top one.
Step 3: Fat top hump
Go back to the first start. Draw a smaller hump inside the top one, in to a point.
Tip Keep the gap between your 2 lines even.
Step 4: Fat bottom hump
Start at that point. Draw a hump inside the bottom one and join its end with a round tip.
Step 5: The curly tail
From the gap draw a fat tail out right, over and down. Curl in, then back to the gap.
Tip The tail gets thinner at its tip.
Step 6: The moon
Above the tail draw a thin moon lying on its back, like a bowl, with 2 pointed tips.
Step 7: The dot
Draw a round dot just above the middle of the moon, sitting inside the bowl.
Step 8: Sparkles
Draw 3 sparkle stars around it: top left, bottom right, and a small one on the left.
Step 9: Yellow sparkles
Colour the 3 sparkles yellow.
Step 10: Orange Om
Colour the whole Om orange: the fat 3, the tail, the moon and the dot. Go over your lines.
Your finished drawing
Follow the steps above and this is where you end up: an om symbol, drawn by you.
Every step in one picture