Watch it draw itself · tap to replay
How to Draw the North Pole
Draw the North Pole in 11 easy steps, about 8 minutes. Free, with a printable worksheet.
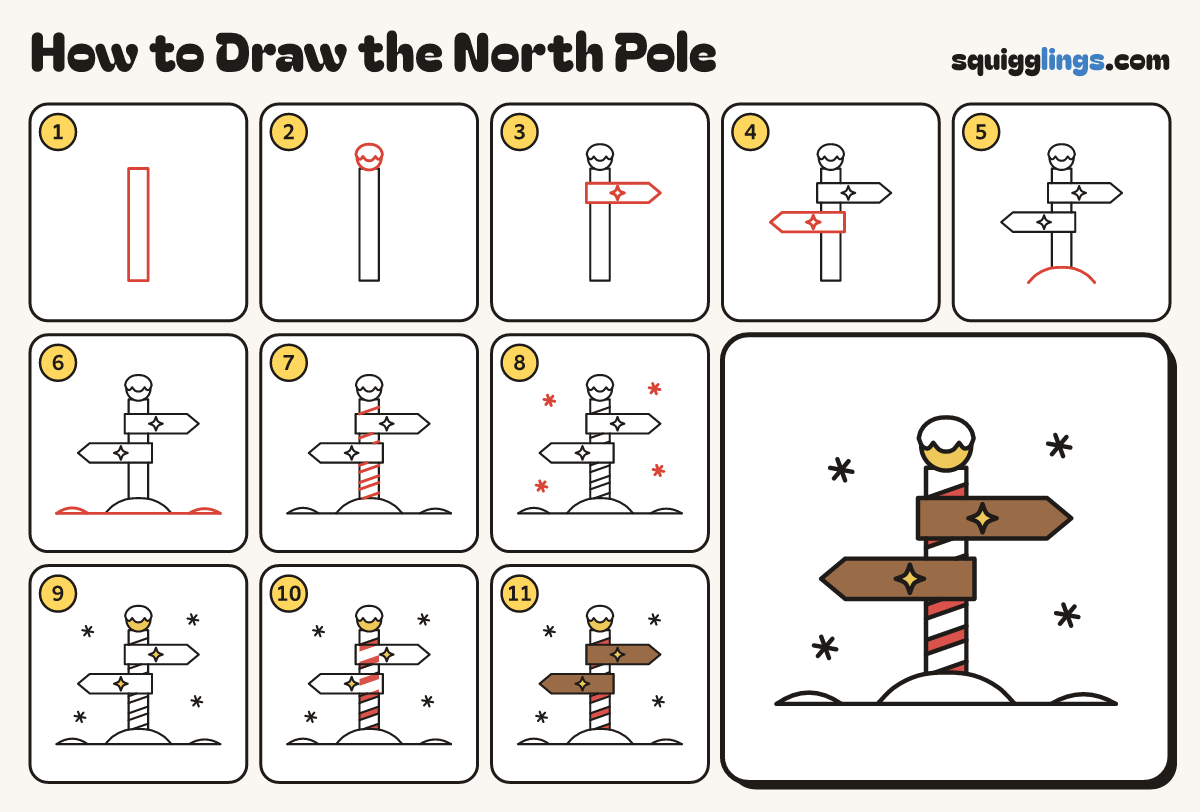
Each picture adds one red line. Draw that line, then scroll to the next picture. Rub out any dashed helper lines at the end. First up: the tall pole.
Step 1: The tall pole
In the middle, draw a tall thin standing box for the pole, nearly as tall as the paper.
Step 2: A ball on top
On top of the pole, draw a ball wider than the pole. Sit a bumpy snow cap over its top.
Step 3: Sign pointing right
Below the ball, draw a sign board across the pole, pointing right. Add a star in the middle.
Step 4: Sign pointing left
Under the first sign, draw a second sign board pointing left. Add a star in the middle.
Step 5: Snow mound
Start on the ground left of the pole. Curve up over its foot like a hill, stopping on the right.
Step 6: The ground
Draw the ground line under the mound from well left to well right, with a snow drift at each end.
Step 7: Candy stripes
Inside the pole, draw slanting lines in pairs, all leaning the same way, like a candy cane.
Step 8: Snowflakes
Draw 4 little snowflakes in the empty sky around the signs, each a star of 3 crossing lines.
Step 9: Gold ball and stars
Colour the 2 stars and the ball yellow like gold. Leave the snow cap and the snow white.
Step 10: White pole, red stripes
Colour every other slanting stripe red, leaving the pole white between them.
Step 11: Brown signs
Colour the 2 signs brown, going around the stars. Go over your lines and the North Pole is done!
Your finished drawing
Follow the steps above and this is where you end up: the North Pole, drawn by you.
Every step in one picture