Watch it draw itself · tap to replay
How to Draw a Bigfoot Footprint
Draw a Bigfoot footprint in 8 easy steps, about 6 minutes. Free, with a printable worksheet.
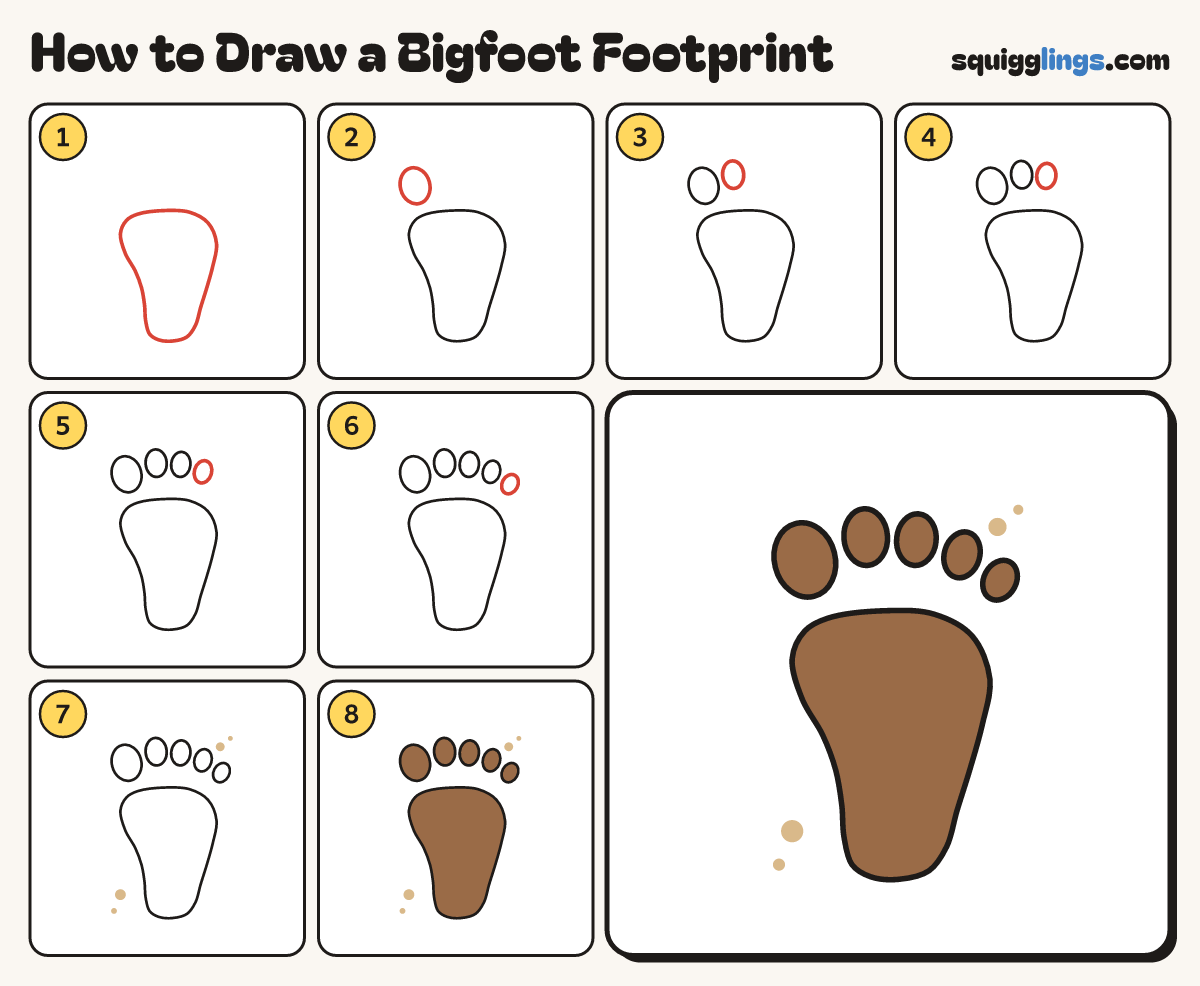
Each picture adds one red line. Draw that line, then scroll to the next picture. Rub out any dashed helper lines at the end. First up: the big sole.
Step 1: The big sole
In the middle, draw a giant footprint, wide on top and narrow at the heel, curving in on the left.
Tip No ankle or leg. It is a print in the mud.
Step 2: The big toe
Above the print on the left, a finger gap away, draw a big oval toe leaning a little outward.
Tip The big toe is the biggest toe.
Step 3: Second toe
Next to the big toe, a little higher, draw a smaller oval toe standing almost straight up.
Step 4: Third toe
Next along, draw another oval toe, a tiny bit smaller, leaning a little to the right.
Step 5: Fourth toe
Next along, lower down, draw a smaller oval toe leaning more to the right.
Step 6: Little toe
Last, out on the right and lower still, draw the smallest oval toe leaning outward, not touching anything.
Tip Each toe is a bit smaller and lower than the last, like steps.
Step 7: Tan mud dots
Dab 4 tan mud dots, big and small, 2 by the heel and 2 above the little toe.
Step 8: Brown print
Colour the big sole and all 5 toes brown. Go over your lines and your bigfoot footprint is done!
Your finished drawing
Follow the steps above and this is where you end up: a Bigfoot footprint, drawn by you.
Every step in one picture