Watch it draw itself · tap to replay
How to Draw Nigiri
Draw nigiri in 13 easy steps, about 10 minutes. Free, with a printable worksheet.
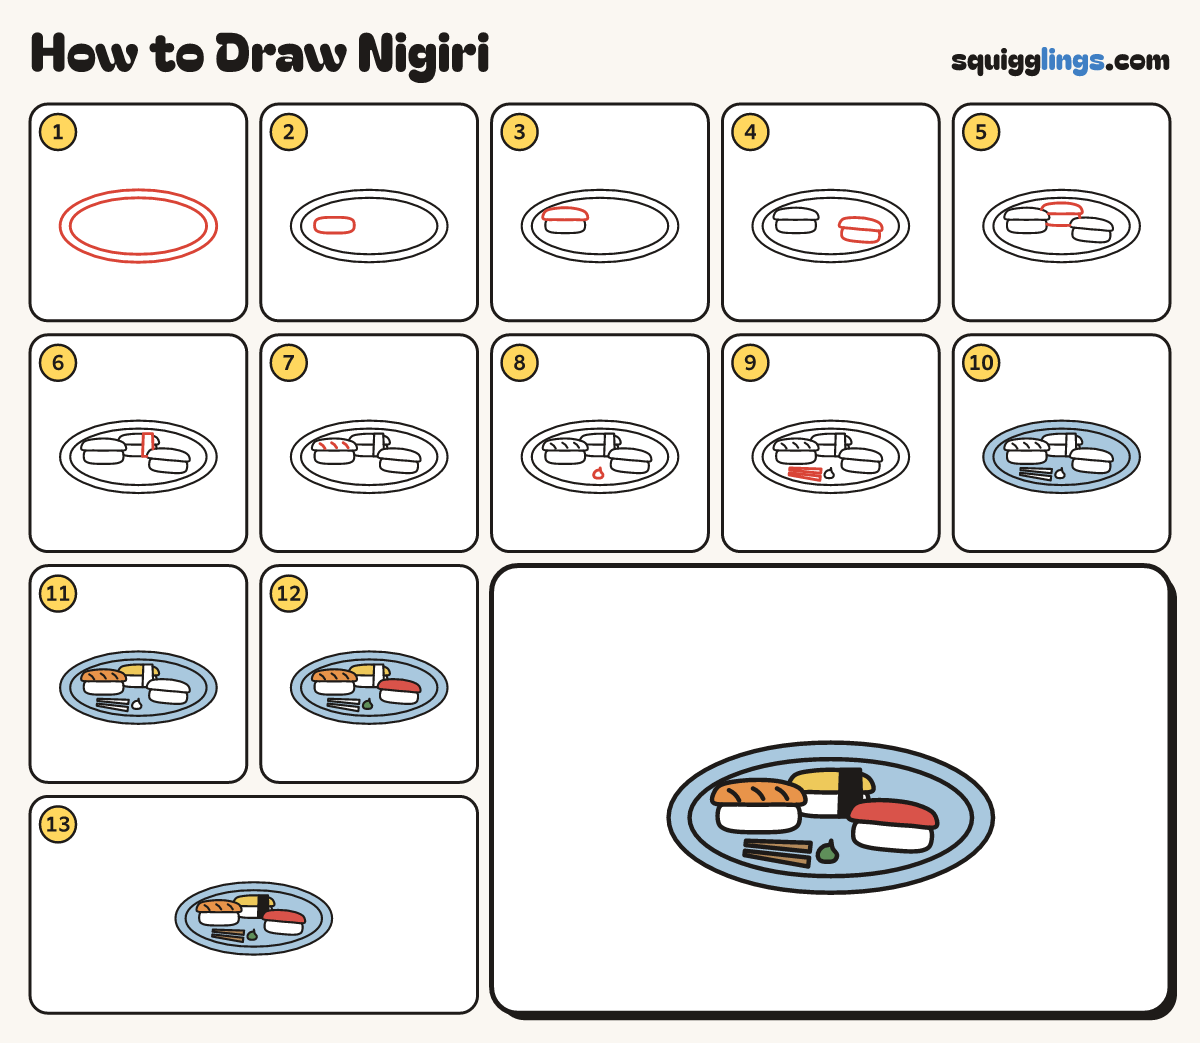
Each picture adds one red line. Draw that line, then scroll to the next picture. Rub out any dashed helper lines at the end. First up: a plate.
Step 1: A plate
Below the middle draw a big flat oval plate, as wide as your hand. Add a second oval just inside.
Step 2: A pillow of rice
On the left of the plate draw a small rounded pillow lying down, as wide as 3 fingers.
Tip Nigiri is a little pillow of rice with a slice of fish on top.
Step 3: A slice of salmon
On top of the pillow draw a thin flat slice draped over it, hanging a bit over both ends.
Step 4: A second one
To the right, a little lower, draw another rice pillow with a slice of tuna draped on top.
Step 5: One at the back
Behind and between them draw a third rice pillow, tucked behind, with a flat slice of egg on top.
Step 6: A seaweed band
Over the right half of the egg piece draw a narrow band going over the top and down both sides.
Step 7: Fat lines
On the salmon draw 3 short slanted lines for the fat stripes.
Step 8: Wasabi
At the front of the plate, between the 2 pieces, draw a small blob of wasabi with a soft peak.
Step 9: Chopsticks
Under the salmon piece draw 2 chopsticks side by side inside the inner oval, slanting down to the right.
Step 10: Sky plate, white rice
Go over your lines. Colour the plate sky blue around the sushi, wasabi and chopsticks, and leave the rice white.
Step 11: Yellow egg, orange salmon
Colour the egg slice yellow around the band, and the salmon orange.
Step 12: Red tuna, green wasabi
Colour the tuna red and the wasabi green.
Step 13: Wood chopsticks, black band
Colour the chopsticks wood brown and the seaweed band black.
Your finished drawing
Follow the steps above and this is where you end up: nigiri, drawn by you.
Every step in one picture