Watch it draw itself · tap to replay
How to Draw a Night Sky
Draw a night sky in 11 easy steps, about 8 minutes. Free, with a printable worksheet.
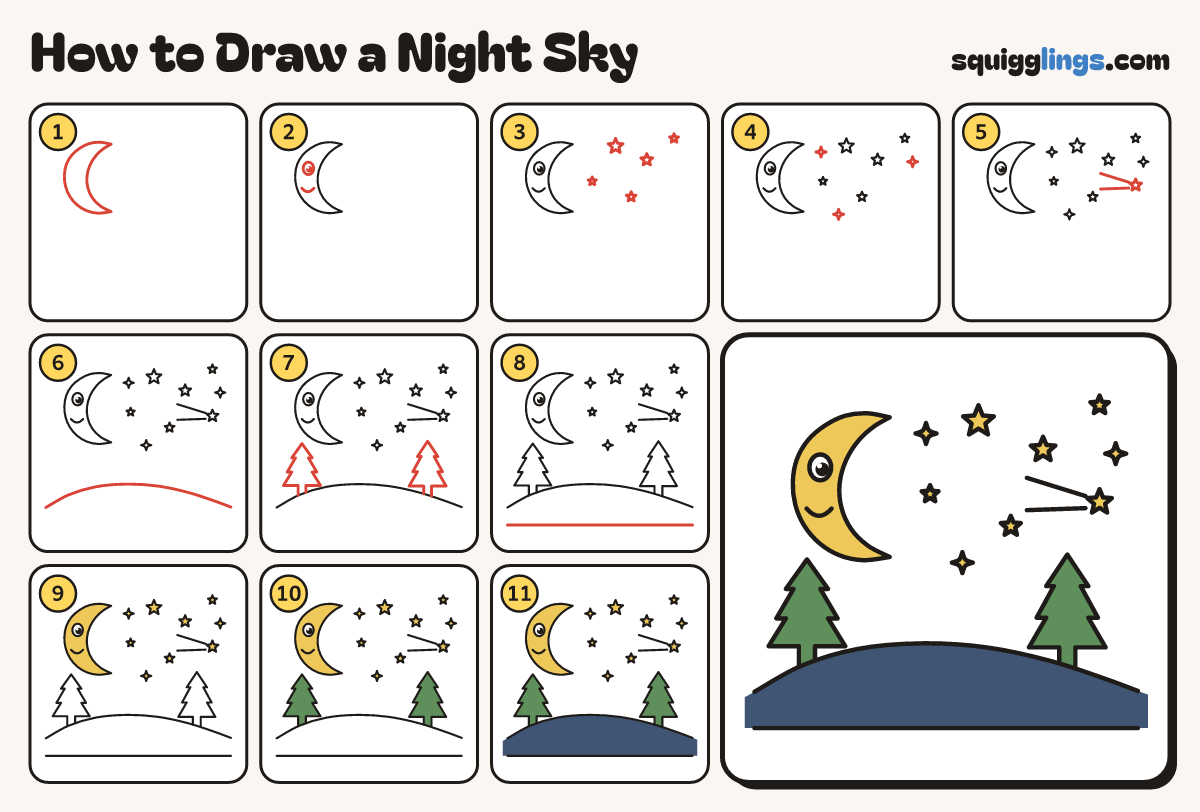
Each picture adds one red line. Draw that line, then scroll to the next picture. Rub out any dashed helper lines at the end. First up: the crescent moon.
Step 1: The crescent moon
High on the left draw a big crescent moon with its horns pointing right, fat in the middle.
Tip The moon is big: about a third of the page tall.
Step 2: A happy face
On the fat part of the moon draw a big eye with a black dot and shine, and a smile.
Step 3: Big stars
Around the sky draw 5 stars with 5 points, of different sizes, the biggest near the top.
Step 4: Sparkles
Draw 3 little 4-point sparkles in the empty spaces of the sky.
Step 5: A shooting star
On the right draw one more star with 2 straight lines streaking away to the left, like a tail.
Step 6: The hill
Start near the left edge, low down. Draw a soft hill up, across and down, stopping near the right edge.
Step 7: Two pine trees
From the hill near each edge, draw a trunk, then zigzag 3 tiers up to a point and back down.
Step 8: The ground
Draw a long straight line near the bottom of the paper, almost from edge to edge, for the ground.
Step 9: Yellow moon and stars
Colour the moon, the stars and the sparkles yellow, going around the eye. Leave the eye white.
Step 10: Green trees
Colour the 2 pine trees green, trunks and all.
Step 11: Navy hill
Colour the hill navy, all the way down to the ground line. Go over your lines. Done!
Your finished drawing
Follow the steps above and this is where you end up: a night sky, drawn by you.
Every step in one picture