Watch it draw itself · tap to replay
How to Draw a Day and Night
Draw a day and night in 14 easy steps, about 11 minutes. Free, with a printable worksheet.
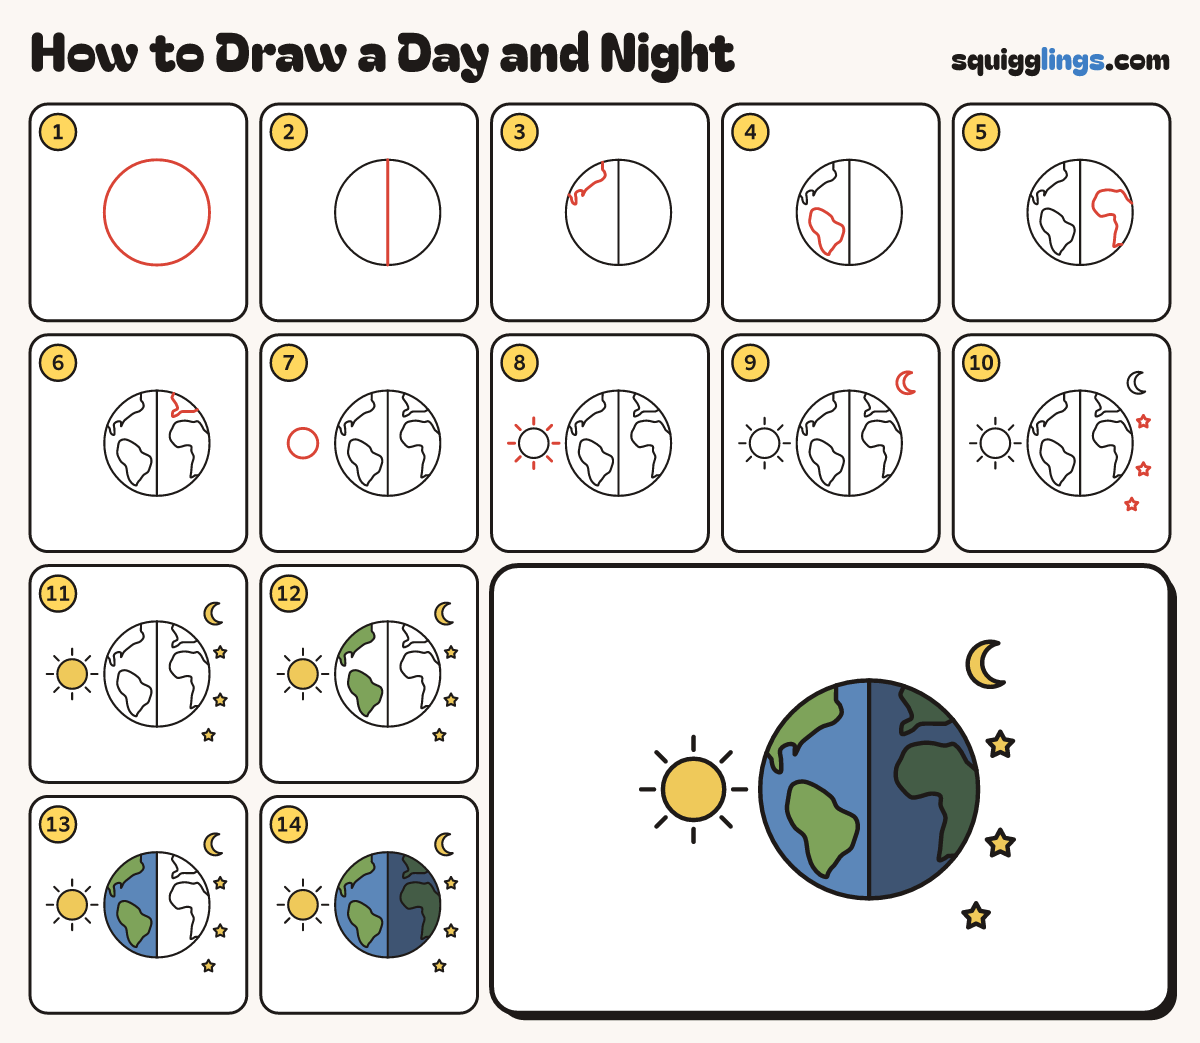
Each picture adds one red line. Draw that line, then scroll to the next picture. Rub out any dashed helper lines at the end. First up: the round earth.
Step 1: The round Earth
In the middle, a little to the right, draw a big round circle for the Earth.
Tip Leave room on the left for the Sun.
Step 2: The dividing line
Draw a straight line down the middle of the Earth. Start at the top and stop at the very bottom.
Tip The left half will be day. The right half will be night.
Step 3: North America
On the left half draw a wavy coast. Start at the top edge and stop at the left edge.
Step 4: South America
Under it draw South America like an ice cream cone: wide at the top, a point at the bottom.
Step 5: Africa
On the right half draw Africa: wide at the top, narrow below. Start and stop at the right edge.
Step 6: Europe
Above Africa draw a bumpy coast, leaving sea between. Start at the top edge and stop at the right edge.
Step 7: The Sun
On the left of the Earth, level with its middle, draw a small round Sun.
Step 8: Sun rays
Draw 8 short rays all the way round the Sun. Do not let them touch the Sun or the Earth.
Step 9: Crescent moon
At the top right, past the Earth, draw a thin moon like a C with 2 sharp points.
Step 10: Three stars
Under the moon, down the right side of the paper, draw 3 small stars with 5 points each.
Step 11: Yellow lights
Colour the Sun, the moon and the 3 stars yellow.
Step 12: Daytime land
On the Sun's side, colour the 2 pieces of land light green.
Step 13: Daytime sea
Colour the sea on the Sun's side bright blue, around the green land. This half is day.
Step 14: Dark night side
Colour the far half dark: dark green land, dark blue sea. This half is night. All done!
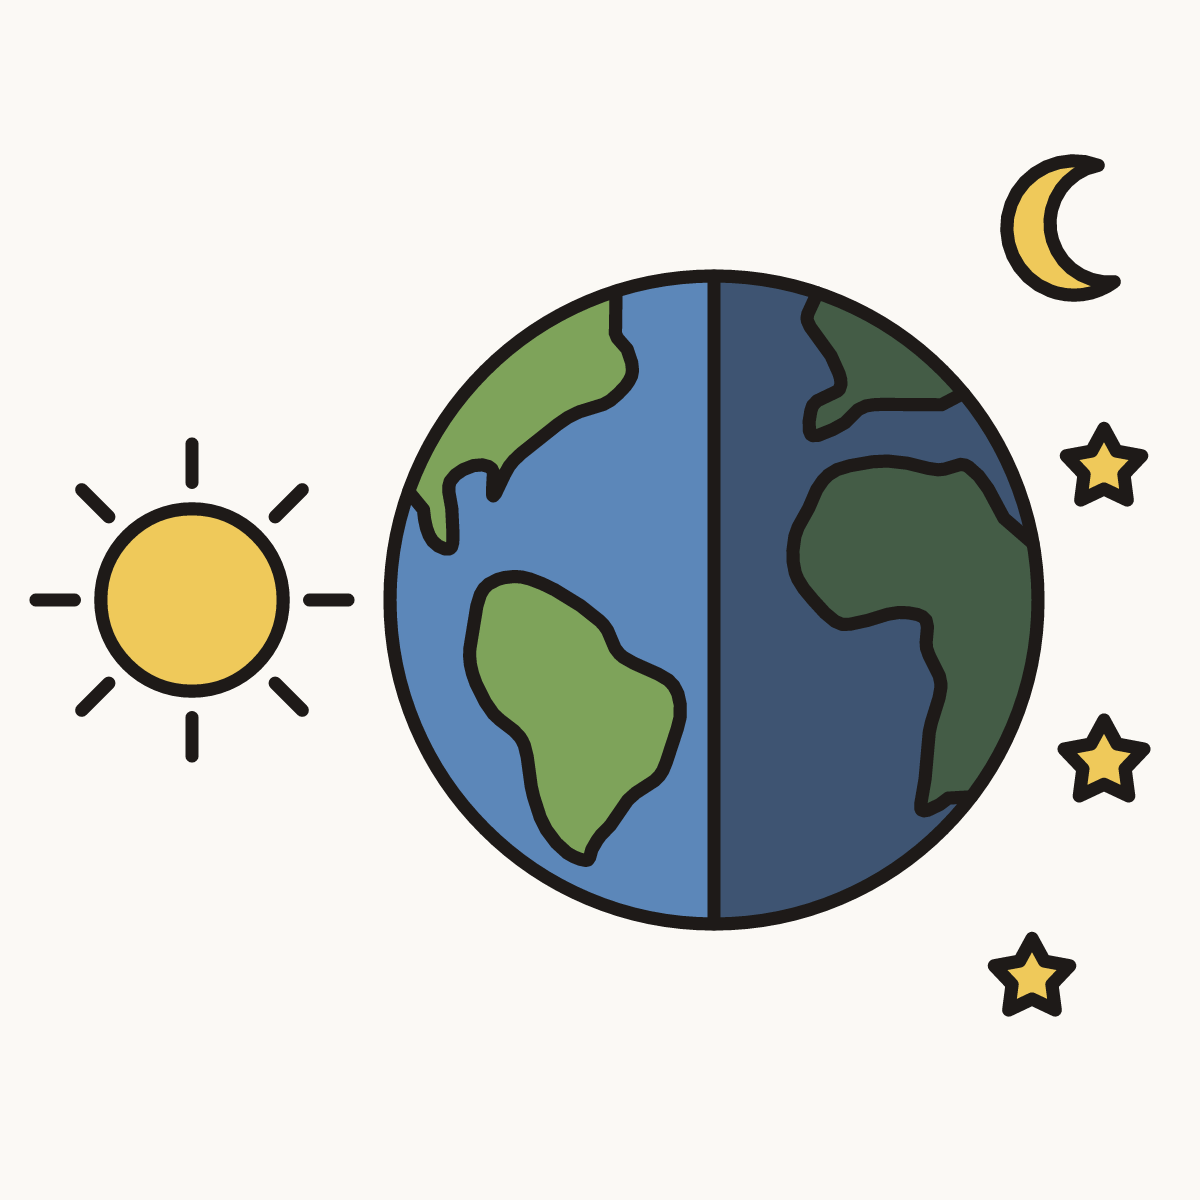
Your finished drawing
Follow the steps above and this is where you end up: a day and night, drawn by you.
Every step in one picture