Watch it draw itself · tap to replay
How to Draw a Neuron
Draw a neuron in 11 easy steps, about 8 minutes. Free, with a printable worksheet.
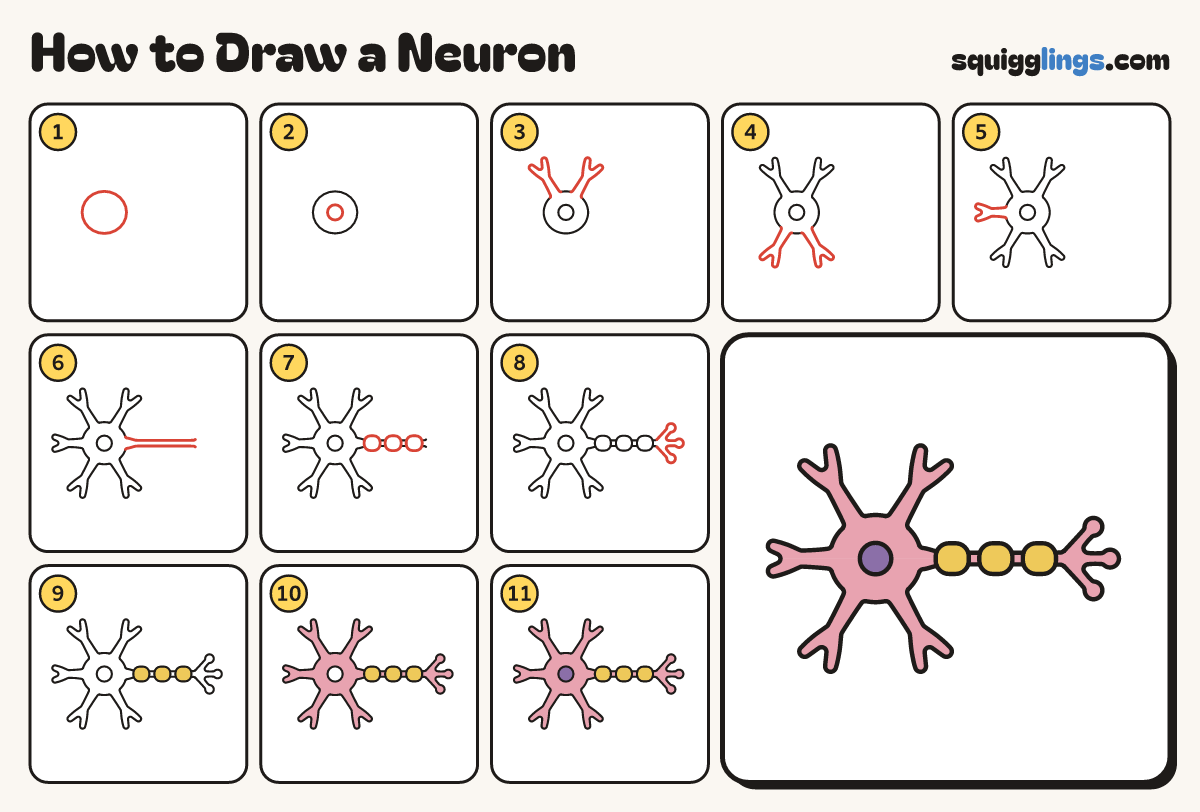
Each picture adds one red line. Draw that line, then scroll to the next picture. Rub out any dashed helper lines at the end. First up: cell body.
Step 1: Cell body
On the left of your paper, draw a round blob about as big as a plum.
Tip Leave lots of room on the right for the long tail.
Step 2: Round middle
In the middle of the blob, draw a small circle. This is the cell's control centre.
Step 3: Top branches
On top of the blob draw 2 branches. Each starts and ends on the blob and splits in 2.
Tip Make each branch thinner as it goes, with round tips.
Step 4: Bottom branches
Under the blob draw 2 more branches. Each starts and ends on the blob and splits in 2.
Step 5: Left branch
On the left of the blob draw 1 more branch. It starts and ends on the blob too.
Step 6: Long tail
Start at the right of the blob. Draw 2 lines close together, straight across. Stop near the edge.
Tip The tail is fat where it leaves the blob, then thin.
Step 7: Three wraps
Over the tail, draw 3 sausage shapes in a row. Leave a small gap between them.
Tip Rub out the tail lines inside each sausage.
Step 8: End twigs
Start at the end of the tail. Draw 3 short twigs with round tips, spreading out. Stop at the tail.
Step 9: Yellow wraps
Go over your lines. Colour the 3 sausage wraps yellow.
Step 10: Pink cell
Colour the cell body, every branch, the tail and the end twigs pink, around the round middle.
Step 11: Purple middle
Colour the round middle purple. Your neuron is done!
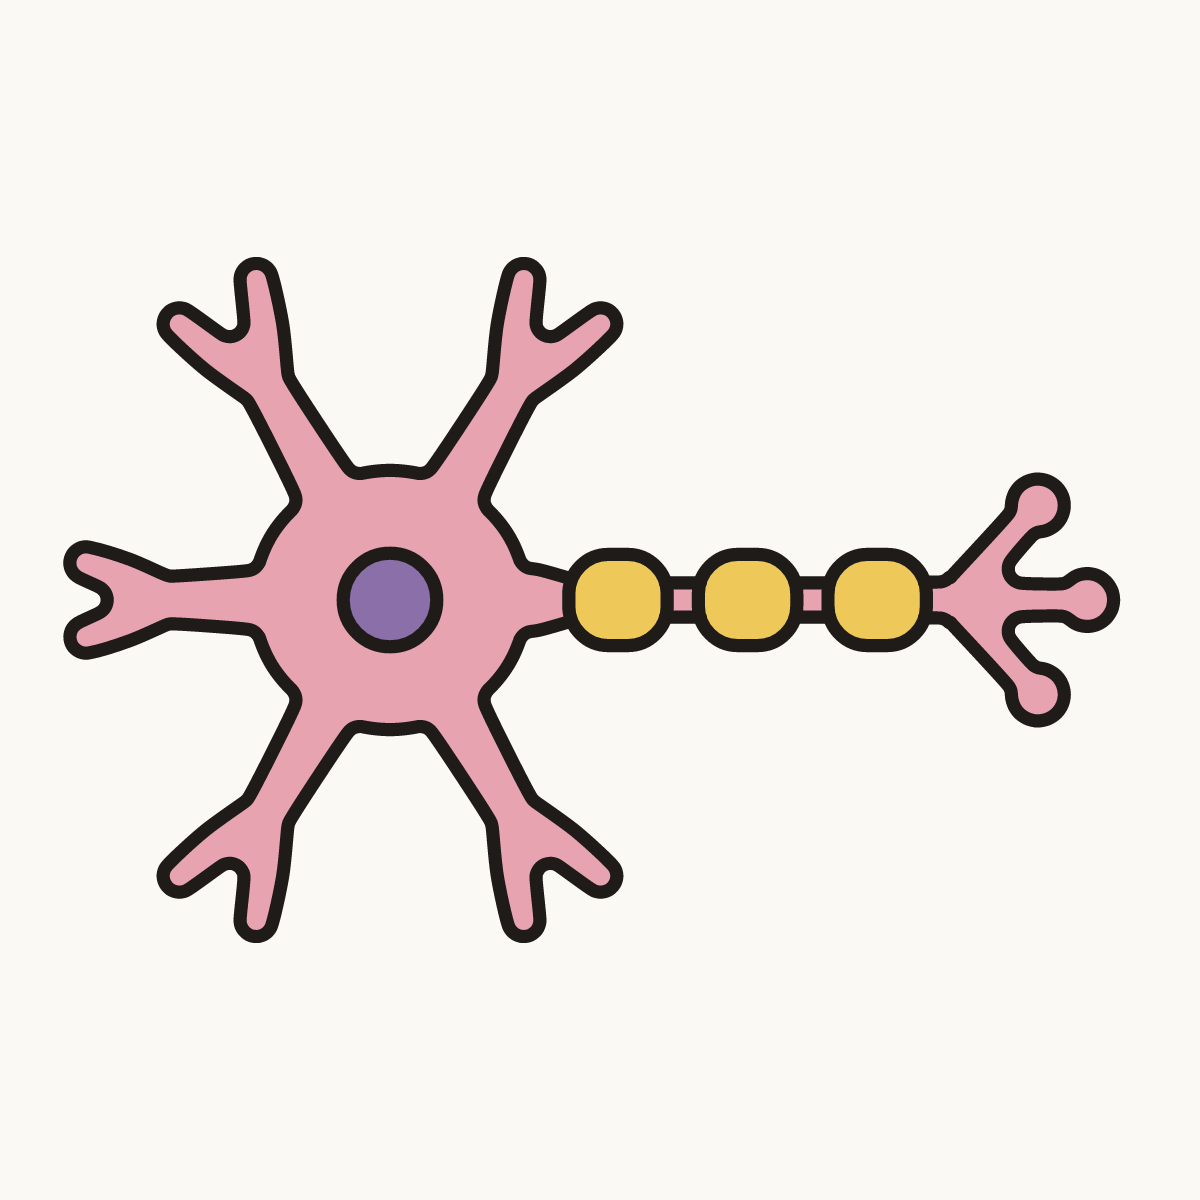
Your finished drawing
Follow the steps above and this is where you end up: a neuron, drawn by you.
Every step in one picture