Watch it draw itself · tap to replay
How to Draw an Asterisk
Draw an asterisk in 10 easy steps, about 8 minutes. Free, with a printable worksheet.
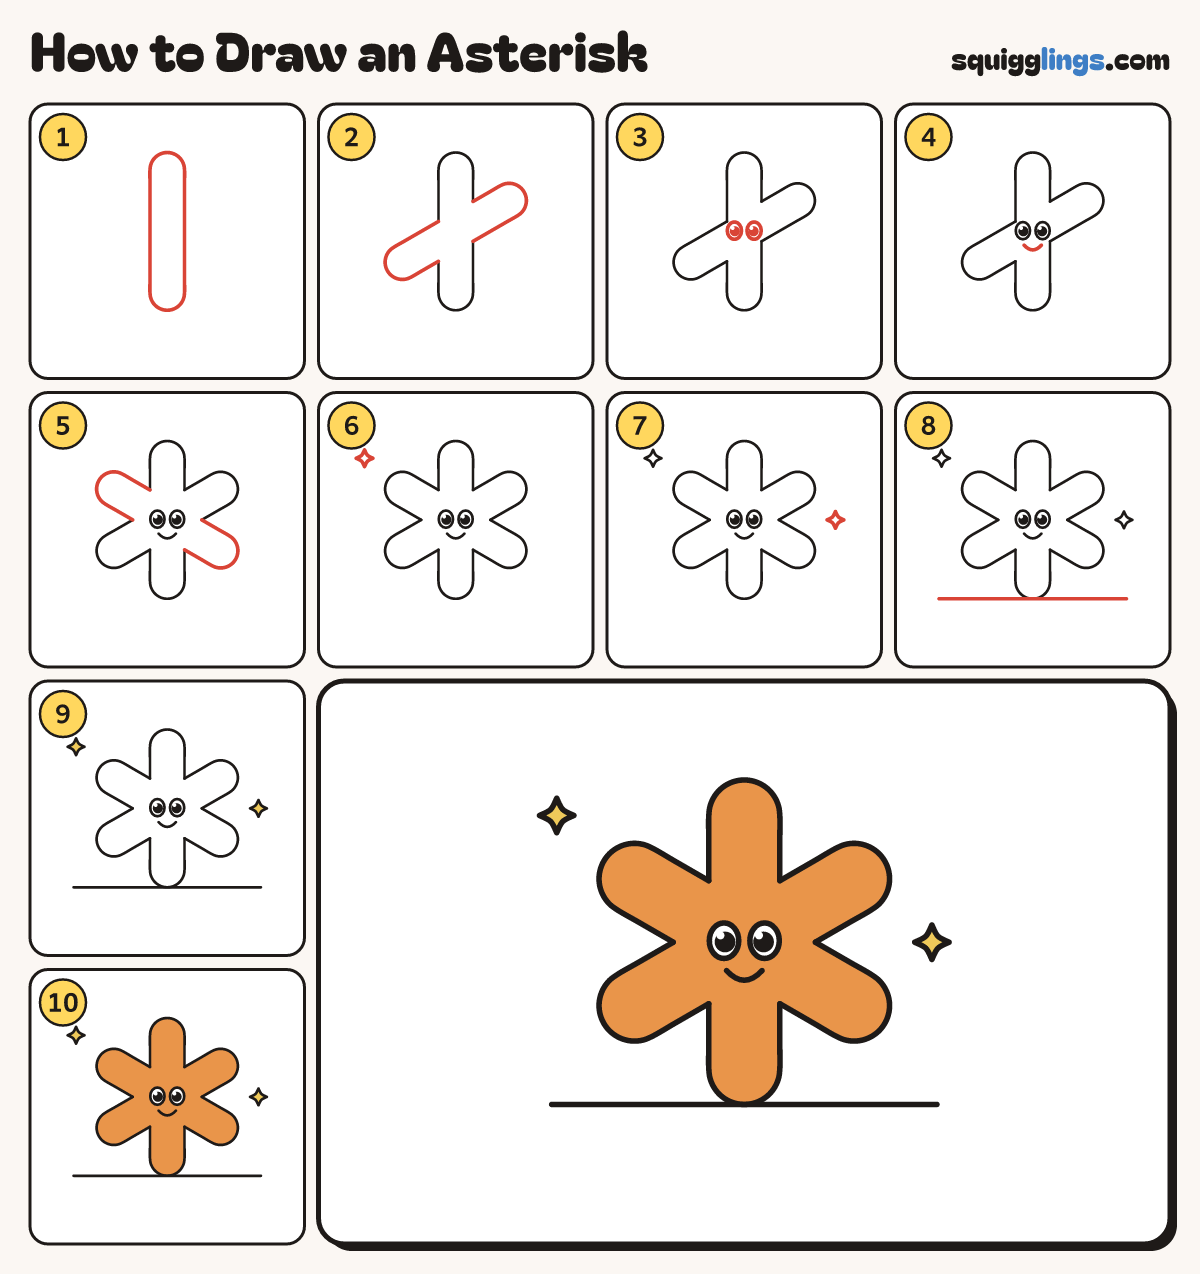
Each picture adds one red line. Draw that line, then scroll to the next picture. Rub out any dashed helper lines at the end. First up: tall bar.
Step 1: Tall bar
In the middle of your paper, draw a tall fat bar standing straight up, with rounded ends.
Tip An asterisk is the little star on a keyboard.
Step 2: Leaning bar
Draw a second fat bar the same size, leaning to the right and crossing the middle of the first.
Tip Rub out the lines in the middle where the bars cross.
Step 3: 2 big eyes
In the middle, where the bars cross, draw 2 round eyes. Colour a black dot in each, leaving a shine.
Step 4: A smile
Under the eyes draw a small U smile, starting under the left eye and stopping under the right eye.
Step 5: Third bar
Draw a third fat bar leaning to the left, crossing the middle behind the face. Now there are 6 arms.
Step 6: Sparkle on the left
High on the left of the asterisk, draw a small sparkle star, like a curvy plus sign.
Step 7: Sparkle on the right
On the right, between 2 arms, draw another small sparkle star to match.
Step 8: The floor
Draw a straight floor line across the paper, just touching the bottom arm.
Step 9: Yellow sparkles
Colour the 2 sparkles yellow.
Step 10: Orange asterisk
Colour the whole asterisk orange, around the eyes. Leave the eyes white. Your asterisk is done!
Your finished drawing
Follow the steps above and this is where you end up: an asterisk, drawn by you.
Every step in one picture