Watch it draw itself · tap to replay
How to Draw a Moon Footprint
Draw a moon footprint in 12 easy steps, about 9 minutes. Free, with a printable worksheet.
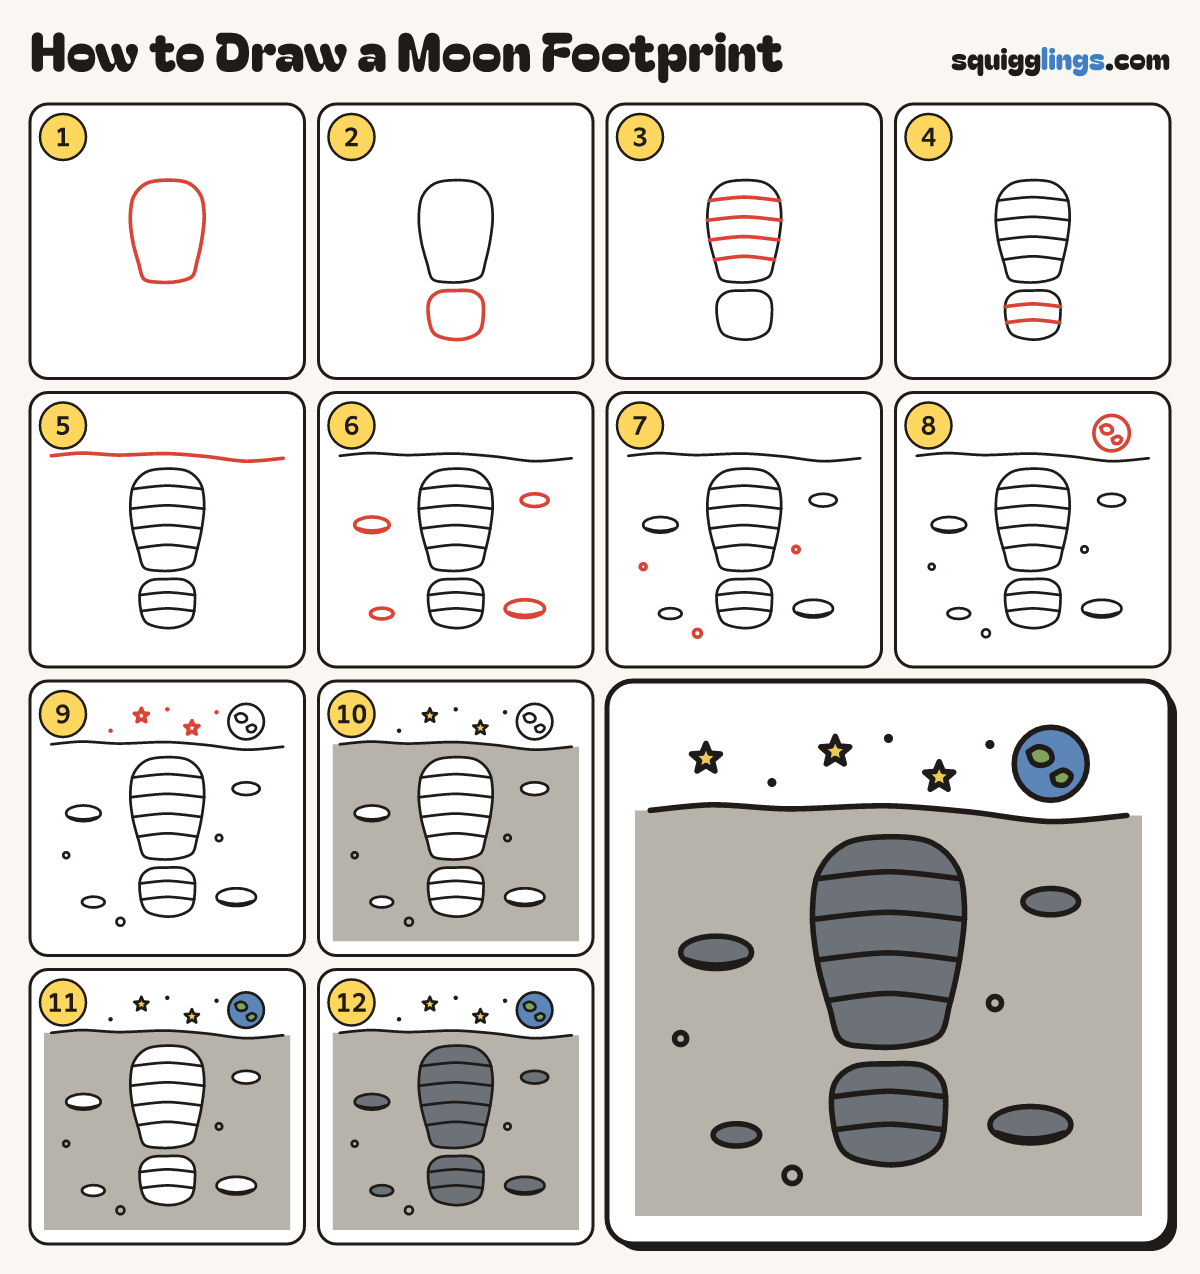
Each picture adds one red line. Draw that line, then scroll to the next picture. Rub out any dashed helper lines at the end. First up: the sole.
Step 1: The sole
In the middle draw the front of a boot print: a rounded shape, wider at the top, like a tongue.
Tip An astronaut's footprint stays in the moon dust for millions of years!
Step 2: The heel
Under the sole, leaving a small gap, draw the heel: a rounded box about half as tall as the sole.
Step 3: Treads on the sole
Across the sole rule 4 gently curved tread bars, evenly spaced, from the left edge to the right edge.
Step 4: Treads on the heel
Across the heel rule 2 more curved tread bars the same way.
Step 5: The horizon
High up, draw a long wobbly line from edge to edge, where the grey moon ground meets space.
Step 6: Craters around
On the ground draw 4 flat oval craters around the footprint. Add a curved shadow line in the 2 biggest.
Step 7: Pebbles
Dot 3 little round pebbles in the dust, spread out: left, right and low down.
Step 8: Earth in the sky
Above the horizon on the right draw a round Earth with two blobby continents inside it.
Step 9: Stars
In the sky draw three five-point stars, and dot three tiny sparkles between them.
Step 10: Yellow stars, grey dust
Go over your lines. Colour the stars yellow, and the ground grey around the footprint and craters.
Step 11: Green lands, blue Earth
Colour the 2 continents green, then colour the Earth blue around them.
Step 12: Slate print and craters
Colour the sole, the heel and the 4 craters slate grey. Your moon footprint is done!
Your finished drawing
Follow the steps above and this is where you end up: a moon footprint, drawn by you.
Every step in one picture