Watch it draw itself · tap to replay
How to Draw a Thunderstorm
Draw a thunderstorm in 10 easy steps, about 8 minutes. Free, with a printable worksheet.
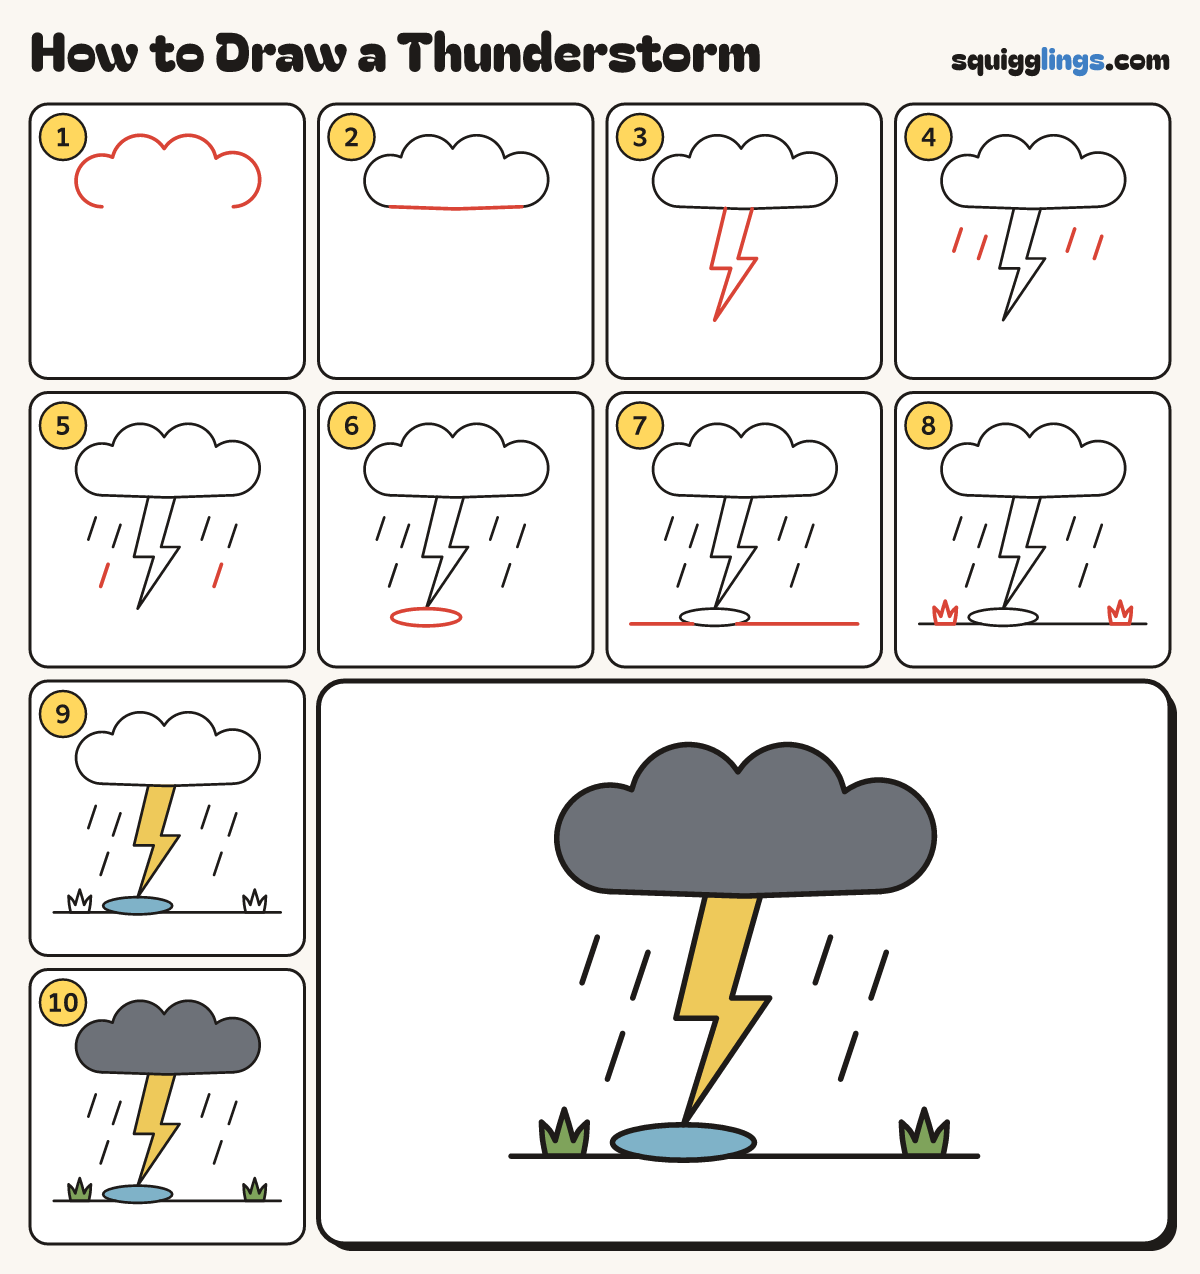
Each picture adds one red line. Draw that line, then scroll to the next picture. Rub out any dashed helper lines at the end. First up: cloud top.
Step 1: Cloud top
Start at the bottom left. Draw 4 big round bumps over to the right, ending at the bottom right.
Tip Make it big and wide: the cloud fills the top of the page.
Step 2: Cloud bottom
Start at the bottom right of the bumps. Draw a flat line back to where you started.
Step 3: Lightning bolt
From the middle of the cloud, draw a chunky zigzag bolt down to a sharp point, then zigzag back up.
Tip The bolt is fat at the top and thin at the point.
Step 4: Slanting rain
Under the cloud, draw 4 short slanting rain dashes, 2 on each side of the bolt.
Step 5: More rain
Lower down, draw 2 more slanting dashes, 1 on each side.
Step 6: A puddle
Under the bolt, draw a long flat oval puddle, its top just touching the point.
Step 7: Ground line
Draw a flat ground line from the left side to the right side. Skip the puddle.
Step 8: Grass tufts
On the ground, draw 2 small grass tufts with 3 pointy blades each, far from the puddle.
Step 9: Yellow bolt, blue puddle
Colour the lightning bolt bright yellow and the puddle blue.
Step 10: Green grass, dark cloud
Colour the grass green and the cloud dark grey. Go over your lines and you are done!
Your finished drawing
Follow the steps above and this is where you end up: a thunderstorm, drawn by you.
Every step in one picture