Watch it draw itself · tap to replay
How to Draw the Milky Way
Draw the Milky Way in 13 easy steps, about 10 minutes. Free, with a printable worksheet.
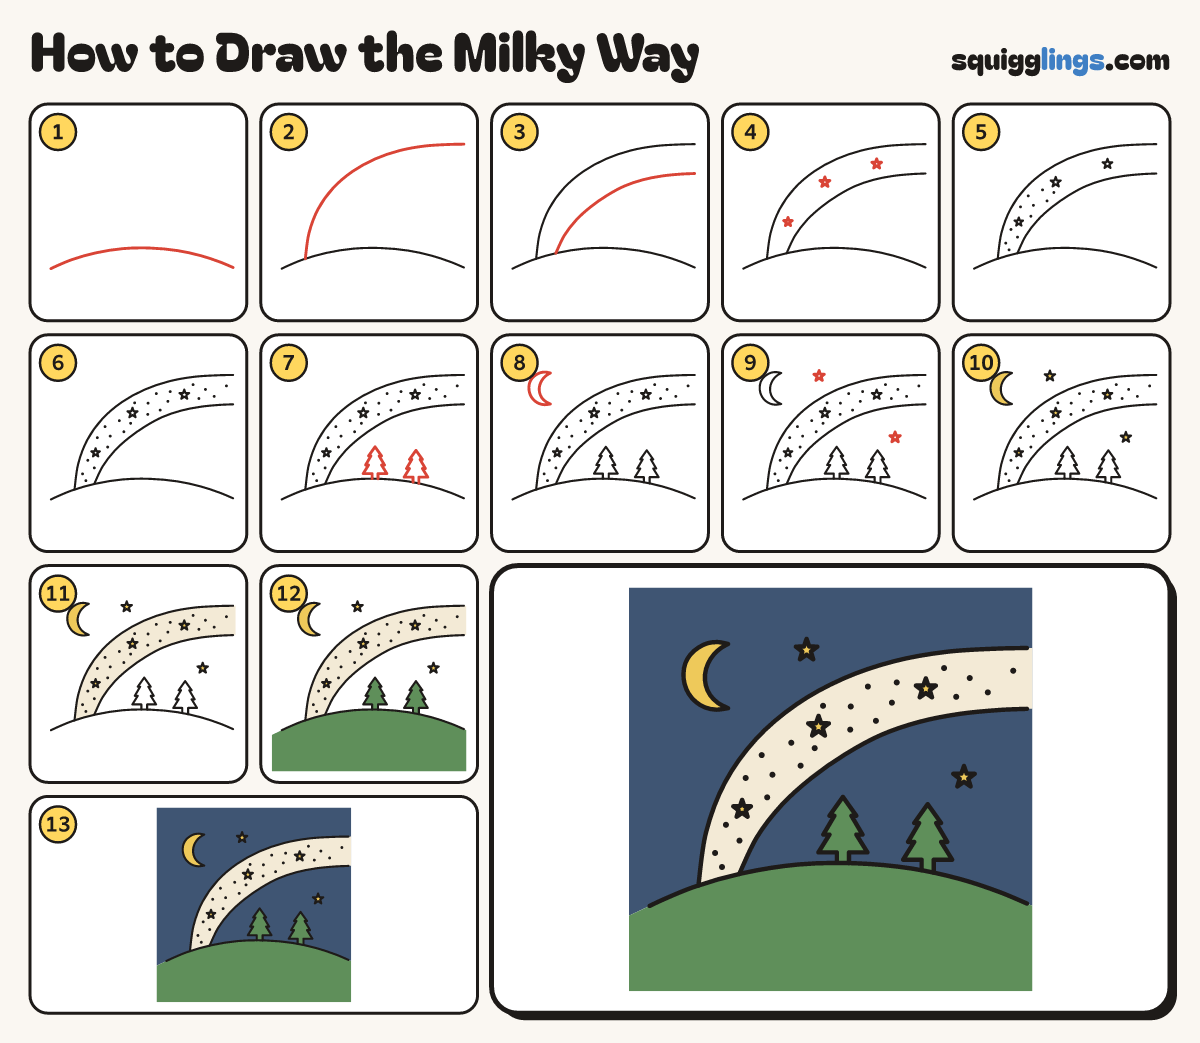
Each picture adds one red line. Draw that line, then scroll to the next picture. Rub out any dashed helper lines at the end. First up: the hill.
Step 1: The hill
Near the bottom, start at the left edge. Draw a low round hill across, stopping at the right edge.
Step 2: Top of the band
Start on the hill near the left. Sweep a long curve up and over, stopping at the right edge.
Step 3: Bottom of the band
Start on the hill a little further right. Sweep a second curve under the first, stopping at the right edge.
Tip Keep the band thin at the hill and wide up high. It is the Milky Way, our own galaxy.
Step 4: Stars in the band
Inside the band, draw 3 small five-point stars spread along it, near each end and in the middle.
Step 5: Faraway stars
Dot lots of tiny dots in the low half of the band for faraway stars, keeping them off the lines.
Step 6: More faraway stars
Keep dotting tiny dots up the band, all the way to the right edge.
Step 7: Two pine trees
Start on the hill's right half. Zigzag up 3 layers to a point, ending back on the hill. Make 2.
Step 8: Crescent moon
In the top left corner, draw a small crescent moon facing right.
Step 9: Two more stars
Outside the band, draw 2 small five-point stars, one near the top and one low on the right.
Step 10: Yellow moon and stars
Colour the moon and all 5 stars yellow.
Step 11: Cream band
Colour the band cream, going around the yellow stars and the dots.
Step 12: Green hill and trees
Colour the hill green down to the bottom edge, and both pine trees green.
Step 13: Navy night
Colour everything above the hill navy blue, around the band, moon, stars and trees. Your Milky Way is done!
Your finished drawing
Follow the steps above and this is where you end up: the Milky Way, drawn by you.
Every step in one picture