Watch it draw itself · tap to replay
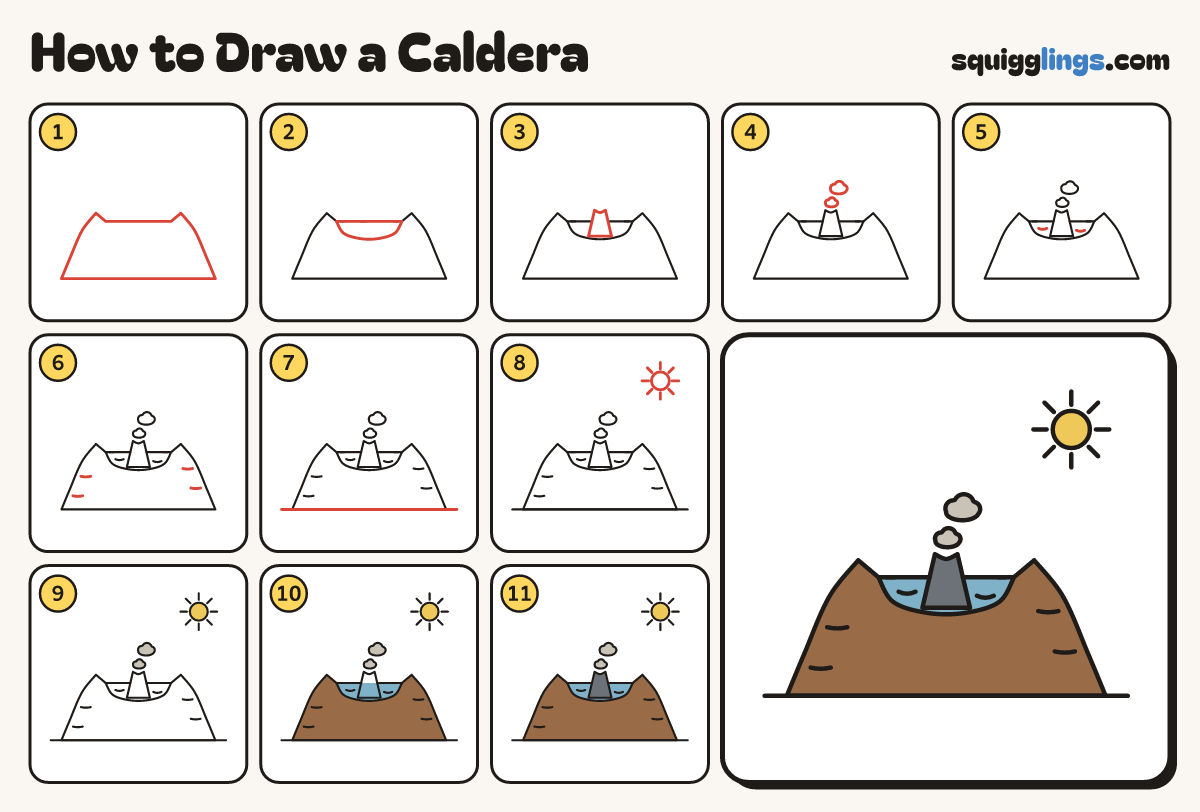
How to Draw a Caldera
Draw a caldera in 11 easy steps, about 8 minutes. Free, with a printable worksheet.
Each picture adds one red line. Draw that line, then scroll to the next picture. Rub out any dashed helper lines at the end. First up: the wide rim.
Step 1: The wide rim
Start at the bottom left. Draw a wide low mountain with a big bowl dip, down to the bottom right.
Tip A caldera is a volcano whose top fell in, leaving a huge bowl.
Step 2: The lake
Start inside the left rim. Draw the lake shore curving down across the bowl and up to the right rim.
Step 3: A small cone
In the middle of the lake draw a small cone standing in the water, with a dip in its top.
Step 4: A little smoke
Draw 2 bumpy puffs of smoke rising from the top of the cone, a small one then a bigger one.
Step 5: Ripples
Draw a short curved ripple on the lake on each side of the cone.
Step 6: Rock layers
Inside each outer slope draw 2 short curved layer lines, not touching the edge.
Step 7: The ground
Draw a flat ground line along the bottom of the mountain, a little past each side.
Step 8: The sun
Draw a small sun with short rays in the top right, away from the edges.
Step 9: Sun and smoke
Go over your lines. Colour the sun yellow and the smoke light grey.
Step 10: Lake and mountain
Colour the lake blue round the cone, then the mountain brown around the lake, pressing softly.
Step 11: Grey cone
Colour the small cone grey. Your caldera is done!
Your finished drawing
Follow the steps above and this is where you end up: a caldera, drawn by you.
Every step in one picture