Watch it draw itself · tap to replay
How to Draw a Glacier
Draw a glacier in 12 easy steps, about 9 minutes. Free, with a printable worksheet.
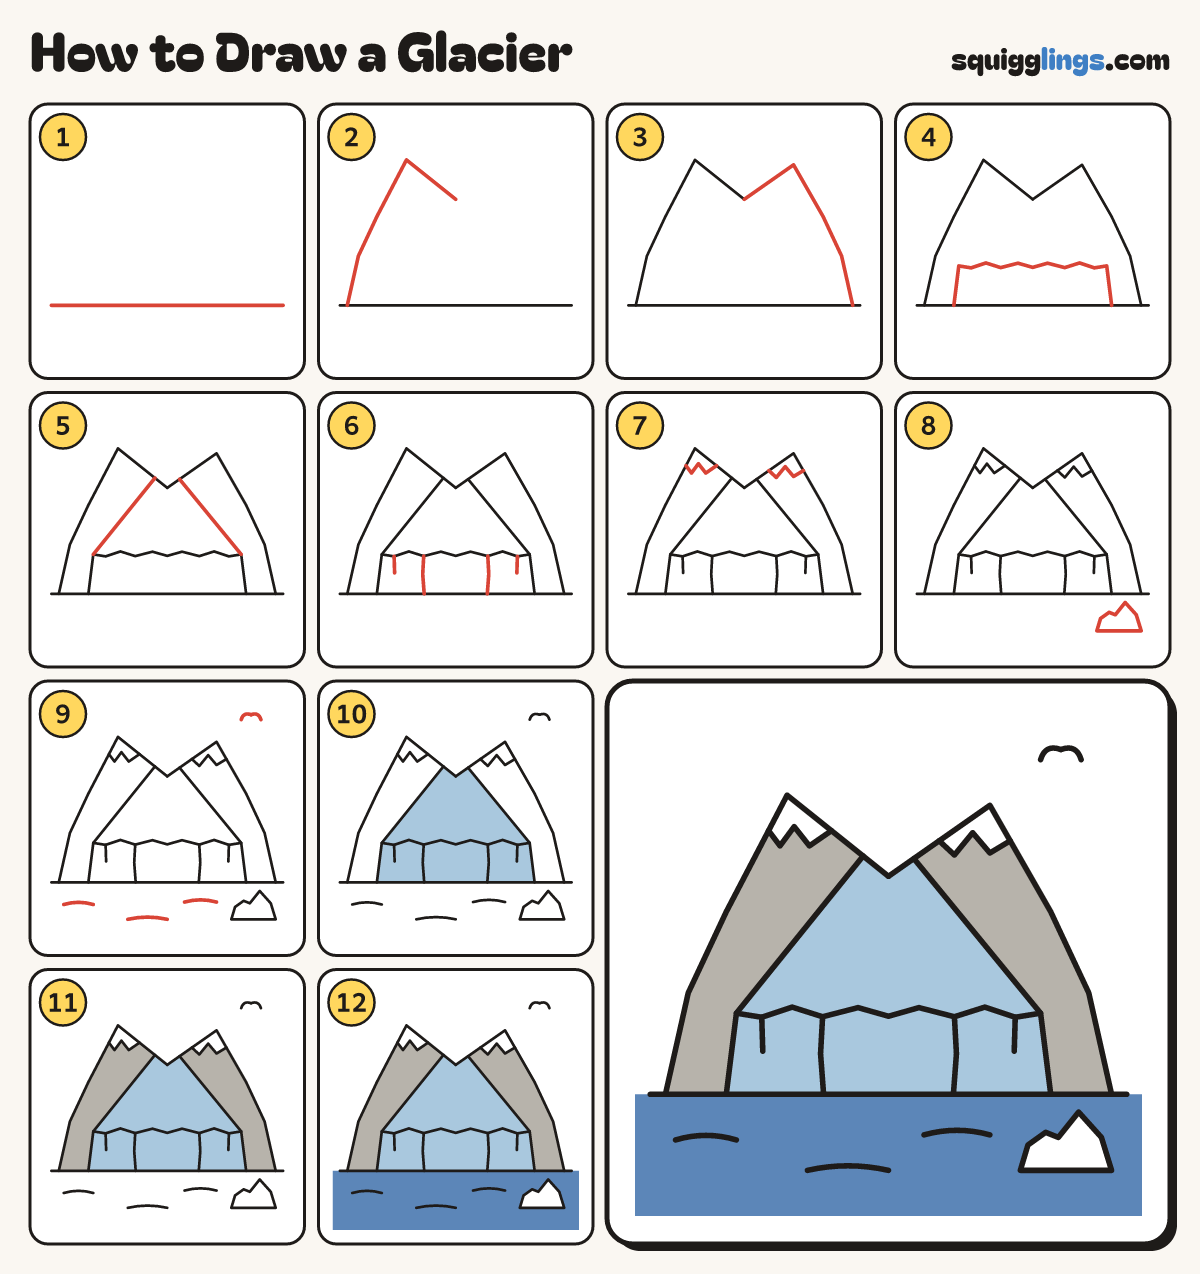
Each picture adds one red line. Draw that line, then scroll to the next picture. Rub out any dashed helper lines at the end. First up: the water line.
Step 1: The water line
Below the middle, draw a long straight line from edge to edge for the top of the sea.
Step 2: Left mountain
From the water line at the left, go up to a sharp peak, then down, stopping high in the middle.
Step 3: Right mountain
Start where the first mountain stops. Go up to a second peak, then down to the water line.
Step 4: The ice wall
In the middle, start on the water line. Go up, across a bumpy flat top, and down to the water.
Tip This wall of ice is the end of the glacier, where it meets the sea.
Step 5: The ice river
From the wall's top corners, draw 2 lines up and in, stopping on the mountains beside the dip.
Tip A glacier is a river of ice that slides down very slowly.
Step 6: Big cracks
Draw 4 straight cracks down from the bumpy top of the wall. Make 2 of them reach the water.
Tip Cracks in a glacier are called crevasses.
Step 7: Snow caps
A little below each peak, draw a zigzag from one slope across to the other for the snow.
Step 8: An iceberg
Low in the sea, right of the wall, draw a small iceberg with a tall peak and a low one.
Step 9: Waves and a bird
Draw 3 short curved waves on the sea. In the sky, draw 1 bird like 2 little hills joined.
Step 10: Sky blue ice
Colour the ice wall and the ice river sky blue. Leave the snow caps and the iceberg white.
Step 11: Grey mountains
Colour both mountains grey, leaving the snow caps white.
Step 12: Blue sea
Go over your lines. Colour the sea blue, around the iceberg, right out to the edges of your paper.
Your finished drawing
Follow the steps above and this is where you end up: a glacier, drawn by you.
Every step in one picture