Watch it draw itself · tap to replay
How to Draw the Asteroid Belt
Draw the asteroid belt in 11 easy steps, about 8 minutes. Free, with a printable worksheet.
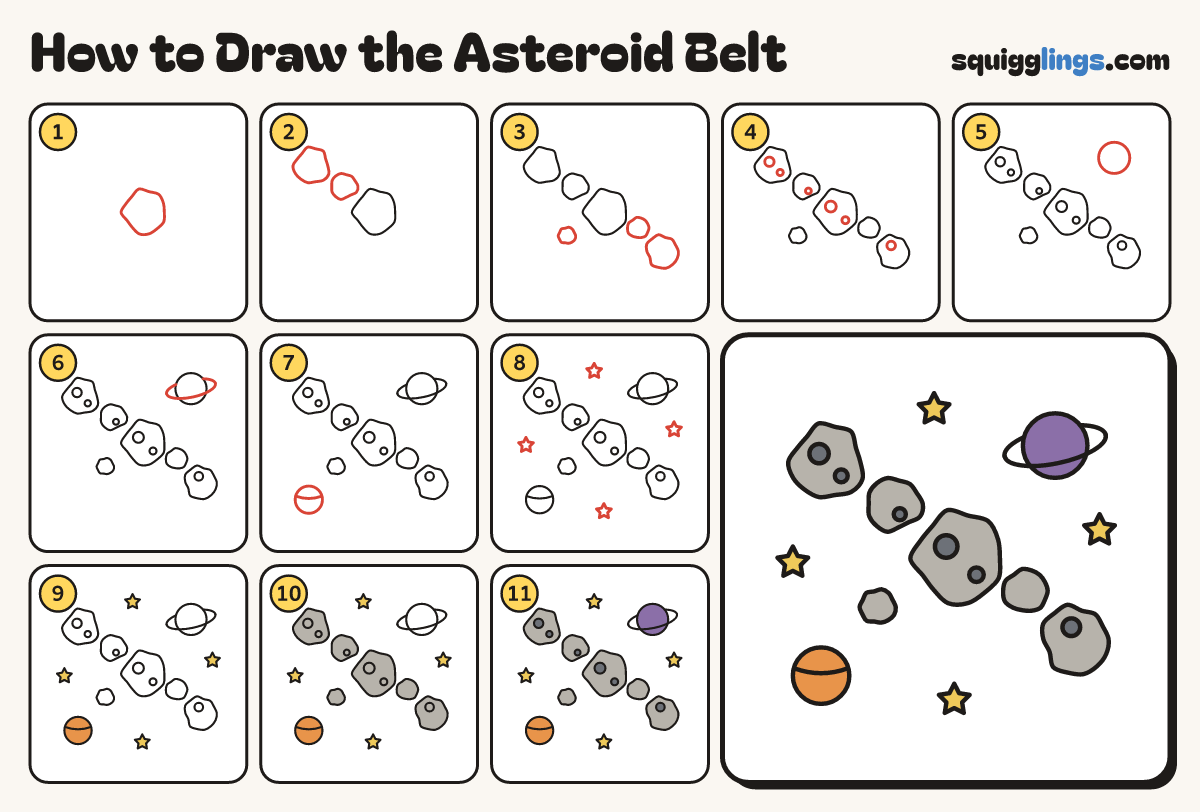
Each picture adds one red line. Draw that line, then scroll to the next picture. Rub out any dashed helper lines at the end. First up: biggest rock.
Step 1: Biggest rock
In the middle of your paper draw one big lumpy potato shape, as big as a plum.
Tip Asteroids are lumpy space potatoes, so make the edges bumpy.
Step 2: Rocks up the line
Up and to the left of the big rock draw a medium lumpy rock, then a bigger one further up.
Step 3: Rocks down the line
Draw 2 rocks down the line to the right, small then bigger, and a tiny one below on the left.
Step 4: Craters
On the big rock draw 2 round craters. Add a few more on the other rocks, not in a row.
Step 5: Round planet
In the top-right corner draw a round planet, a bit smaller than the big rock.
Step 6: Planet ring
Start left of the planet. Draw a tilted ring across its front and round behind, stopping where you began.
Tip Where the ring goes behind the planet, stop at the planet's edge.
Step 7: Striped planet
In the bottom-left corner draw a smaller round planet with one curved stripe across it.
Step 8: Four stars
Draw 4 fat stars in the empty spaces, clear of the rocks and the planets.
Step 9: Yellow stars, orange planet
Go over your lines, then colour the stars yellow and the striped planet orange.
Step 10: Grey rocks
Colour all 6 rocks grey, leaving the craters clear.
Step 11: Dark craters, purple planet
Colour every crater a darker grey and the ringed planet purple. Your asteroid belt is done!
Your finished drawing
Follow the steps above and this is where you end up: the asteroid belt, drawn by you.
Every step in one picture