Watch it draw itself · tap to replay
How to Draw a Melting Candle
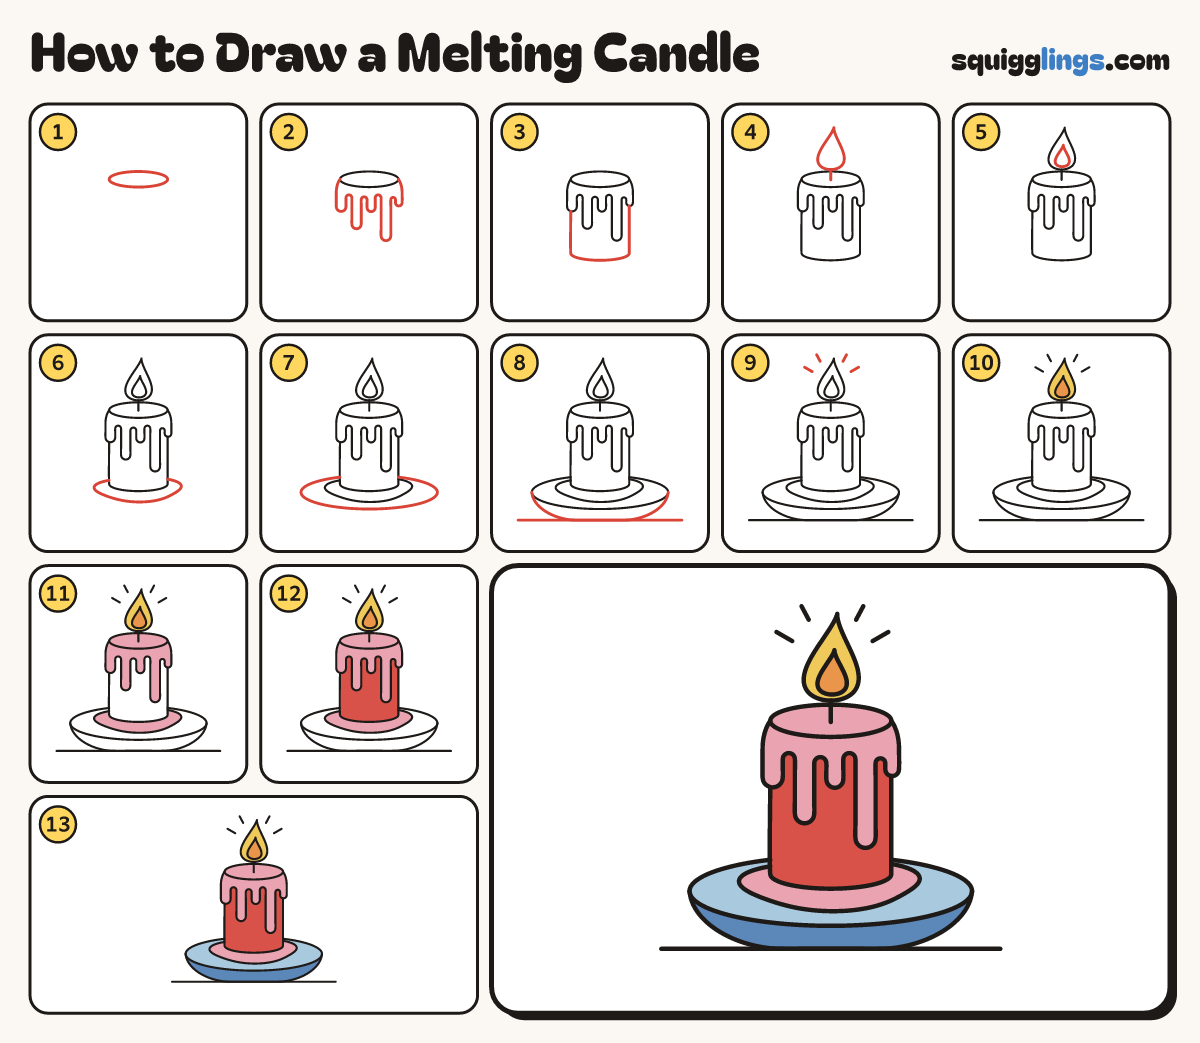
Draw a melting candle in 13 easy steps, about 10 minutes. Free, with a printable worksheet.
Each picture adds one red line. Draw that line, then scroll to the next picture. Rub out any dashed helper lines at the end. First up: the candle top.
Step 1: The candle top
A little above the middle, draw a wide flat oval for the top of the candle.
Tip Leave room above it for the flame.
Step 2: Melting drips
Start at the oval's left end. Draw 5 long round drips of different lengths. Stop at the right end.
Tip Each drip is a long U. Join them with tiny upside-down U shapes.
Step 3: The candle sides
Start under the first drip. Draw a line down, a curve along the bottom, and up to the last drip.
Step 4: Wick and flame
Start in the middle of the top. Draw a short wick up and stop. On it draw a teardrop flame.
Tip Fat at the bottom, pointed at the top, like a drop of water.
Step 5: The flame's heart
Inside the flame draw a small teardrop, sitting low, for the hot heart of the flame.
Step 6: A puddle of wax
Start low on the left side. Draw a wobbly puddle round the candle's foot. Stop on the right side.
Step 7: The dish
Start on the left side above the puddle. Draw a big flat oval round the front. Stop on the right.
Step 8: Under the dish
Start at the oval's left end. Curve down, go flat along the bottom, and curve up to the right end.
Tip The dish is shallow, like a saucer.
Step 9: Warm glow
Round the top of the flame draw 4 short rays pointing away, with a gap from the flame.
Step 10: Colour the flame
Colour the flame yellow and its heart orange.
Step 11: Pink melted wax
Colour the melted wax pink: the top of the candle, all the drips and the puddle.
Step 12: Red candle
Colour the candle red, around the pink drips.
Step 13: Blue dish
Colour the top of the dish light blue, around the puddle. Colour underneath it darker blue. Your candle is done!
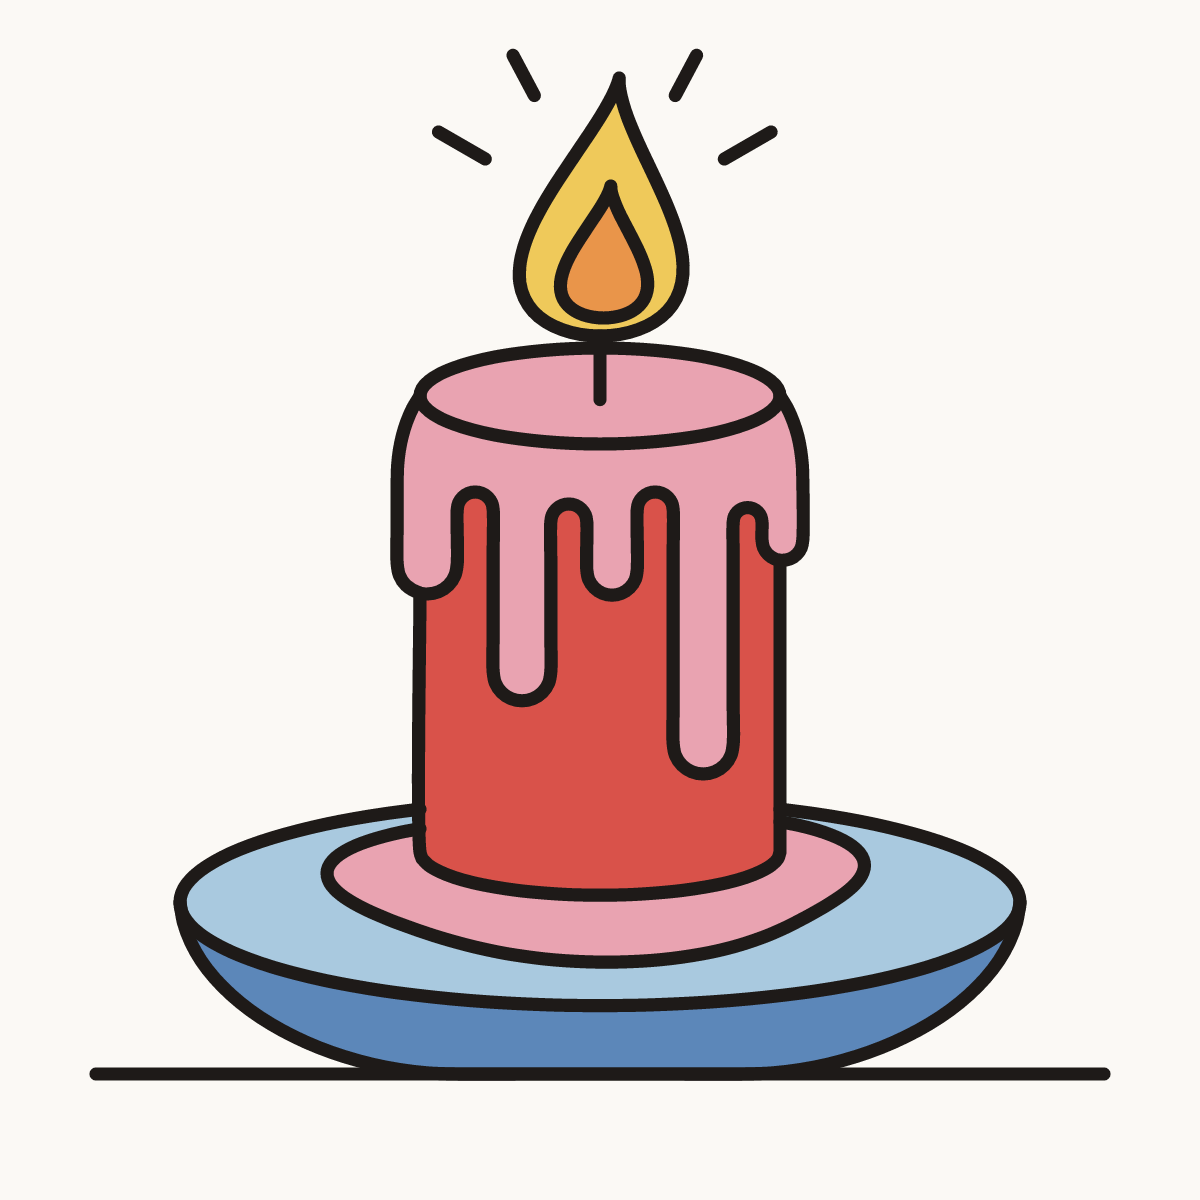
Your finished drawing
Follow the steps above and this is where you end up: a melting candle, drawn by you.
Every step in one picture