Watch it draw itself · tap to replay
How to Draw a Toy Robot
Draw a toy robot in 12 easy steps, about 9 minutes. Free, with a printable worksheet.
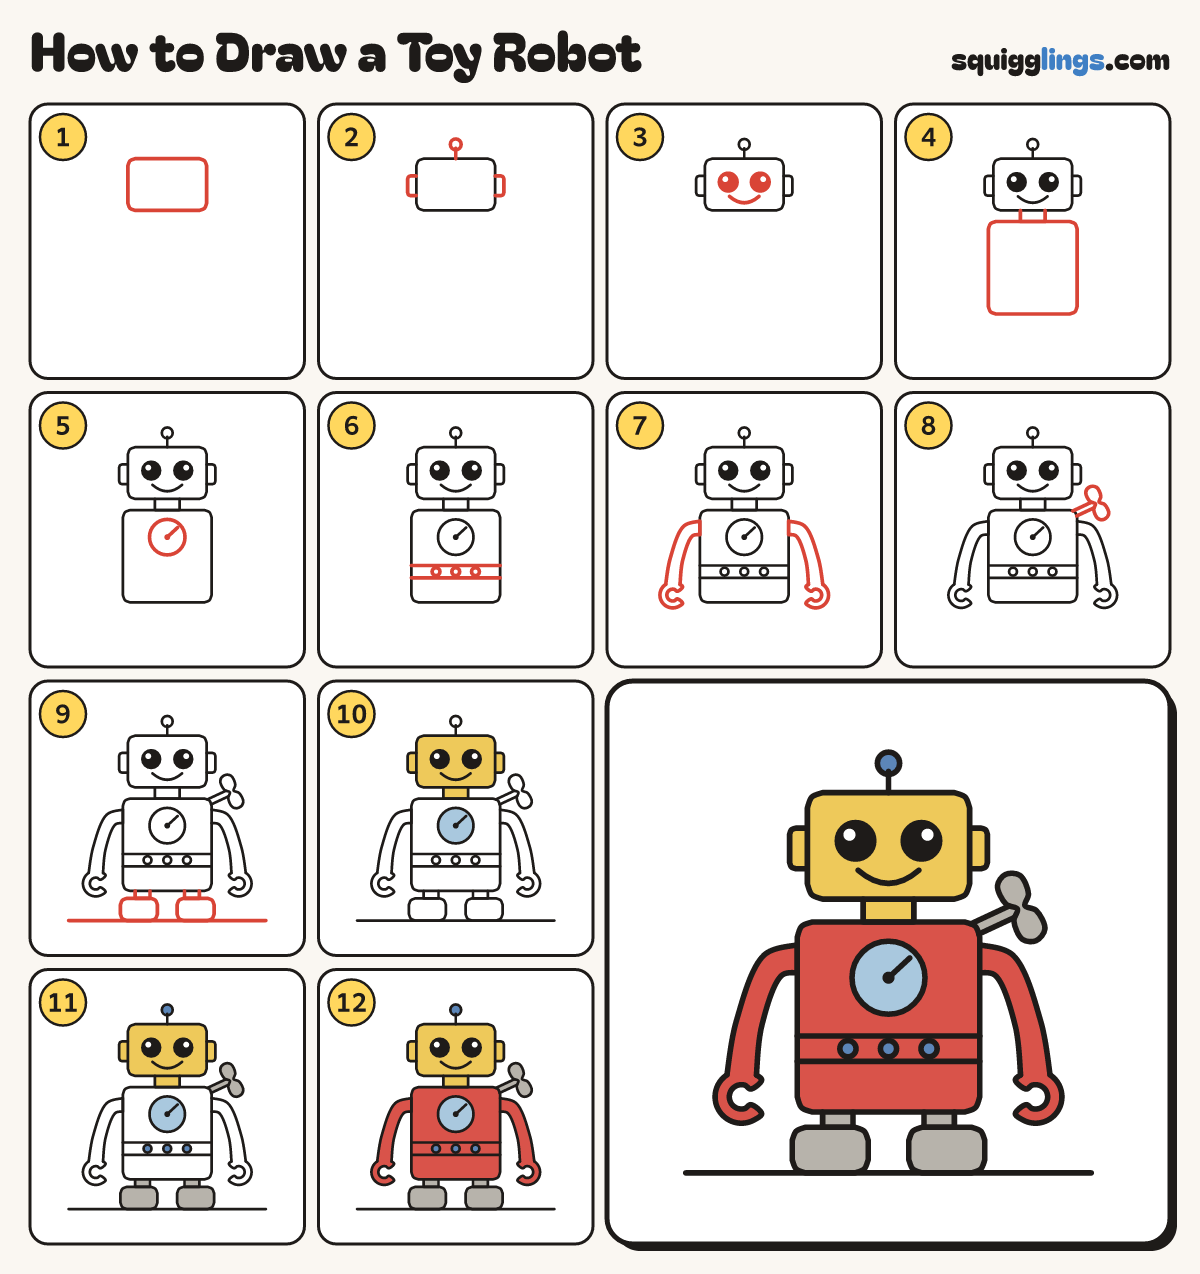
Each picture adds one red line. Draw that line, then scroll to the next picture. Rub out any dashed helper lines at the end. First up: the head box.
Step 1: The head box
Near the top of your paper draw a wide box for the head, a bit wider than tall.
Step 2: Antenna and ear bolts
Start on top of the head and draw a line up to a ball. Add a box bolt each side.
Step 3: A friendly face
Draw 2 big black eyes, a finger apart. Start under the left eye, draw a U smile to the right one.
Step 4: Neck and body
Start under the head. Draw a short neck down, across and back up to the head. Add a box body.
Tip The body is taller and a bit wider than the head.
Step 5: The chest dial
Draw one big circle dial high on the body. From a middle dot, draw a needle up to the right.
Tip More than a third as wide as the body. The needle stops inside.
Step 6: Control panel
Below the dial draw 2 lines from the left edge across to the right. Add 3 round buttons between them.
Step 7: Claw arms
Start high on the left side. Draw a tube arm out and down, opening into a fat C claw.
Step 8: Wind-up key
From the top right of the body, draw 2 short lines slanting up. Add a bow-tie shape on the end.
Step 9: Feet and ground
Start under the body, draw 2 tiny legs, back up to it. Add block feet and a ground line.
Step 10: Yellow head, sky dial
Colour the head, the ear bolts and the neck yellow, and colour the dial sky blue.
Step 11: Grey feet, blue lights
Colour the feet, the legs and the key grey, and the antenna ball and 3 buttons blue.
Step 12: Red body and arms
Go over your lines, then colour the body, arms and claws red, around the dial and the buttons.
Your finished drawing
Follow the steps above and this is where you end up: a toy robot, drawn by you.
Every step in one picture