Watch it draw itself · tap to replay
How to Draw a Greek Helmet
Draw a Greek helmet in 13 easy steps, about 10 minutes. Free, with a printable worksheet.
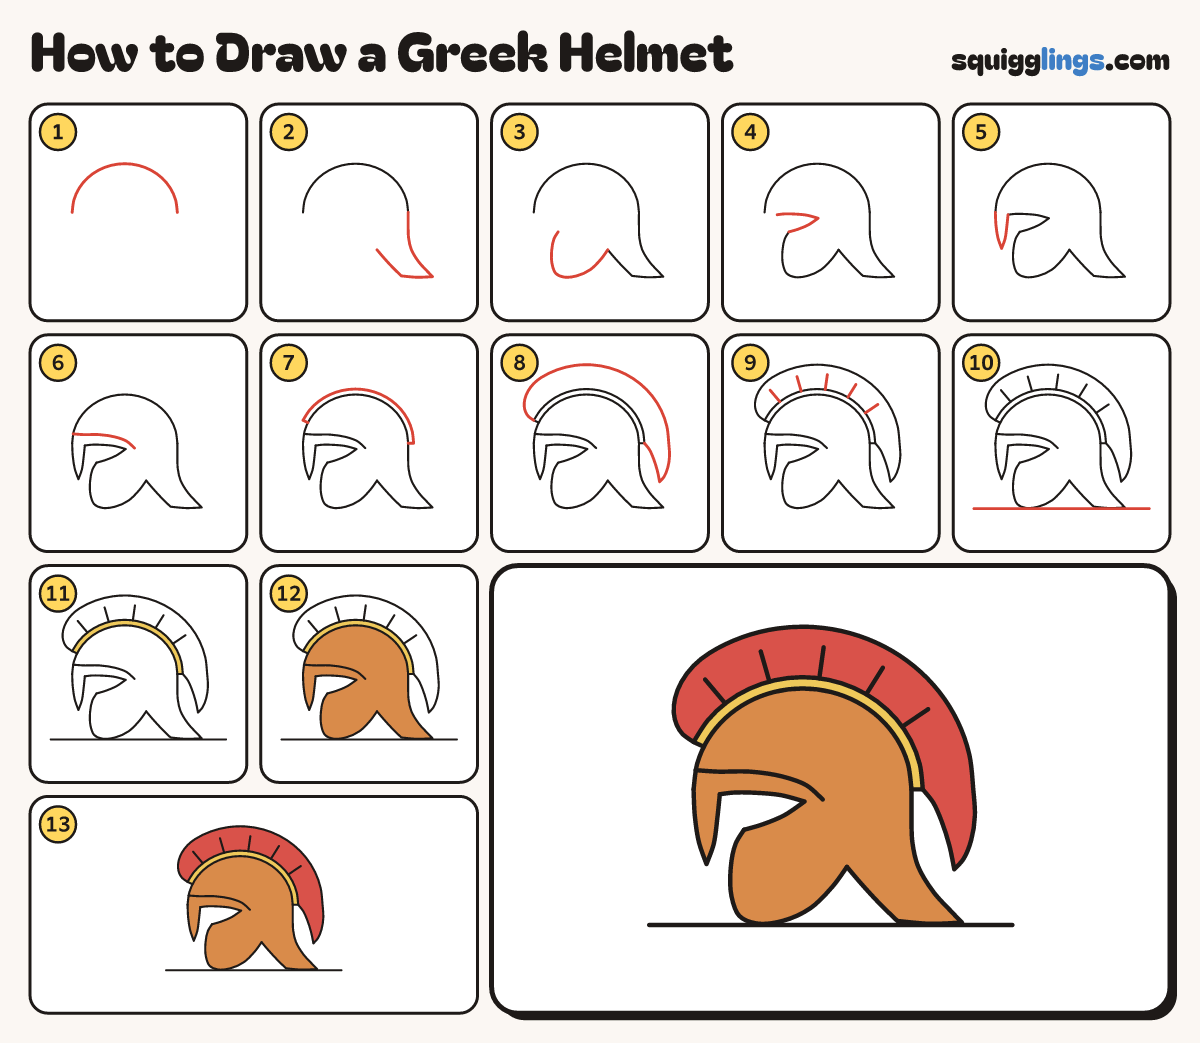
Each picture adds one red line. Draw that line, then scroll to the next picture. Rub out any dashed helper lines at the end. First up: the dome.
Step 1: The dome
Draw a big round dome like an upside-down bowl. Start on the left and stop level on the right.
Tip Leave room above it for the crest.
Step 2: Neck guard
From the right end draw down and flare out to a point. Come back underneath, then up to a notch.
Step 3: Cheek guard
From the notch sweep down to a round tip at the front. Curl up and stop below the dome.
Tip The cheek guard is long. It covered the whole cheek.
Step 4: Eye opening
From the cheek guard draw a pointed eye shape going back, then forward again. Stop near the front.
Step 5: Nose guard
From the eye opening draw down to a point, then back up to the dome's left end.
Tip Leave a gap between the nose guard and the cheek guard.
Step 6: Brow line
Start on the dome's front edge. Draw a curved brow over the eye opening and stop past its point.
Step 7: Crest band
Along the top of the dome draw a thin band, from the front right over to the back.
Step 8: Horsehair crest
Start at the band's front. Draw a tall arch over the dome and down behind. Stop at the band's end.
Tip Keep the crest the same height all the way over.
Step 9: Crest lines
Draw 5 short lines fanning out from the band into the crest.
Step 10: The ground
Draw a ground line under the helmet, touching the cheek guard and the neck guard.
Step 11: Yellow band
Go over your lines. Colour the thin crest band yellow.
Step 12: Bronze helmet
Colour the whole helmet ginger orange, like shiny bronze. Leave the eye opening white.
Step 13: Red crest
Colour the crest red, from its front to the tip of its tail. Your Greek helmet is done!
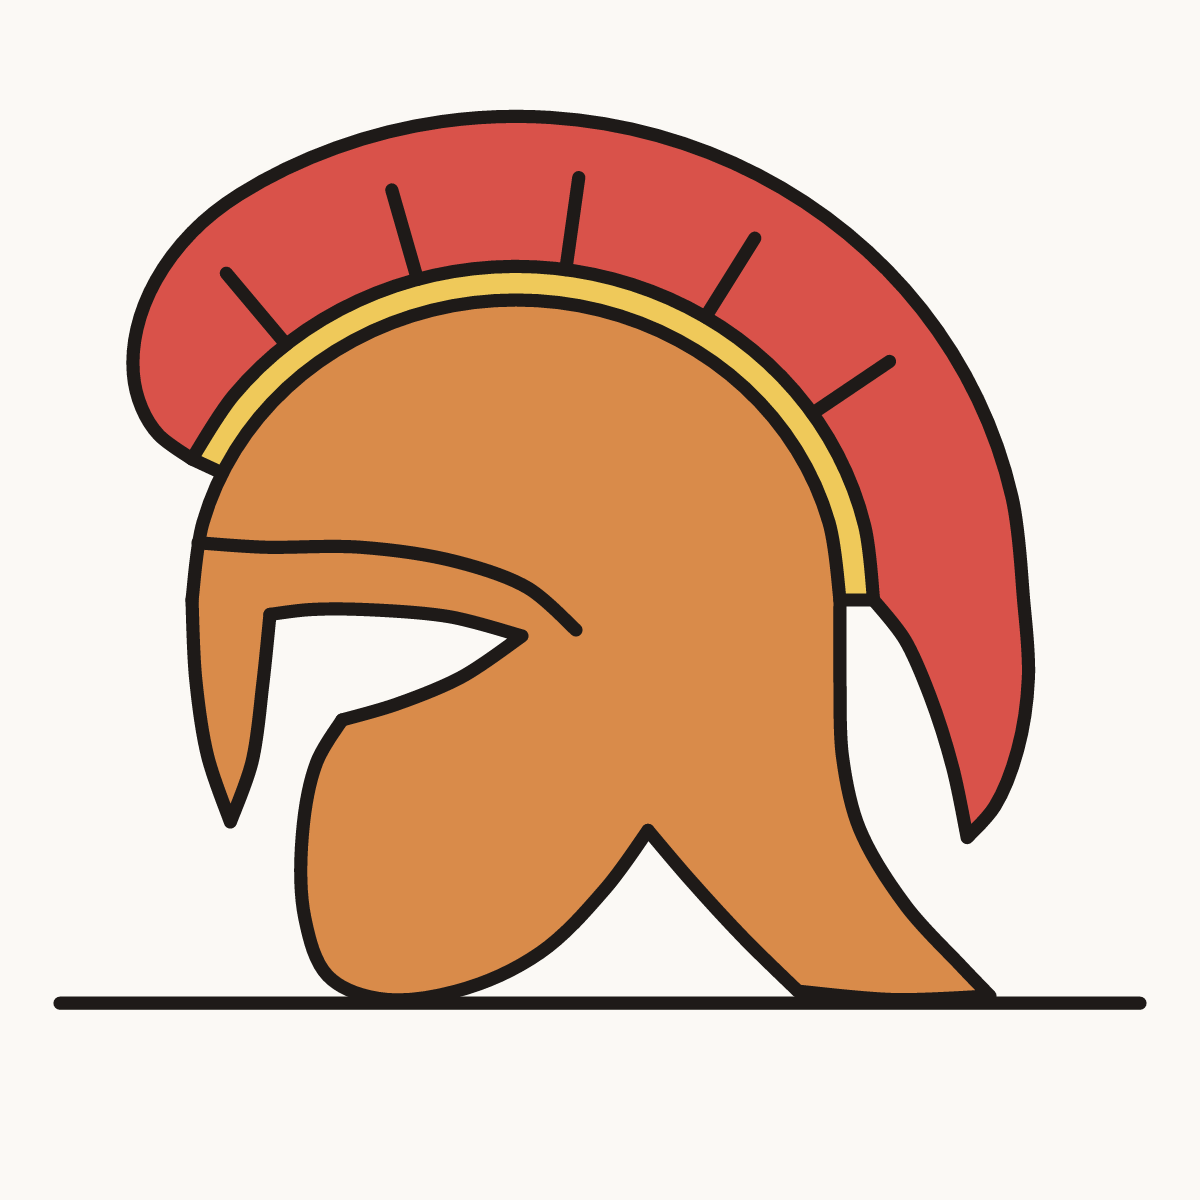
Your finished drawing
Follow the steps above and this is where you end up: a Greek helmet, drawn by you.
Every step in one picture