Watch it draw itself · tap to replay
How to Draw a Matamata
Draw a matamata in 14 easy steps, about 11 minutes. Free, with a printable worksheet.
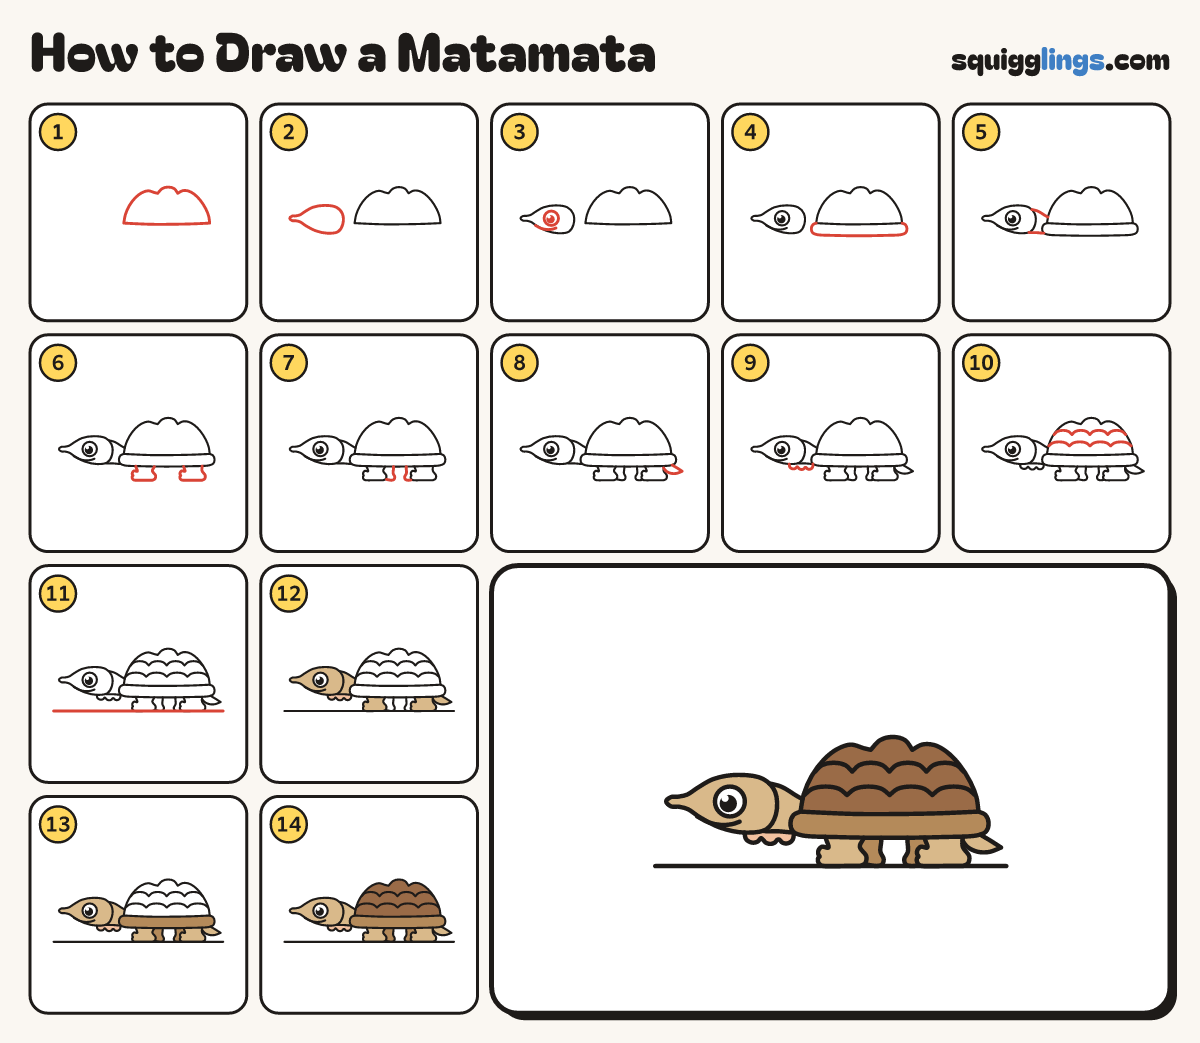
Each picture adds one red line. Draw that line, then scroll to the next picture. Rub out any dashed helper lines at the end. First up: knobby shell.
Step 1: Knobby shell
In the middle of your paper, draw a low shell with 3 round knobs on top and a flat bottom.
Step 2: Flat head
Left of the shell and a little lower, draw a long flat head that narrows to a thin tube nose.
Step 3: Eye and smile
Draw a big eye with a dot and a shine in the head. Add a small smile under it.
Step 4: Shell rim
Start at the shell's front corner. Draw a band under the shell with round ends, stopping at the back corner.
Step 5: Thick neck
Join the head to the shell with a thick neck, one line on top and one below.
Step 6: Stumpy legs
Under the front and the back of the rim, draw 2 short stumpy legs with round toes on the ground.
Tip Keep the legs short, so the shell stays low.
Step 7: Far legs
Start on the rim behind the front leg. Draw a thin leg, stopping on the ground. Repeat at the back.
Step 8: Short tail
Start under the back of the rim. Draw a short pointy tail trailing low, then back under the rim.
Step 9: Neck frills
Under the neck, draw 3 soft round frills in a row, from the back of the head to the shell.
Step 10: Shell ridges
Draw 2 bumpy lines across the shell, each from the front edge to the back edge.
Step 11: The ground
Draw one long straight ground line under all the feet, from under the nose to behind the tail.
Step 12: Peach frills, tan skin
Colour the frills peach, then the head, neck, near legs and tail tan. Leave the eye white.
Tip Go over your lines first.
Step 13: Wood rim, far legs
Colour the rim and the 2 far legs wood brown.
Step 14: Brown shell
Colour the knobby shell brown. Your matamata is done!
Your finished drawing
Follow the steps above and this is where you end up: a matamata, drawn by you.
Every step in one picture