Watch it draw itself · tap to replay
How to Draw a Snowy Owl
Draw a snowy owl in 11 easy steps, about 8 minutes. Free, with a printable worksheet.
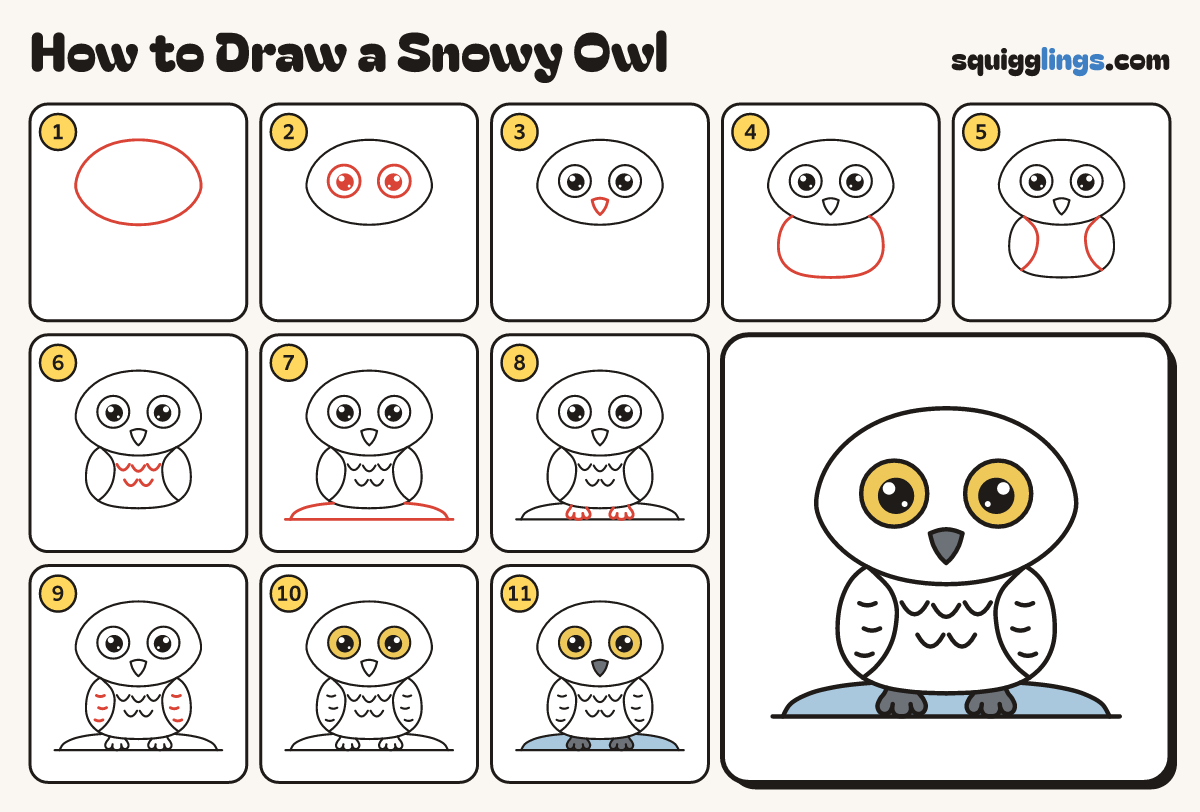
Each picture adds one red line. Draw that line, then scroll to the next picture. Rub out any dashed helper lines at the end. First up: the head.
Step 1: The head
Near the top of your paper draw a big soft oval, wider than tall, flatter at the chin.
Tip No ear tufts: a snowy owl's head is smooth.
Step 2: Two big eyes
Across the middle of the head draw 2 big circle eyes. Colour a big black dot in each.
Tip Owl eyes are enormous: each one about a quarter of the head wide.
Step 3: The beak
Under the gap between the eyes draw a small teardrop beak hanging point-down.
Step 4: The body
Start under the left cheek. Draw a big C down to the bottom middle. Do the right so they meet.
Tip The body is narrower than the head, fattest near the bottom.
Step 5: Folded wings
Start on each side under the head. Draw a fat leaf wing down to a soft tip near the bottom.
Step 6: Feathery tummy
Between the wings draw 3 little U's side by side, then 2 below in the gaps, like fish scales.
Step 7: A snow mound
Draw a ground line. Near its left end, start a low snow hump under the owl, down to the line.
Step 8: Two feet
Under each eye draw a foot: start on the tummy, come down onto the snow and draw 3 round toes.
Step 9: Speckles
Draw 3 short speckle marks down each wing.
Tip A few small marks are plenty.
Step 10: White owl, yellow eyes
Go over your lines. Colour the eyes yellow around the black dots. Leave the owl white.
Step 11: Blue snow, grey feet
Colour the snow mound very light blue, around the feet. Colour the beak and feet dark grey.
Your finished drawing
Follow the steps above and this is where you end up: a snowy owl, drawn by you.
Every step in one picture