Watch it draw itself · tap to replay
How to Draw an Aardvark
Draw an aardvark in 10 easy steps, about 8 minutes. Free, with a printable worksheet.
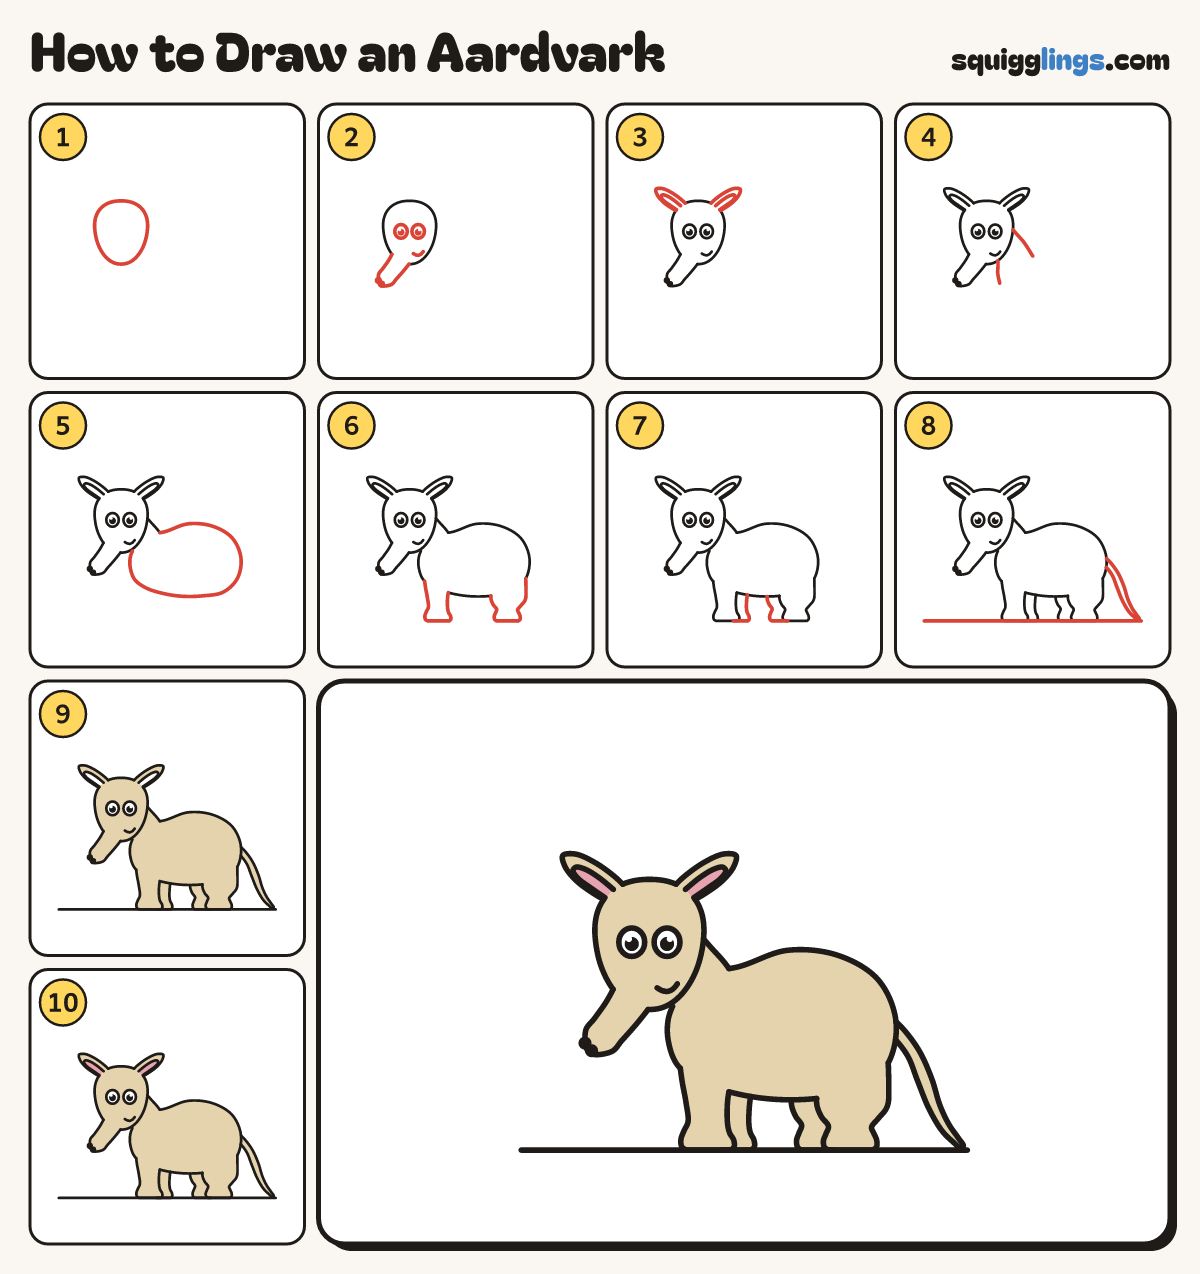
Each picture adds one red line. Draw that line, then scroll to the next picture. Rub out any dashed helper lines at the end. First up: the head.
Step 1: The head
Near the top left, draw an egg head with the narrow end down. Leave lots of room on the right.
Step 2: Eyes and long snout
Draw 2 big eyes. Below them, draw a long snout sloping down left to a round tip, and a smile.
Tip The long tube snout is the aardvark's big clue.
Step 3: Tall ears
On each top corner of the head, draw a tall leaf ear leaning out, with a smaller leaf inside.
Step 4: The neck
Slope the neck from behind the head down to smile height. Curve the chest from the chin to nose height.
Step 5: Bean body
From the bottom of the neck, draw a big bean body with a high humped back and a round bottom.
Step 6: Two legs
From the chest, draw a thick leg narrowing down to a round foot. Add a fat back leg that bends.
Tip Short strong legs for digging.
Step 7: Far legs
Just behind each leg, draw a thinner leg peeking out. Draw only the part you can see.
Step 8: Tail and ground
Draw a ground line. From the bottom, draw a thick tail curving down to a pointed tip on it.
Step 9: Colour it sand
Go over your lines. Colour the aardvark sand. Leave the eyes and the ear insides white.
Step 10: Pink ears
Colour the ear insides pink.
Your finished drawing
Follow the steps above and this is where you end up: an aardvark, drawn by you.
Every step in one picture