Watch it draw itself · tap to replay
How to Draw a Simple Mandala
Draw a simple mandala in 11 easy steps, about 8 minutes. Free, with a printable worksheet.
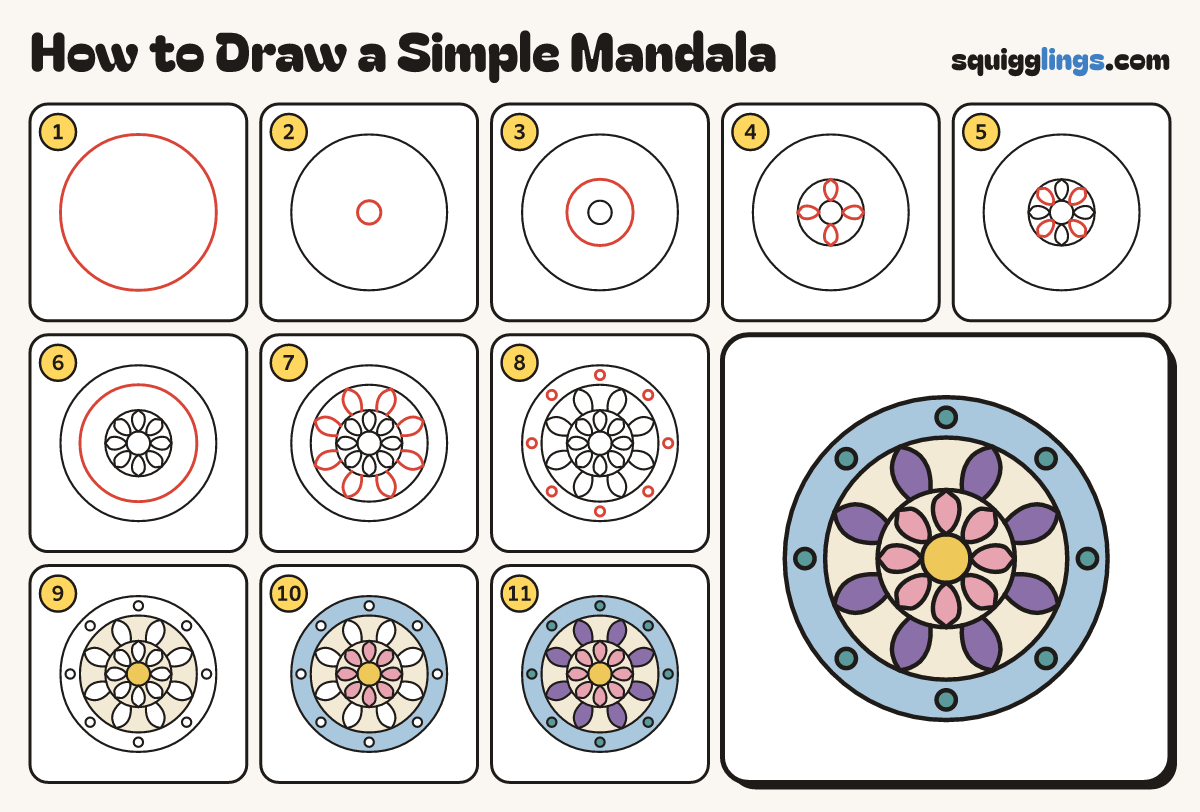
Each picture adds one red line. Draw that line, then scroll to the next picture. Rub out any dashed helper lines at the end. First up: the big circle.
Step 1: The big circle
Draw a big circle that fills most of your paper. Everything goes inside it.
Tip A mandala is a circle pattern, like a flower seen from above.
Step 2: The centre
In the very middle of the big circle draw a small circle.
Step 3: The first ring
Draw a middle-sized circle around the small one. Leave a good gap between them.
Step 4: 4 petals
Draw 4 pointy petals like a plus sign. Start each on the small circle and stop on the first ring.
Step 5: 4 more petals
Draw 4 more petals in the gaps, so there are 8 petals all the way round.
Step 6: The second ring
Draw another circle about halfway between the first ring and the big circle.
Step 7: Big petals
Draw 8 big petals. Start and stop each on the first ring, with its point on the second ring.
Tip Line each big petal up with a gap between the small petals.
Step 8: Dots all round
Between the second ring and the big circle draw 8 small dots, one in line with each small petal.
Step 9: Cream and yellow
Go over your lines. Inside the second ring, colour around all the petals cream. Colour the centre yellow.
Step 10: Sky and pink
Colour the outer band sky blue, around the dots. Colour the 8 small petals pink.
Step 11: Teal and purple
Colour the dots teal and the 8 big petals purple. Done!
Your finished drawing
Follow the steps above and this is where you end up: a simple mandala, drawn by you.
Every step in one picture