Watch it draw itself · tap to replay
How to Draw a Mallard Duck
Draw a mallard duck in 10 easy steps, about 8 minutes. Free, with a printable worksheet.
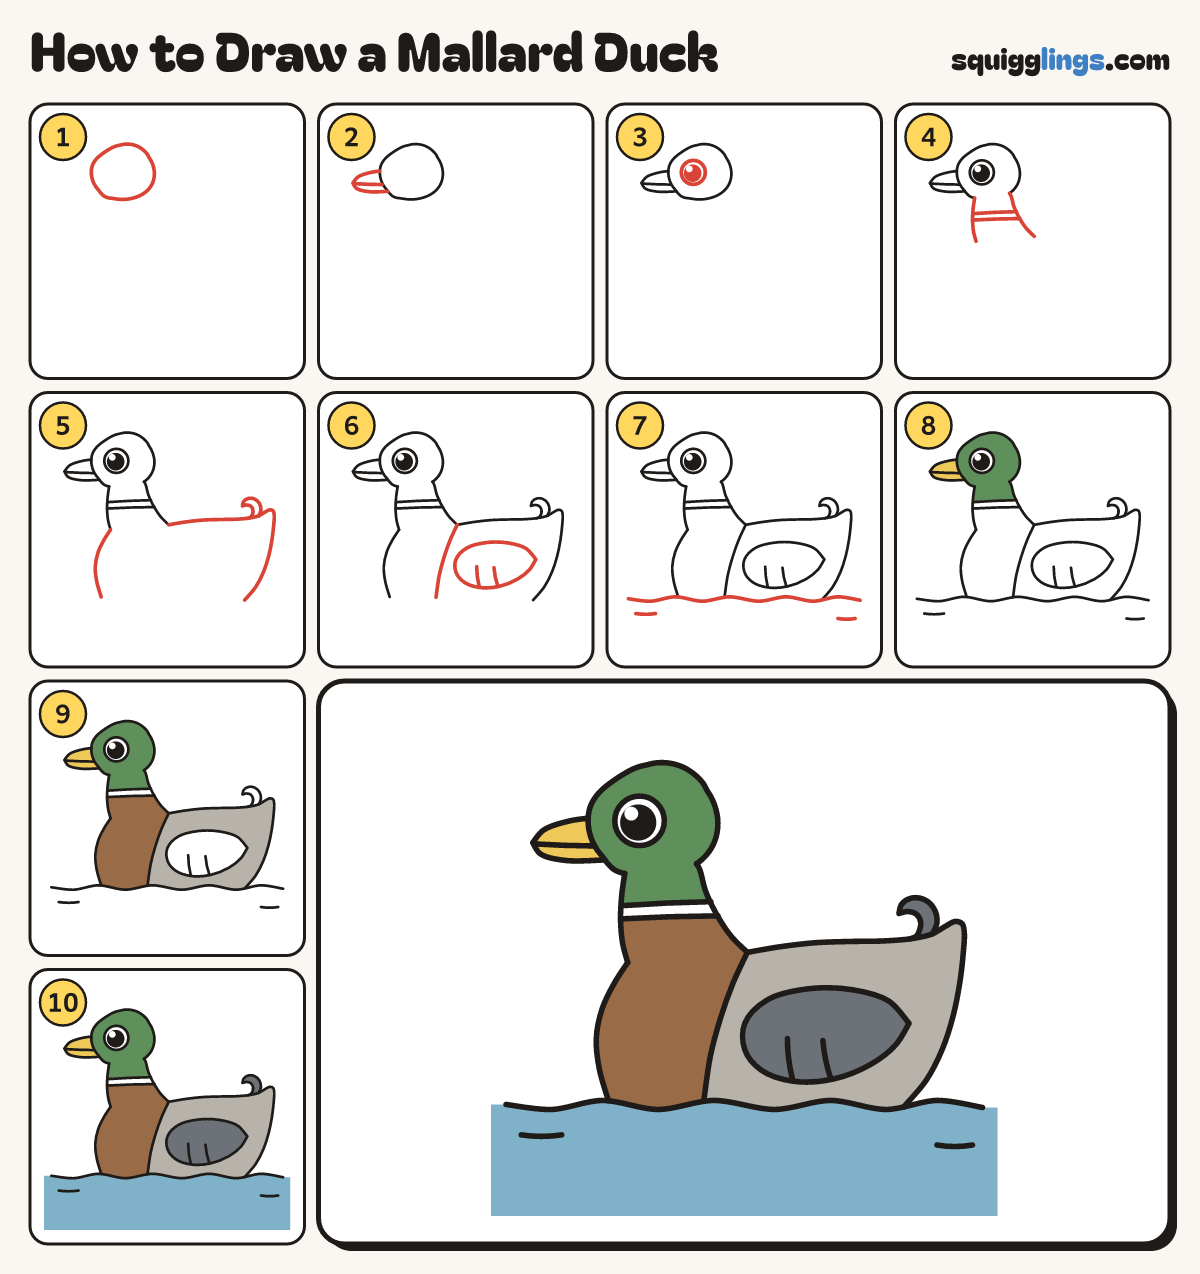
Each picture adds one red line. Draw that line, then scroll to the next picture. Rub out any dashed helper lines at the end. First up: round head.
Step 1: Round head
Near the top left, draw a round head, a little wider than tall, with a smooth dome on top.
Tip Leave room under it for a short neck and a long body.
Step 2: Flat yellow bill
Start on the head's front. Draw a long flat bill out left to a round tip, back to the chin.
Tip A mouth line from the tip back to the head splits the bill.
Step 3: One big eye
Behind the bill, a little back, draw a big round eye with a big black dot and a white shine.
Step 4: Short neck and ring
From the chin and head's back, draw 2 neck lines down, stopping half a head down. Add 2 ring curves.
Tip Rub out the bit of head line between the 2 neck lines.
Step 5: Chest, back and tail
From the neck, draw a chest down, and a back round a tail point. Both stop level at the bottom.
Tip Add a little comma curl on the back, just before the tail point.
Step 6: Chest line and wing
From where the neck meets the back, draw a curve down to the bottom. Add a teardrop wing beside it.
Step 7: Wavy water
From the left edge, draw a soft wavy water line across to the right edge, under the duck. Add ripples.
Step 8: Yellow bill, green head
Colour the bill yellow, then the head and neck green above the ring. Leave the eye and ring white.
Step 9: Grey body, brown chest
Colour the body grey, around the wing. Colour the chest brown, from the ring down to the water.
Step 10: Dark wing, blue water
Colour the wing and tail curl dark grey. Colour the water blue under the wavy line. Your duck is done!
Your finished drawing
Follow the steps above and this is where you end up: a mallard duck, drawn by you.
Every step in one picture