Watch it draw itself · tap to replay
How to Draw a Magnolia Tree
Draw a magnolia tree in 10 easy steps, about 8 minutes. Free, with a printable worksheet.
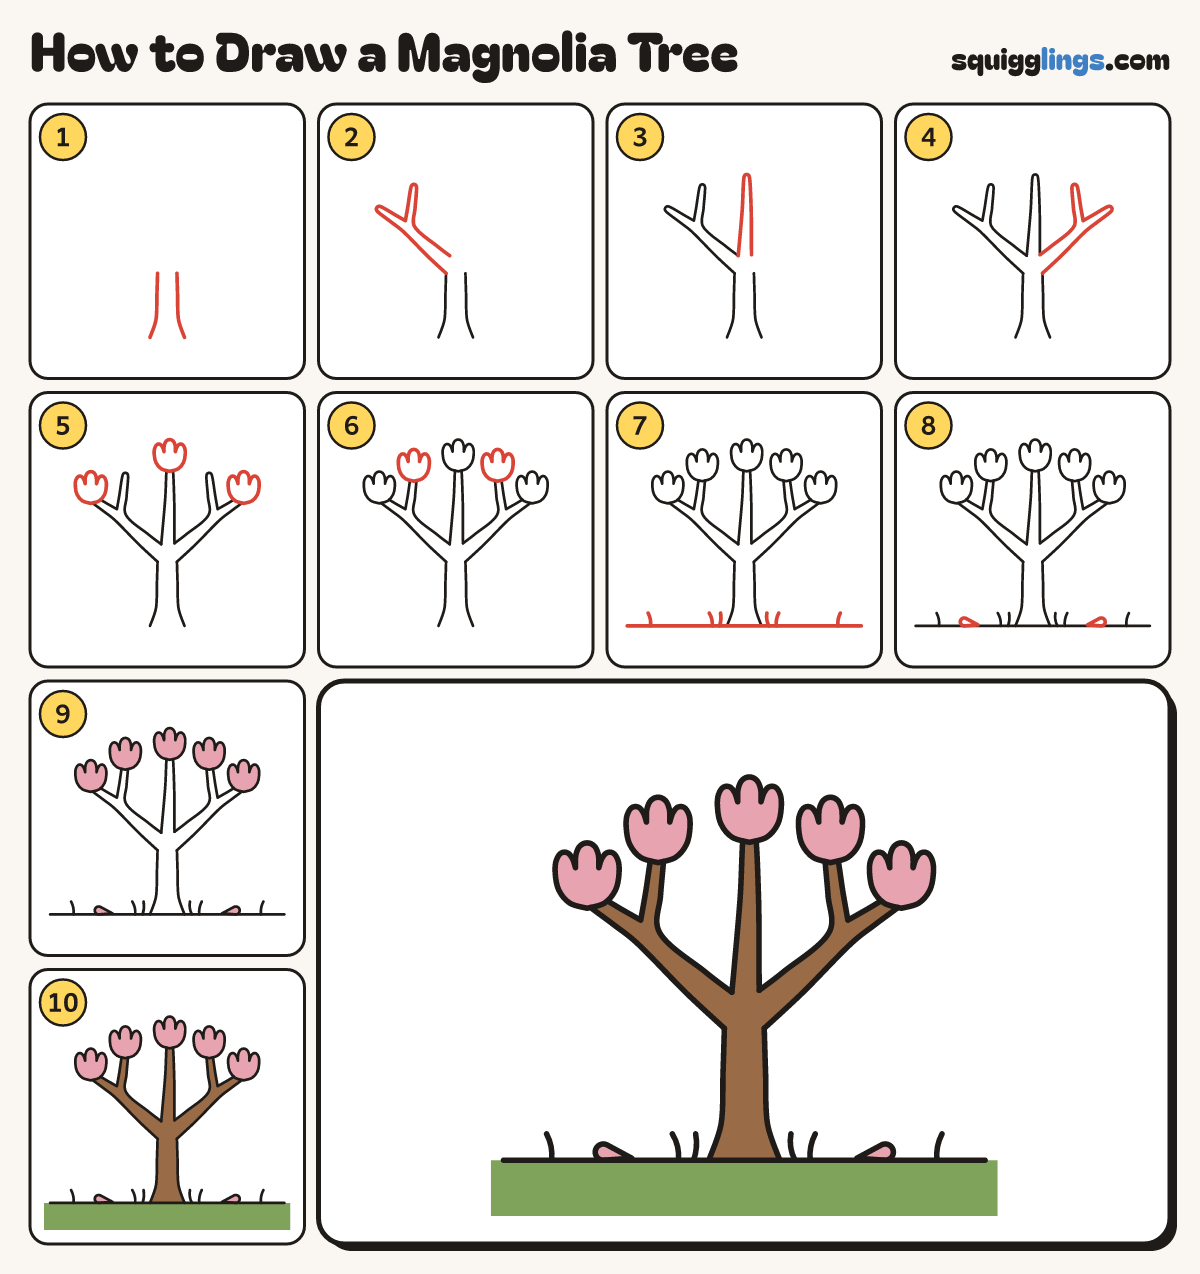
Each picture adds one red line. Draw that line, then scroll to the next picture. Rub out any dashed helper lines at the end. First up: the bare trunk.
Step 1: The bare trunk
Start near the bottom. Draw 2 trunk lines up, flaring out at the bottom. Stop a little below the middle.
Tip Keep the 2 trunk lines 2 fingers apart.
Step 2: Left branch
Start at the left trunk top. Draw a branch out left and a twig up. Stop above the trunk.
Tip Branches get thinner as they go, with rounded tips.
Step 3: Middle branch
Start where the left branch stopped. Draw a branch up to a round tip, then back down a finger over.
Step 4: Right branch
From the middle branch's foot, draw a twig up and a branch out right. Stop at the right trunk top.
Step 5: Three blooms
On the far left, middle and far right tips, draw a cup flower with 3 round petals.
Step 6: Two more blooms
Draw the same cup flower on the 2 upright twigs, so every tip has one bloom and none touch.
Step 7: Ground and grass
Draw a ground line under the trunk from edge to edge. Add a few short grass blades.
Step 8: Fallen petals
Draw 2 fallen petals lying flat on the ground, one each side, like small soft teardrops.
Step 9: Pink blooms
Colour every bloom and both fallen petals pink.
Step 10: Green grass, brown trunk
Colour the grass under the line green, and the trunk and branches brown. Your magnolia tree is done!
Your finished drawing
Follow the steps above and this is where you end up: a magnolia tree, drawn by you.
Every step in one picture