Watch it draw itself · tap to replay
How to Draw a Lunch Tray
Draw a lunch tray in 13 easy steps, about 10 minutes. Free, with a printable worksheet.
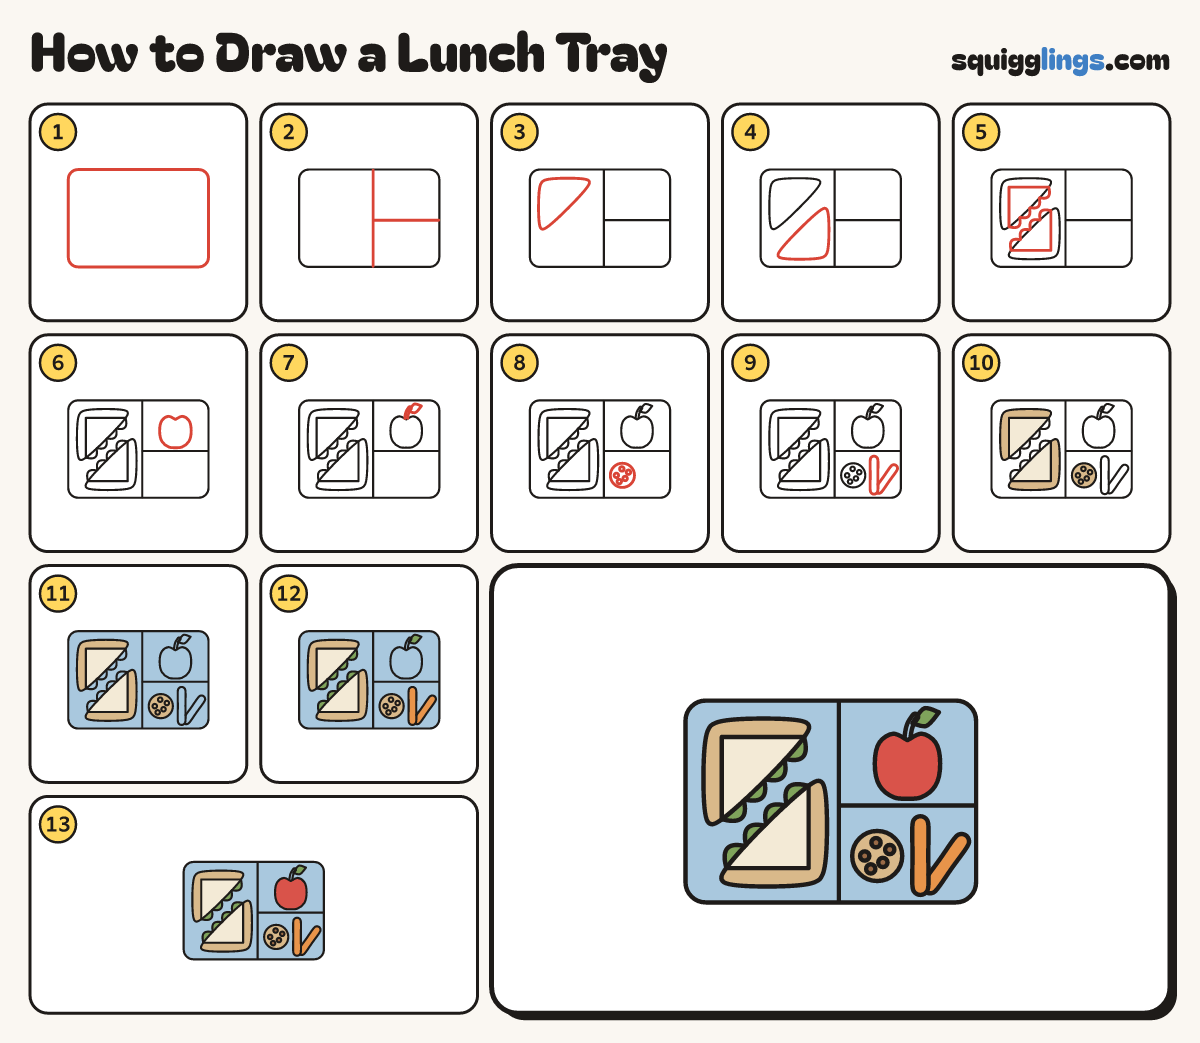
Each picture adds one red line. Draw that line, then scroll to the next picture. Rub out any dashed helper lines at the end. First up: the tray.
Step 1: The tray
In the middle of your paper draw a big wide rounded box, for a tray seen from above.
Step 2: The sections
Draw a line down the tray from top to bottom, right of middle. Halfway down, draw across to the right.
Step 3: Half a sandwich
In the big left section draw a triangle for half a sandwich: flat top, straight left side, slanted right side.
Step 4: The other half
Below it draw the other half the other way round, so the 2 halves make a square with a gap.
Step 5: Crusts and lettuce
From slant back to slant, draw an L crust line in each half. Add lettuce bumps along the slant.
Tip Soft bumps like little clouds, not sharp teeth.
Step 6: An apple
In the top right section draw a round apple, with a tiny dip at the top.
Step 7: Stem and leaf
From the dip draw a short stem going up, and a little leaf leaning off it to the right.
Step 8: A cookie
In the bottom right section, on the left, draw a round cookie with 5 little chips scattered on it.
Step 9: Carrot sticks
Next to the cookie draw 2 carrot sticks like fat little sausages: one standing up, a shorter one leaning right.
Step 10: Cream and tan
Go over your lines. Colour the sandwich insides cream, and the crusts and the cookie tan.
Step 11: Blue tray
Colour the tray sky blue, all around the food.
Step 12: Orange carrots, green lettuce
Colour the carrot sticks orange, and the leaf and the lettuce bumps green.
Step 13: Red apple, brown chips
Colour the apple red and the cookie chips brown, and your lunch tray is done!
Your finished drawing
Follow the steps above and this is where you end up: a lunch tray, drawn by you.
Every step in one picture