Watch it draw itself · tap to replay
How to Draw a Fruit Rainbow
Draw a fruit rainbow in 10 easy steps, about 8 minutes. Free, with a printable worksheet.
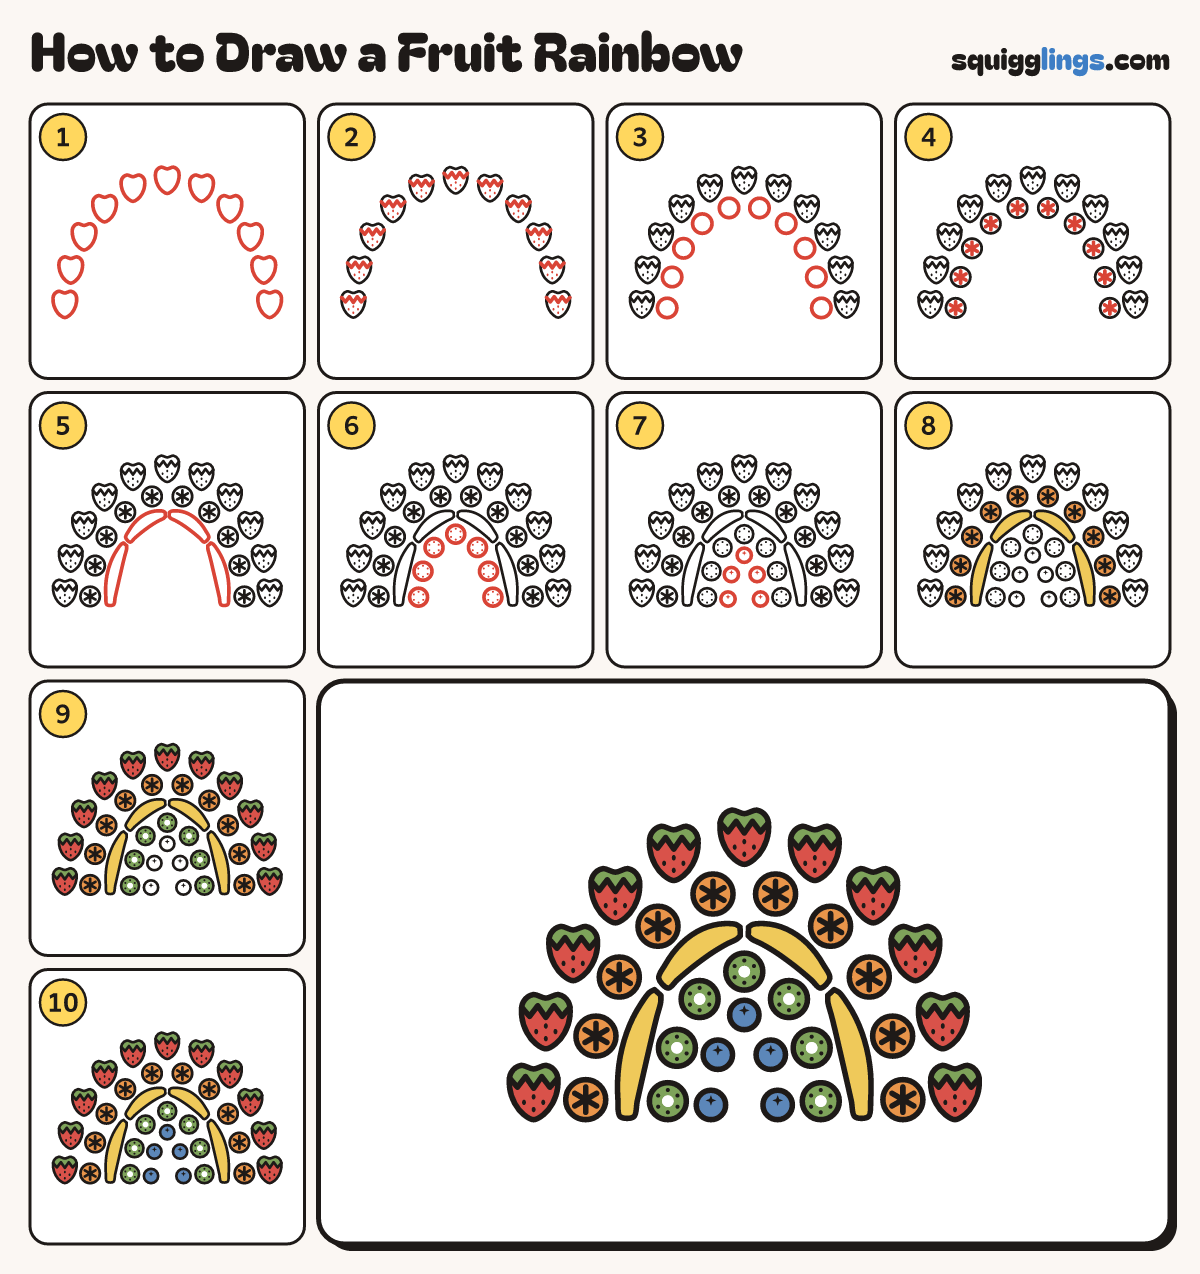
Each picture adds one red line. Draw that line, then scroll to the next picture. Rub out any dashed helper lines at the end. First up: strawberries.
Step 1: Strawberries
Draw 11 strawberries in a big tall arch, like a rainbow, from the bottom left over to the bottom right.
Tip Each one is round at the top with a soft point at the bottom.
Step 2: Leaves and seeds
Across the top of each strawberry draw a zigzag of leaves, from edge to edge. Dot 4 seeds below.
Step 3: Orange slices
Just inside the strawberries draw a second arch of 10 circles for orange slices.
Step 4: Slice lines
Inside each orange circle draw 3 short lines crossing in the middle, like a star.
Step 5: Bananas
Inside the oranges draw an arch of 4 curved bananas, each with a little stalk at its top end.
Tip Make each banana fat in the middle and thin at both ends.
Step 6: Kiwi slices
Inside the bananas draw an arch of 7 circles for kiwi slices. Dot a ring of 6 seeds in each.
Step 7: Blueberries
In the middle draw a small arch of 5 circles for blueberries. Dot a tiny star on each.
Step 8: Yellow and orange
Go over your lines. Colour the 4 bananas yellow and the 10 orange slices orange.
Step 9: Green and red
Colour the leaves and the kiwi slices green, leaving a white dot in each kiwi. Colour the strawberries red.
Step 10: Blue blueberries
Colour the blueberries blue. Your fruit rainbow is done!
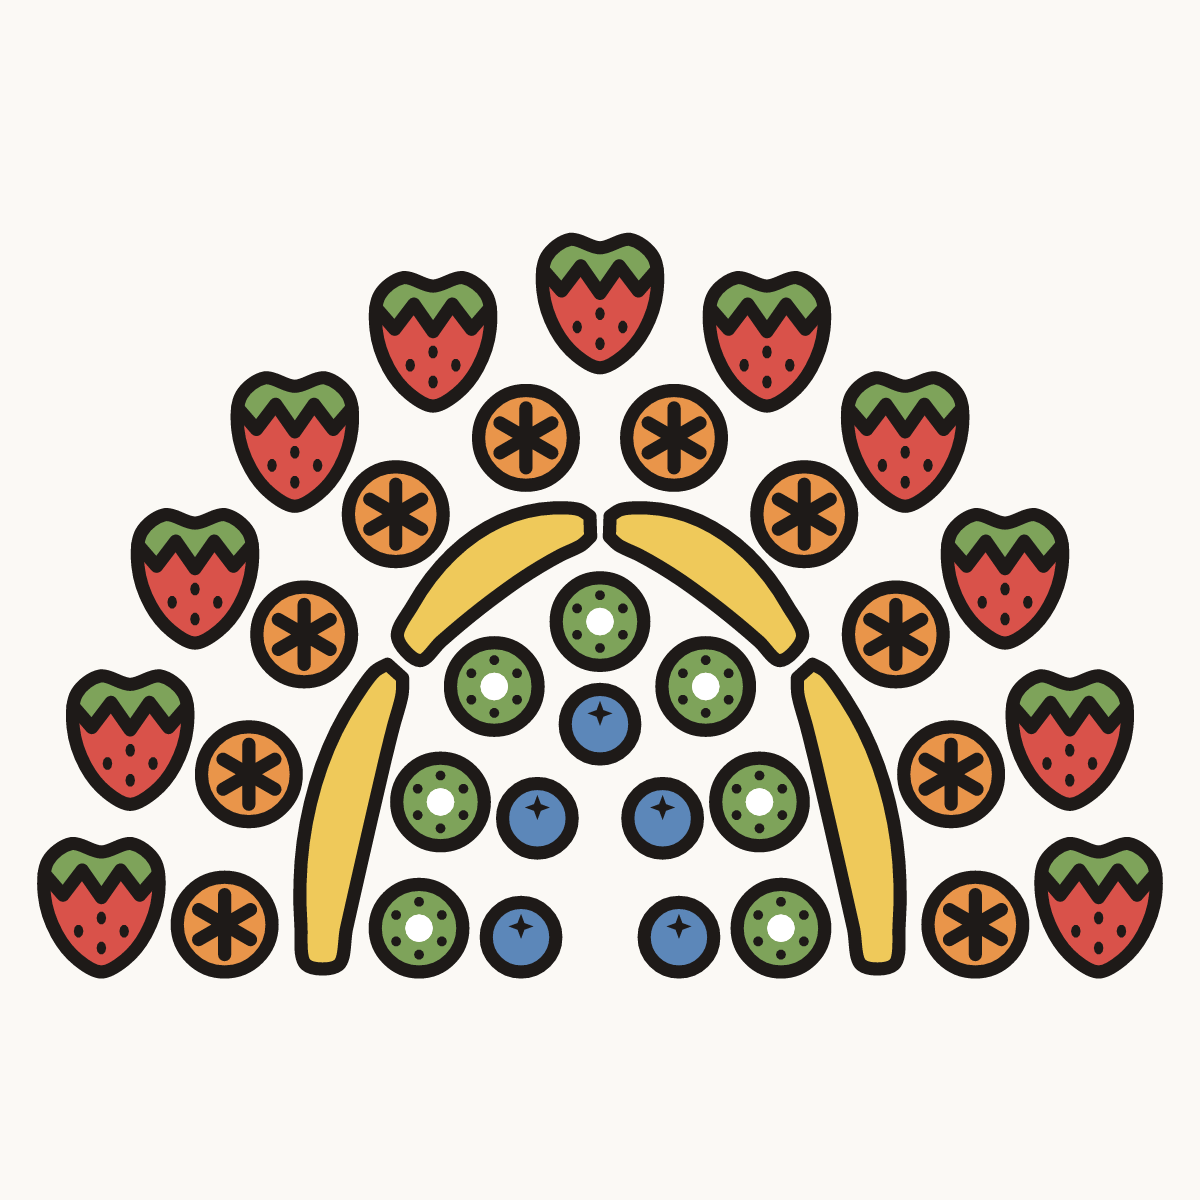
Your finished drawing
Follow the steps above and this is where you end up: a fruit rainbow, drawn by you.
Every step in one picture