Watch it draw itself · tap to replay
How to Draw a Leopard Face
Draw a leopard face in 11 easy steps, about 8 minutes. Free, with a printable worksheet.
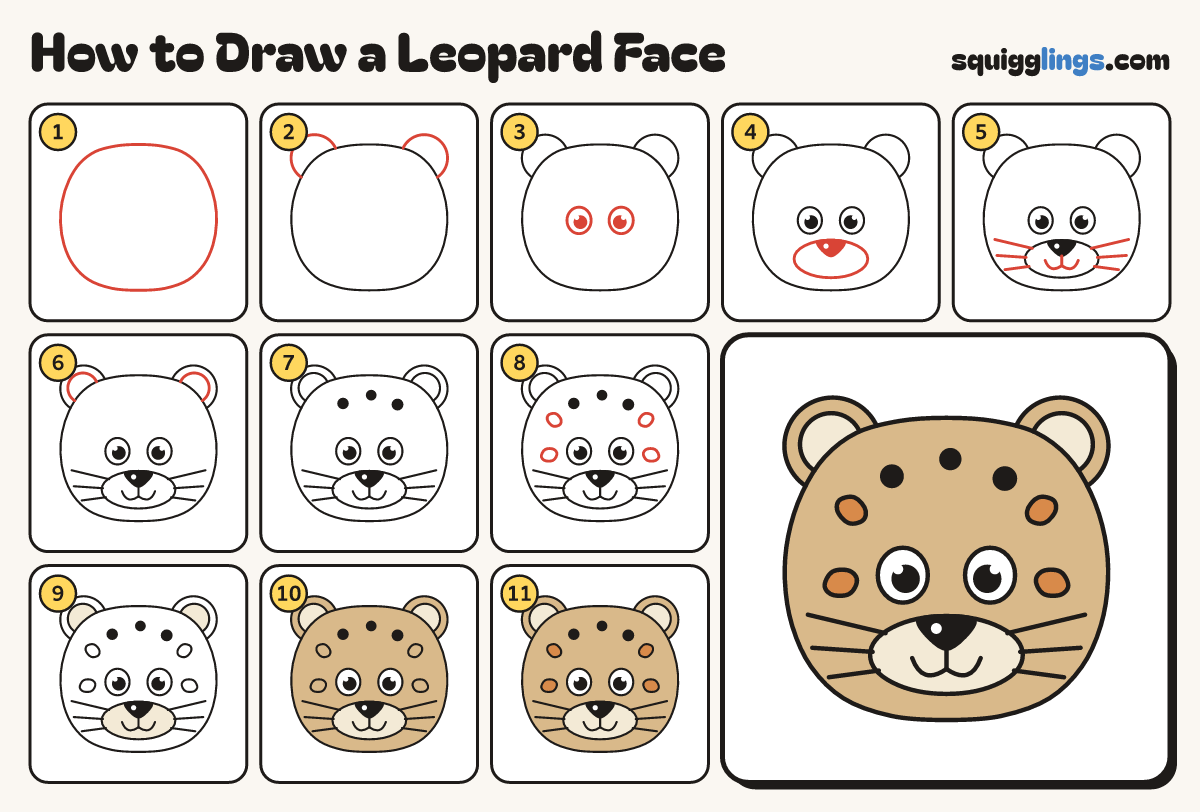
Each picture adds one red line. Draw that line, then scroll to the next picture. Rub out any dashed helper lines at the end. First up: the head.
Step 1: The head
Draw a big head, wider than tall, filling most of the page, with round cheeks and a wide chin.
Step 2: Round ears
On each top corner of the head draw a round ear, like half a cookie.
Tip Leopard ears are round, not pointy, and sit out on the corners.
Step 3: Two big eyes
Below the middle of the head draw 2 big eggy eyes, half an eye apart. Add black dots with shines.
Step 4: Snout and nose
Under the eyes draw a wide oval snout, leaving a sliver of chin. Add a black triangle nose on top.
Step 5: Smile and whiskers
From the nose draw a line down to a w smile. Add 3 whiskers each side, reaching across the cheek.
Tip Fan the whiskers apart like a hand, long and even.
Step 6: Inside the ears
Inside each ear draw a smaller half-circle, starting and stopping on the head line.
Step 7: Forehead dots
Above the eyes dot 3 small black spots in a gentle arch, the middle one highest.
Tip The forehead spots tell everyone this is a leopard.
Step 8: Ring spots
Draw 4 small wobbly rings, like little donuts: one on each cheek and one near each ear.
Step 9: Cream snout and ears
Colour the snout and the inside of the ears cream.
Step 10: Colour the fur tan
Colour the head and ears tan, around the cream snout, inner ears and ring spots. Leave the eyes white.
Step 11: Ginger ring middles
Colour the middle of each ring ginger. Your leopard is done!
Your finished drawing
Follow the steps above and this is where you end up: a leopard face, drawn by you.
Every step in one picture