Watch it draw itself · tap to replay
How to Draw a Lemonade Stand
Draw a lemonade stand in 13 easy steps, about 10 minutes. Free, with a printable worksheet.
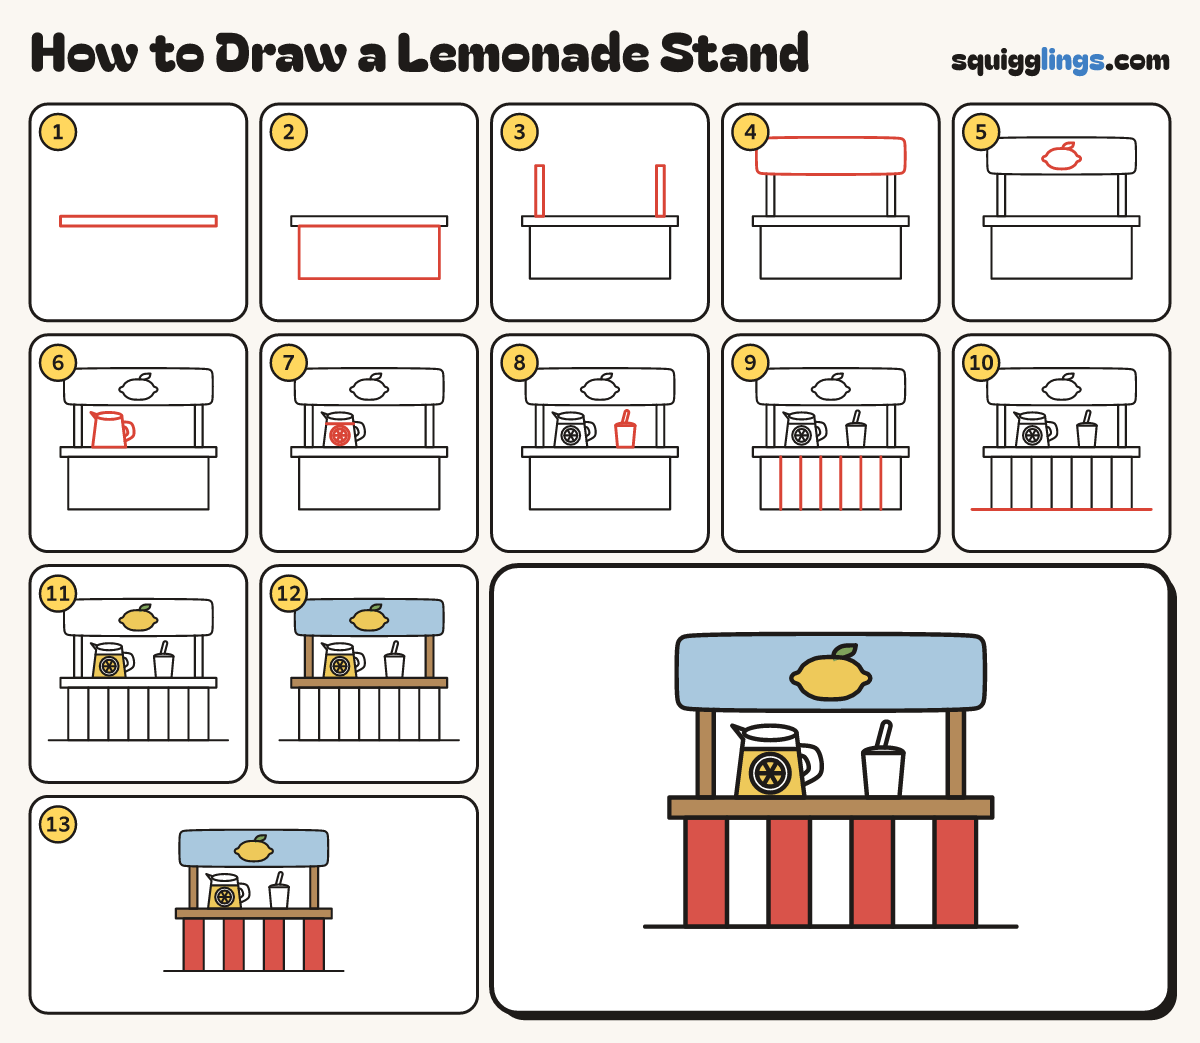
Each picture adds one red line. Draw that line, then scroll to the next picture. Rub out any dashed helper lines at the end. First up: the counter top.
Step 1: The counter top
Below the middle of your paper, draw a long thin box lying flat, nearly as wide as the page.
Step 2: The front
Under the counter top, draw a big wide box hanging down, a little narrower than the top, for the front.
Step 3: Two posts
Near each end of the counter top, draw a tall thin post going straight up, as tall as the front.
Step 4: The sign
Across the top of the posts, draw a long box with soft corners for the sign, wider than the posts.
Step 5: Lemon on the sign
In the sign's middle, draw a fat lemon with a tiny bump at each end and a leaf on top.
Step 6: A pitcher
On the counter's left, draw a pitcher: a box with an oval top, a spout and a C handle.
Step 7: Lemonade inside
Draw the lemonade line across the pitcher, and a lemon slice below: a circle in a circle, 6 spokes.
Step 8: A cup
On the right of the counter, draw a small cup with an oval top and a straw leaning up right.
Step 9: Stripes
Draw six lines straight down the front of the stand, from the counter top to the bottom, spread out evenly.
Step 10: The ground
Draw a ground line under the stand from well left to well right, level with its bottom.
Step 11: Yellow lemons, green leaf
Go over your lines, then colour the lemon, the lemonade and the slice middle yellow, and the leaf green.
Step 12: Blue sign, wood posts
Colour the sign sky blue around the lemon and leaf, then the counter top and both posts wood brown.
Step 13: Red stripes
Colour every second stripe on the front red, leaving the others white.
Your finished drawing
Follow the steps above and this is where you end up: a lemonade stand, drawn by you.
Every step in one picture