Watch it draw itself · tap to replay
How to Draw a Visor
Draw a visor in 10 easy steps, about 8 minutes. Free, with a printable worksheet.
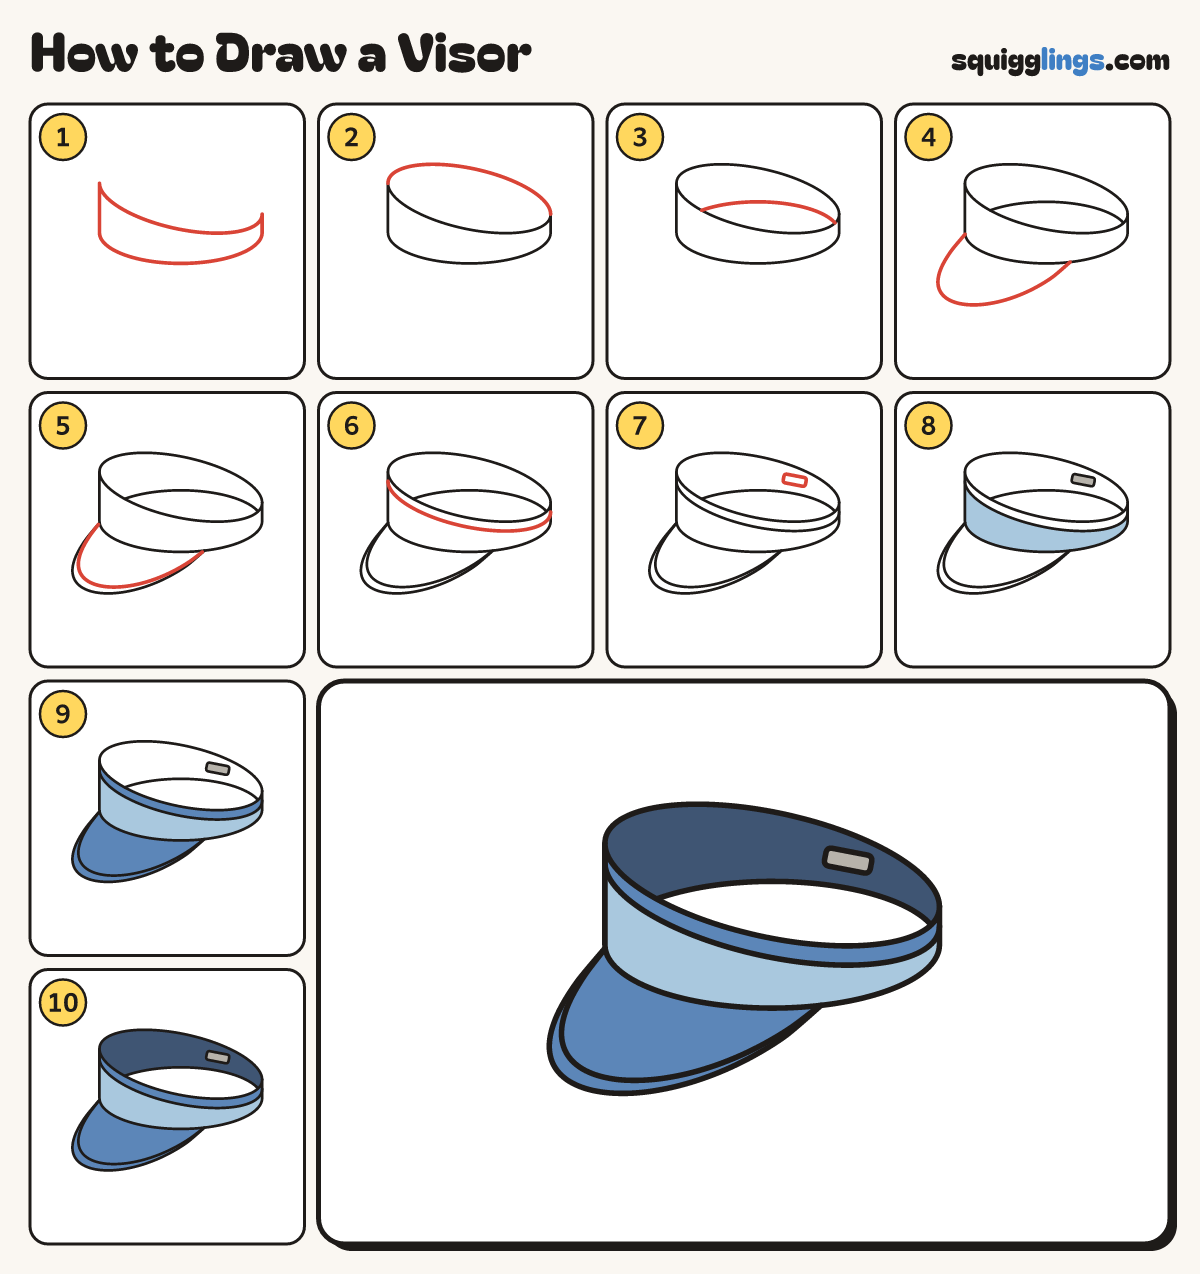
Each picture adds one red line. Draw that line, then scroll to the next picture. Rub out any dashed helper lines at the end. First up: the front band.
Step 1: The front band
Draw a wide curved band, like a thick smile. Make it tall on the left and thin on the right.
Tip The top edge and the bottom edge both sag in the middle, like the front of a bowl.
Step 2: The back strap
Start at the band's top left corner. Draw a rainbow curve over to its top right corner.
Tip A visor has no top. This curve is the far edge of the opening.
Step 3: Inside the strap
Inside the opening draw a lower rainbow. Start on the band's top edge and stop on it again.
Tip Stay close under the first rainbow on the right, to keep the strap thin.
Step 4: The bill
Start at the band's bottom left corner. Draw a big round tongue down, stopping under the band's middle.
Tip The bill is the part that keeps the sun out of your eyes. Make it big.
Step 5: The bill seam
Start under the band's corner. Draw a line just inside the bill's edge, right round, and stop on the band.
Tip Keep the same small gap from the edge the whole way.
Step 6: The trim
Start on the band's left end. Draw a line just under its top edge and stop on the right end.
Step 7: The fastener
On the back strap, on the right, draw a small flat box with soft corners.
Tip This is the sticky tab that makes the strap tighter or looser.
Step 8: Light blue band
Go over your lines. Colour the front band under the trim light blue. Colour the fastener grey.
Step 9: Blue bill
Colour the bill and the thin trim blue.
Step 10: Dark blue inside
Colour the inside of the strap dark blue, around the fastener. Leave the hole empty. Your visor is ready!
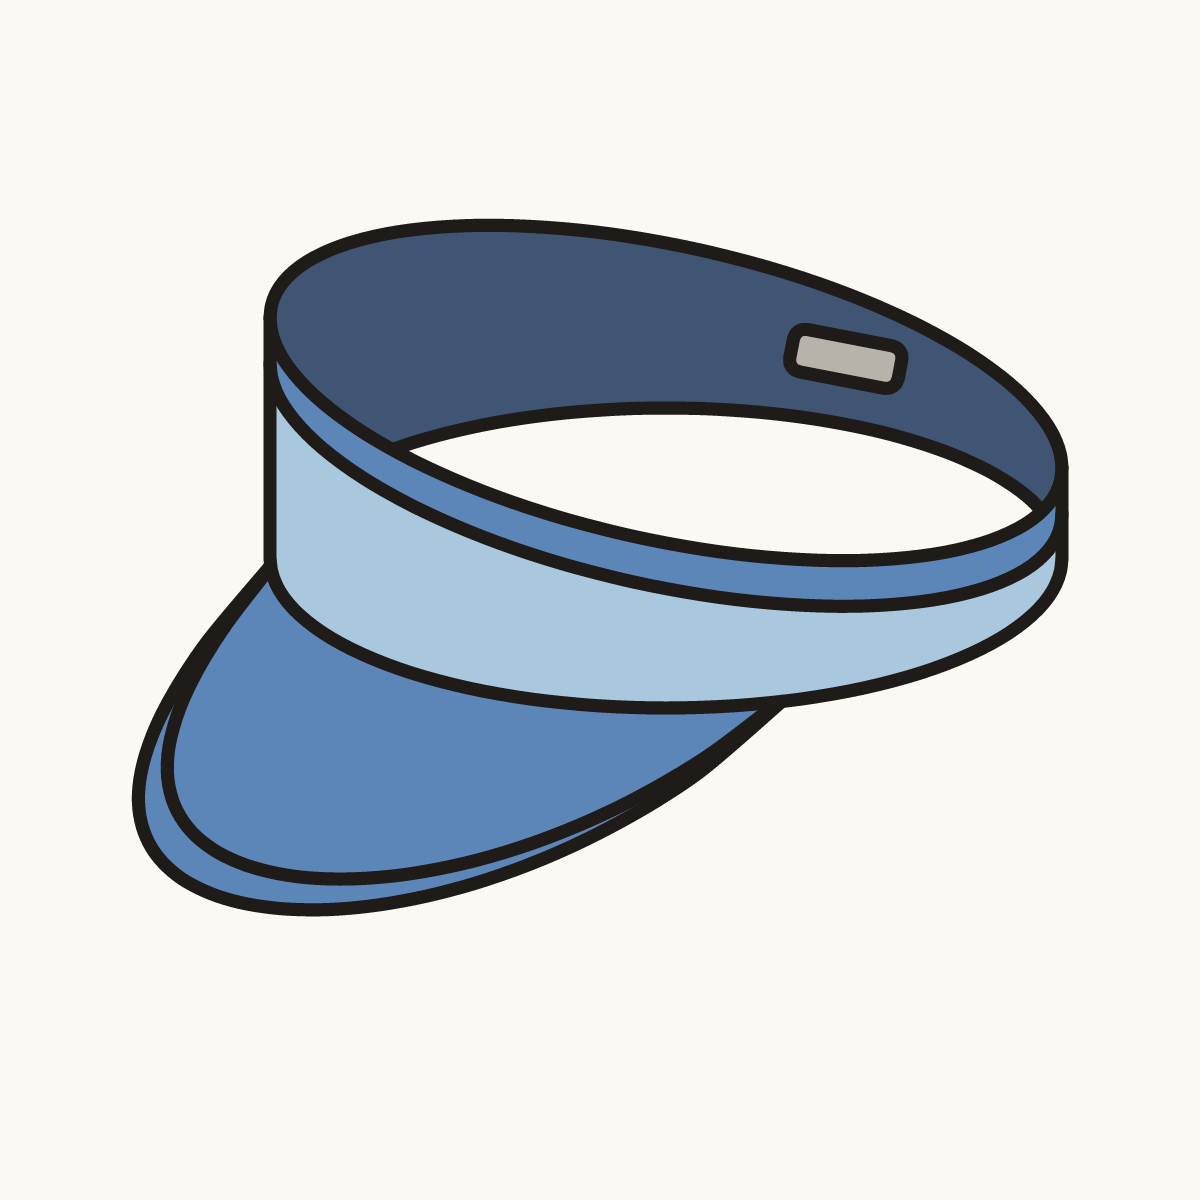
Your finished drawing
Follow the steps above and this is where you end up: a visor, drawn by you.
Every step in one picture