Watch it draw itself · tap to replay
How to Draw a Leaf Pile
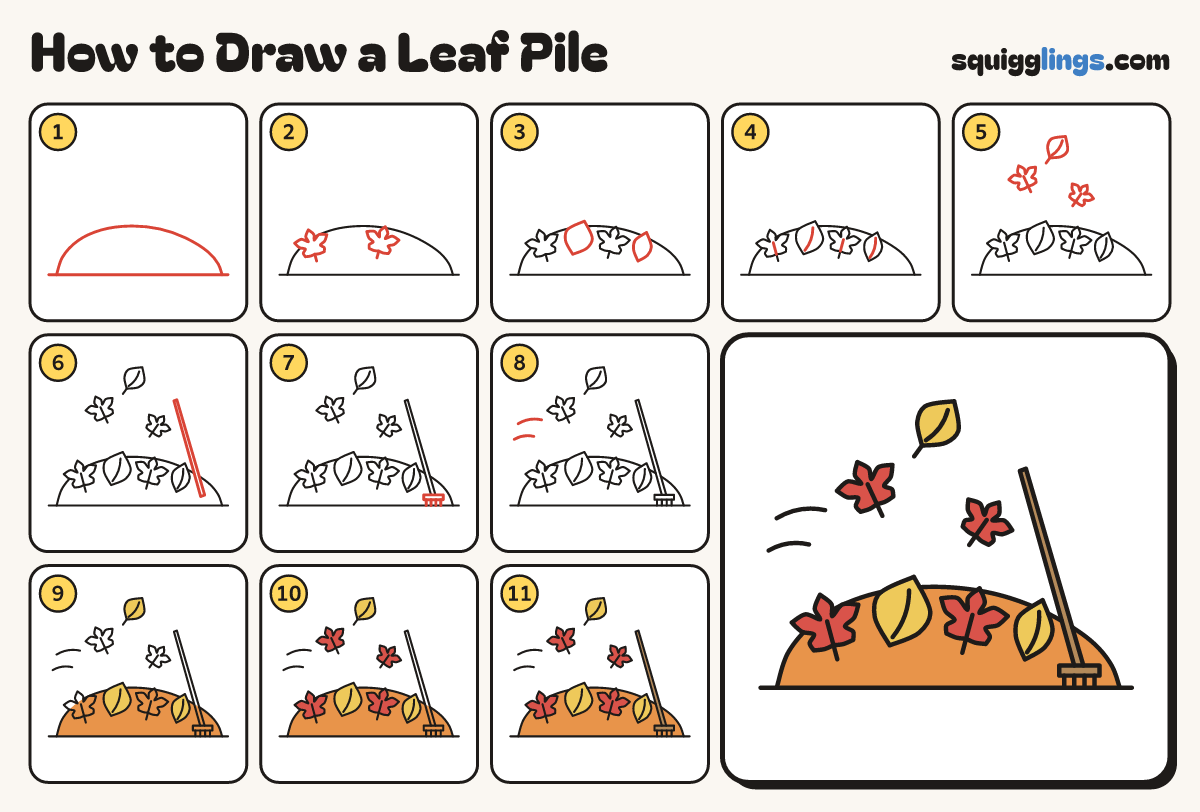
Draw a leaf pile in 11 easy steps, about 8 minutes. Free, with a printable worksheet.
Each picture adds one red line. Draw that line, then scroll to the next picture. Rub out any dashed helper lines at the end. First up: the pile.
Step 1: The pile
Draw a ground line across your paper. Start at the left, draw one big soft hill, stop at the right.
Tip A leaf pile is one big soft hill, not a row of bumps.
Step 2: Maple leaves
On the heap draw 2 maple leaves poking out. Each has 3 big points, 2 small ones and a stem.
Step 3: Almond leaves
Between and beside them draw 2 fat almond leaves poking up out of the heap.
Step 4: Leaf veins
In each leaf in the pile draw a vein up from the bottom. Stop the maple veins halfway.
Step 5: Leaves in the air
Above the pile draw 2 maple leaves and 1 almond leaf tumbling down. Give each a stem and a vein.
Step 6: The rake handle
Start near the bottom right corner. Draw a long thin handle leaning on the pile. Stop near the top.
Step 7: The rake head
At the bottom of the handle draw a small flat bar. Add 4 short teeth going down to the ground.
Step 8: Wind
On the left draw 2 short curved wind lines in the air, one above the other.
Step 9: Yellow and orange
Go over your lines. Colour the 3 almond leaves yellow, then the heap orange, going around the leaves and rake.
Step 10: Red maple leaves
Colour the 4 maple leaves red, 2 in the pile and 2 in the air.
Step 11: Wood rake
Colour the rake wood brown. Your leaf pile is done!
Your finished drawing
Follow the steps above and this is where you end up: a leaf pile, drawn by you.
Every step in one picture