Watch it draw itself · tap to replay
How to Draw a Cave
Draw a cave in 11 easy steps, about 8 minutes. Free, with a printable worksheet.
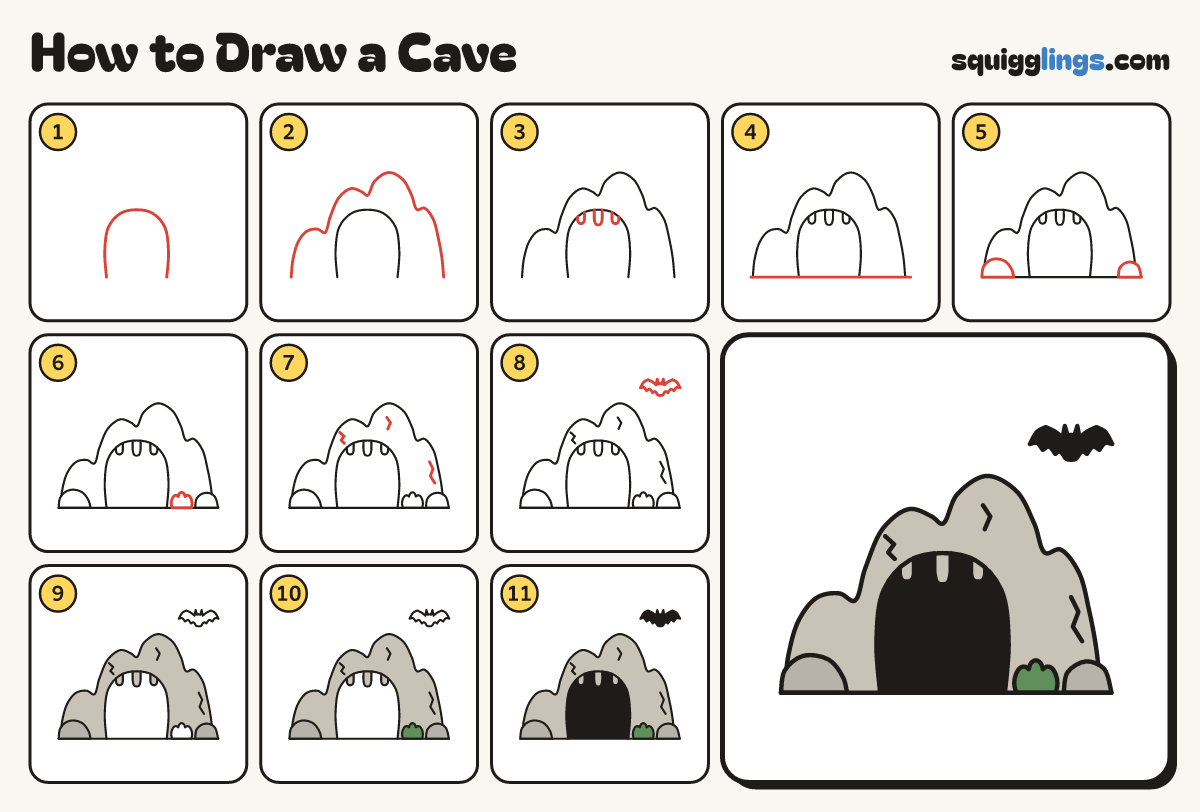
Each picture adds one red line. Draw that line, then scroll to the next picture. Rub out any dashed helper lines at the end. First up: cave mouth.
Step 1: Cave mouth
Start below the middle of the page. Draw a big upside-down U as tall as your hand, and stop level.
Tip Leave the bottom open. The ground will close it later.
Step 2: Lumpy rock
Start on the ground left of the opening. Draw a big lumpy hill over the cave, stopping on the ground.
Step 3: Rock drips
In the top of the opening hang 3 rock drips. Start on the curve, draw a U, stop on it.
Tip Keep each drip short and round at the bottom, like a finger, not a point.
Step 4: Ground
Start just left of the rock. Draw a straight line along its bottom, stopping just past the right side.
Step 5: Two boulders
At the left foot of the rock draw a round boulder. Draw a smaller one at the right foot.
Step 6: Round bush
Right of the opening draw a round bumpy bush on the ground.
Step 7: Cracks in the rock
Give the rock 3 short zigzag cracks here and there.
Step 8: Little bat
In the sky to the right draw a little bat: a round head, 2 pointy ears and 2 scalloped wings.
Step 9: Colour the rock
Colour the rock and the 3 drips stone grey, and the 2 boulders darker grey.
Step 10: Green bush
Colour the bush green.
Step 11: Dark inside
Colour the inside of the cave black, around the drips, and the bat black. Go over your lines!
Your finished drawing
Follow the steps above and this is where you end up: a cave, drawn by you.
Every step in one picture