Watch it draw itself · tap to replay
How to Draw a Lazy River
Draw a lazy river in 13 steps, about 10 minutes. Free, with a printable worksheet.
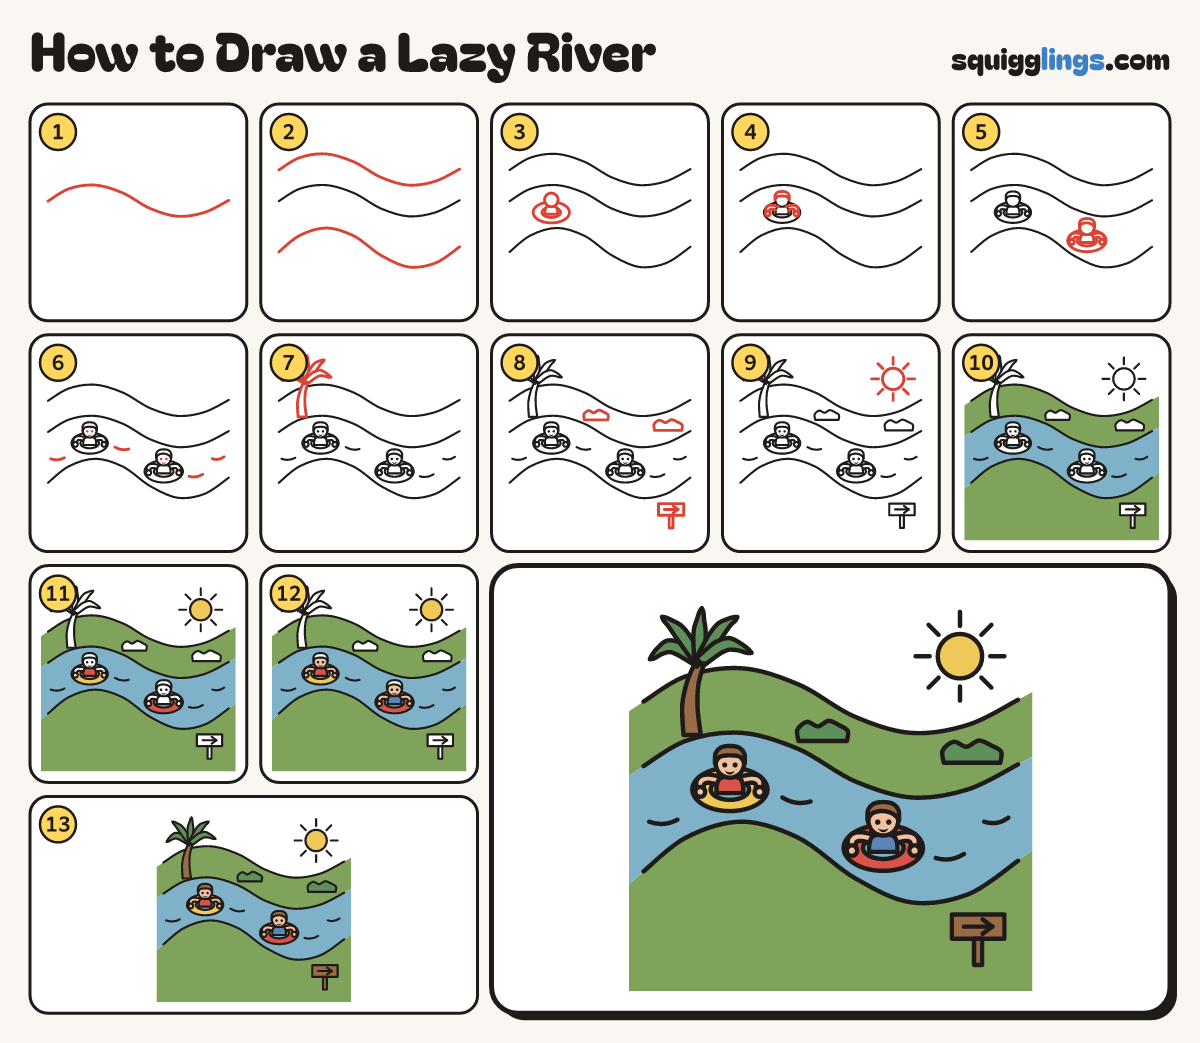
Each picture adds one red line. Draw that line, then scroll to the next picture. Rub out any dashed helper lines at the end. First up: far bank.
Step 1: Far bank
Start at the left edge. Draw a long gently wavy line across the middle and stop at the right edge.
Tip You sit in a rubber ring and the slow current carries you round.
Step 2: Near bank
From the left edge, draw a lower wiggle across to the right. Add a hill line above, edge to edge.
Tip Keep the river wide enough for 2 rubber rings.
Step 3: First rider
On the river's left, draw a flat oval ring with an oval inside. Add a round head and short body.
Step 4: Hair and arms
Give the kid hair on top. Add 2 bent arms resting on the ring, with round hands.
Step 5: Second rider
Further right and lower on the river, draw a second kid in a ring the same way.
Step 6: Faces and ripples
Give each kid 2 dot eyes and a smile. Add a few short ripple lines around the rings.
Step 7: Palm tree
On the far bank at the left, draw a palm tree: a curved trunk and 5 long leaves fanning out.
Step 8: Bushes and a sign
Draw 2 bumpy bushes on the far bank. Add a small arrow sign on a post at the bottom right.
Step 9: The sun
Draw a sun with short rays in the top right corner.
Step 10: Blue river, green banks
Colour the river blue around the kids and rings. Colour the grass leaf green around the palm, bushes and sign.
Step 11: Yellow and red
Colour the first kid's ring and the sun yellow, and the second kid's ring and the first kid's shirt red.
Step 12: Peach faces, blue shirt
Colour the faces and arms peach and the second kid's shirt blue.
Step 13: Brown hair, green palm
Colour the hair, palm trunk and sign brown, and the leaves and bushes green. Your lazy river is done!
Your finished drawing
Follow the steps above and this is where you end up: a lazy river, drawn by you.
Every step in one picture