Watch it draw itself · tap to replay
How to Draw a Lace Border
Draw a lace border in 10 easy steps, about 8 minutes. Free, with a printable worksheet.
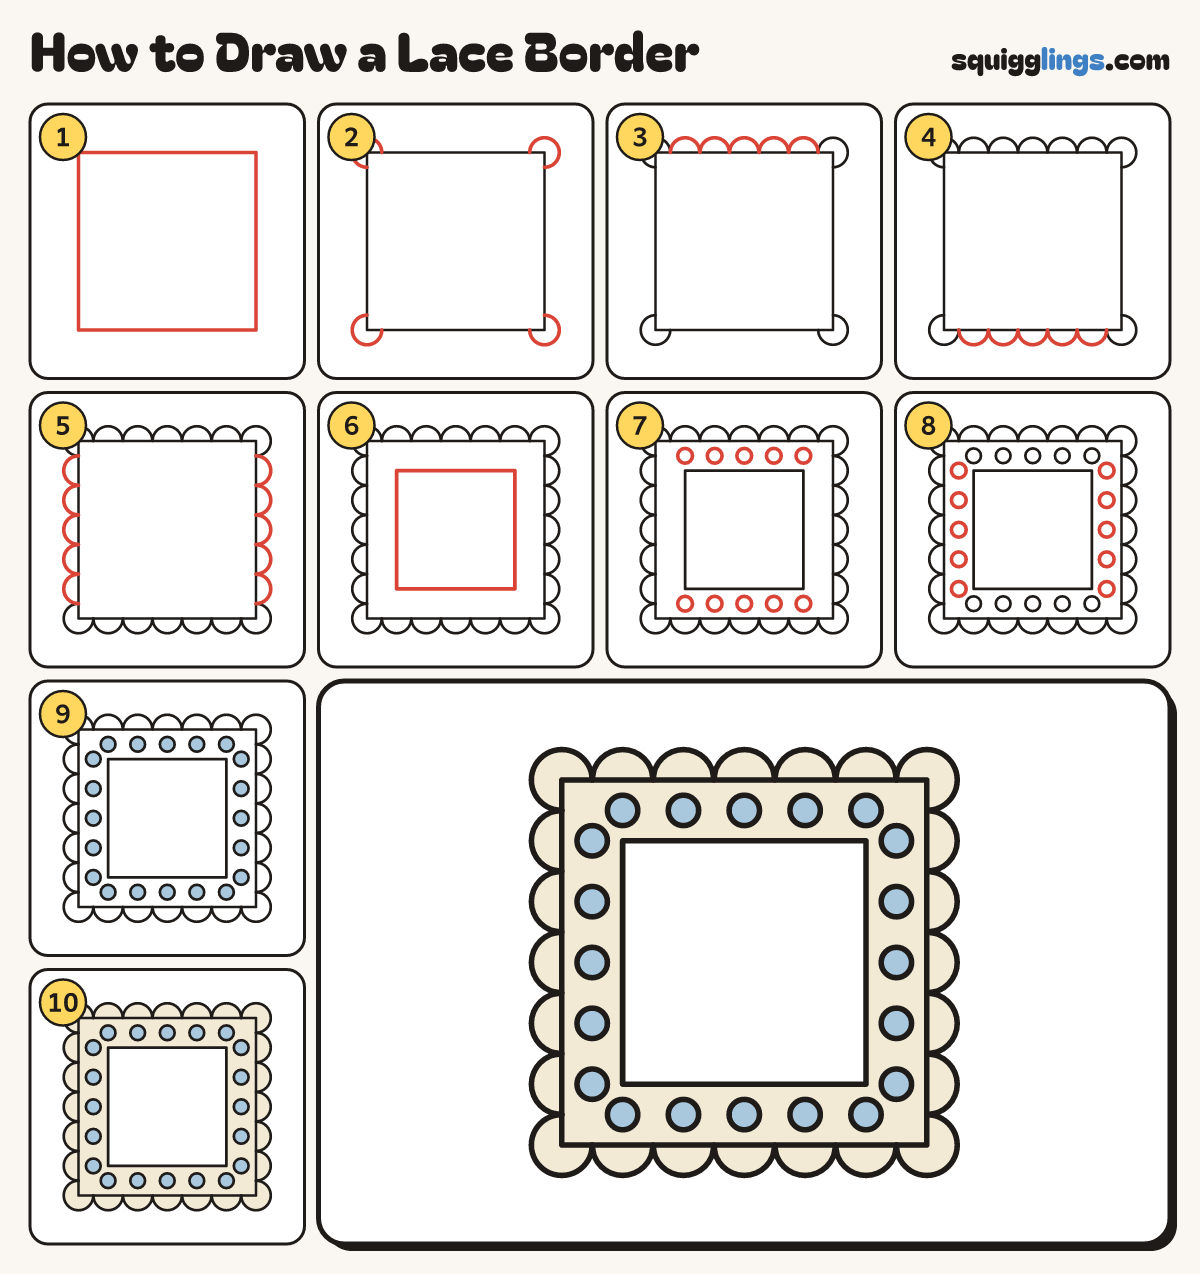
Each picture adds one red line. Draw that line, then scroll to the next picture. Rub out any dashed helper lines at the end. First up: the big square.
Step 1: The big square
In the middle of your page draw a big square. Leave a thumb of space all round it.
Tip A lace border frames a page, so the middle stays empty.
Step 2: Corner bumps
Round each corner of the square draw a big round bump. Each one starts and stops on the square.
Step 3: Top frill
Start at the top left bump. Draw 5 round bumps along the top and stop at the top right bump.
Tip Each bump starts and stops on the square, like a row of little hills.
Step 4: Bottom frill
Start at the bottom right bump. Draw 5 bumps along the bottom and stop at the bottom left bump.
Step 5: Side frills
Draw 5 bumps down each side too. Start at the top corner bump and stop at the bottom one.
Step 6: The inside square
Inside the big square draw a smaller square, a finger in all the way round.
Tip Now the lace is an even band with an empty middle.
Step 7: Holes top and bottom
In the top band draw a small circle under each of the 5 bumps. Do the same along the bottom.
Step 8: Holes down the sides
Down the left band draw a small circle beside each of the 5 bumps. Do the same on the right.
Tip Now 20 holes go all the way round.
Step 9: Light blue holes
Go over your lines. Colour all 20 little holes light blue.
Tip The blue is the table showing through the holes in the lace.
Step 10: Cream lace
Colour the lace band cream, round the blue holes and out into every bump. Leave the middle white.
Your finished drawing
Follow the steps above and this is where you end up: a lace border, drawn by you.
Every step in one picture