Watch it draw itself · tap to replay
How to Draw a Cool S
Draw a cool s in 13 easy steps, about 10 minutes. Free, with a printable worksheet.
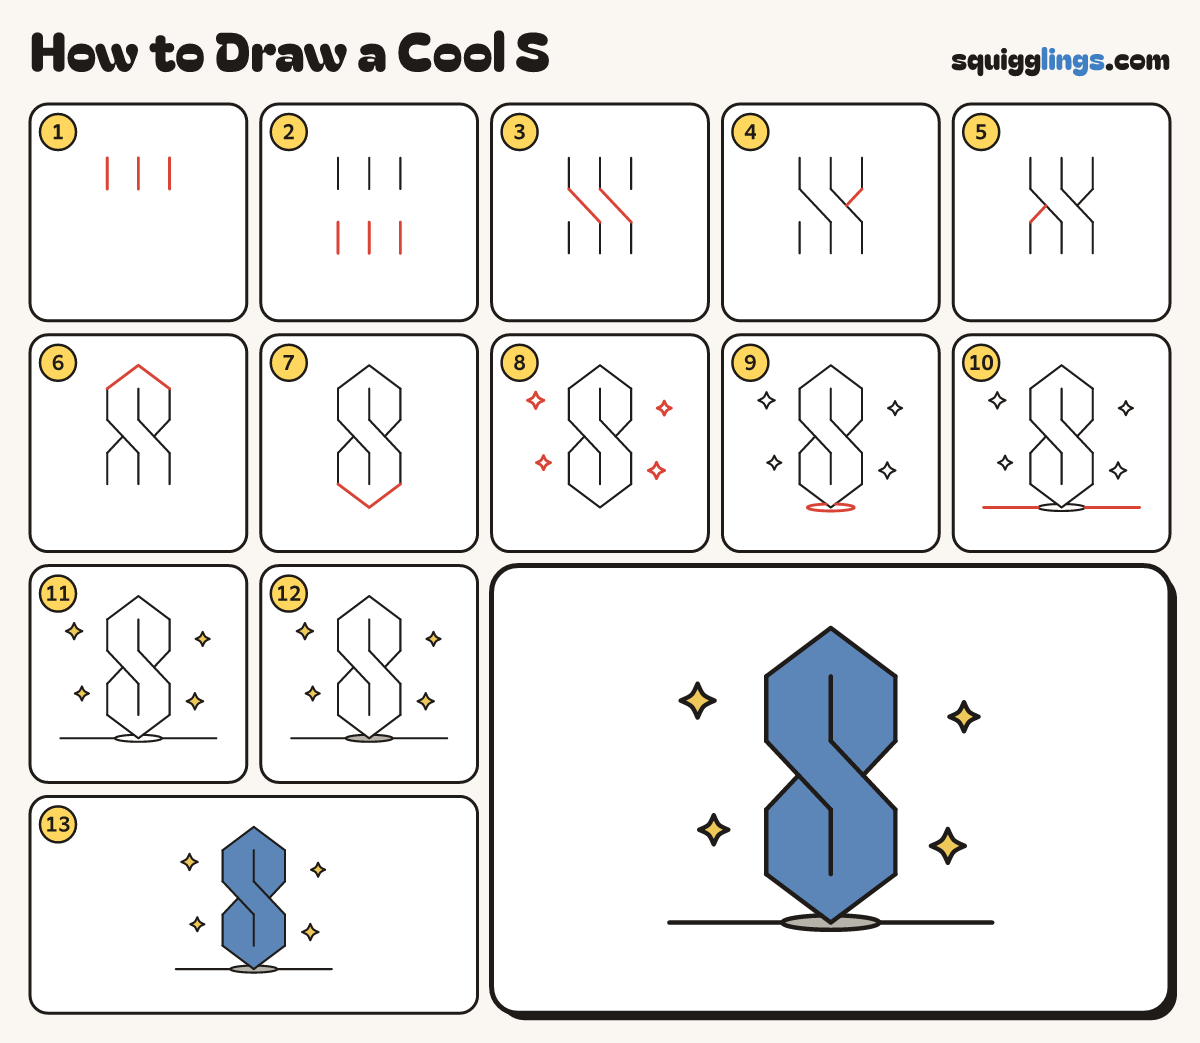
Each picture adds one red line. Draw that line, then scroll to the next picture. Rub out any dashed helper lines at the end. First up: three short lines.
Step 1: Three short lines
Start near the top of your paper. Draw 3 short lines straight down, side by side, and stop them level.
Tip Keep the 2 gaps between the lines the same width.
Step 2: Three more lines
Leave a gap. Start under each line and draw 3 more lines straight down. Stop them level too.
Tip Make the gap about as tall as the space between 2 lines.
Step 3: Two long slants
From the top left line slant down to the bottom middle line. Then from top middle to bottom right.
Tip Both slants lean the same way and never touch.
Step 4: Top short slant
From the bottom of the top right line draw a short slant down left. Stop at the long slant.
Step 5: Bottom short slant
From the top of the bottom left line draw a short slant up right. Stop at the long slant.
Tip Now the S looks like it weaves over and under itself.
Step 6: The pointed top
From the top of the left line draw a pointed roof, up to the middle, down to the right line.
Tip The middle line stops short. It does not reach up into the point.
Step 7: The pointed bottom
From the bottom of the left line draw a V, down to the middle and up to the right line.
Tip Turn your paper upside down. The S should look just the same!
Step 8: Four sparkles
Draw 2 sparkle stars on the left of the S and 2 on the right, one high and one low.
Tip A sparkle star has 4 points: up, down, left and right.
Step 9: A shadow
Draw a thin flat oval for the shadow, with the bottom point of the S in its middle.
Step 10: The floor
Draw a long floor line out from each side of the shadow.
Step 11: Yellow sparkles
Go over your lines, then colour the 4 sparkle stars yellow.
Step 12: Grey shadow
Colour the shadow under the S grey.
Step 13: Blue S
Colour the whole S blue, right into both points. Your cool S is done!
Your finished drawing
Follow the steps above and this is where you end up: a cool s, drawn by you.
Every step in one picture