Watch it draw itself · tap to replay
How to Draw a Knight Silhouette
Draw a knight silhouette in 13 easy steps, about 10 minutes. Free, with a printable worksheet.
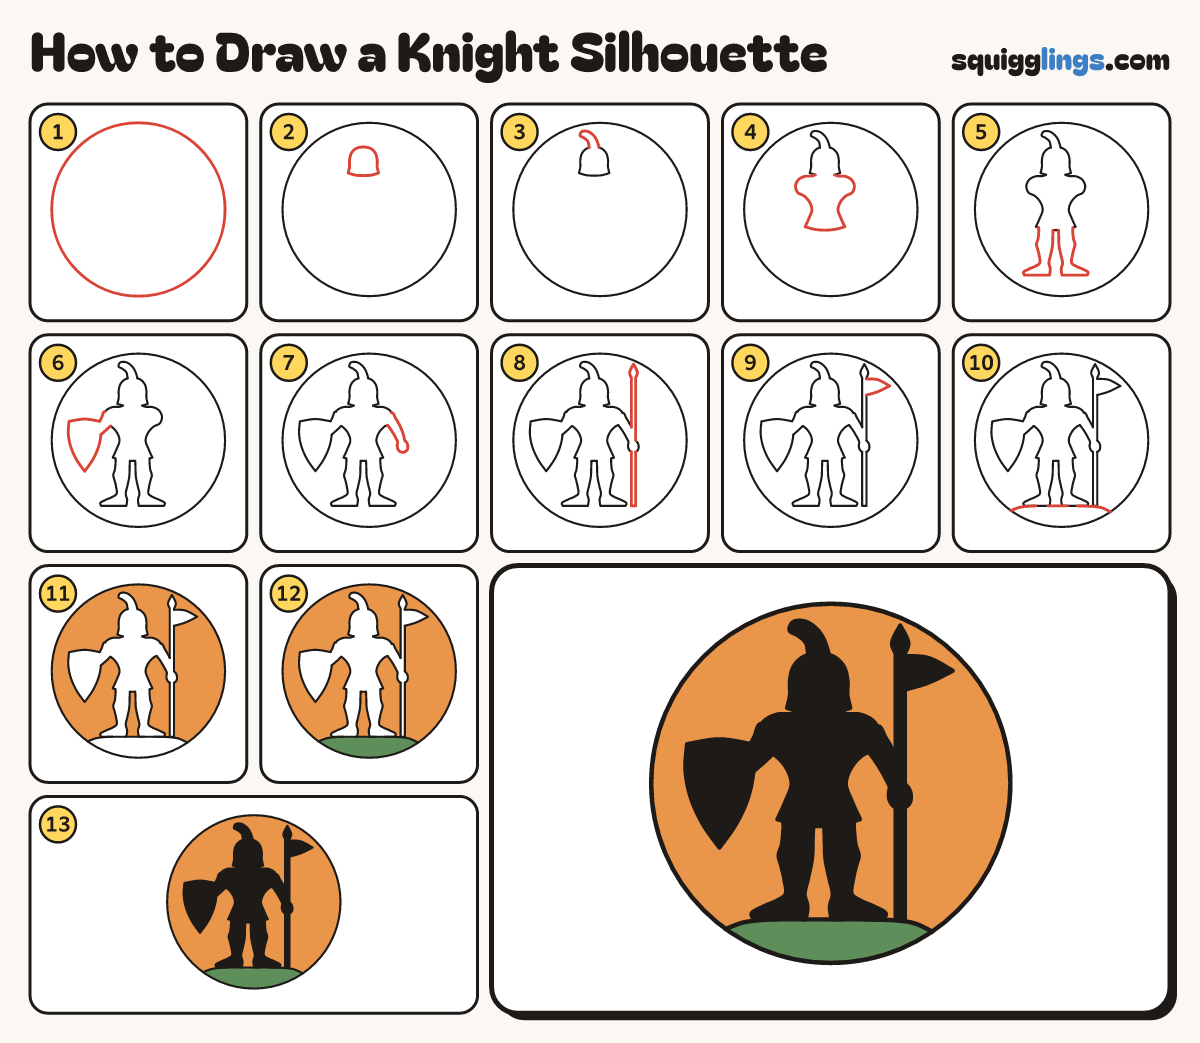
Each picture adds one red line. Draw that line, then scroll to the next picture. Rub out any dashed helper lines at the end. First up: low sun.
Step 1: Low sun
Draw a huge round sun that fills most of your paper.
Tip Draw it lightly. The knight stands inside it.
Step 2: Helmet
Near the top of the sun draw a helmet: a round dome with straight sides and a flat bottom.
Step 3: Feather plume
On top of the helmet draw a fat feather that curls over to the left.
Step 4: Armour
Under the helmet draw round shoulder plates, a slim waist, then a short skirt flaring out.
Tip Make the shoulders much wider than the helmet.
Step 5: Legs and pointed feet
From the skirt draw 2 legs with a bump at each knee. End each in a pointed foot.
Tip Leave a gap between the legs and point the toes out.
Step 6: Shield and arm
On the left draw a shield: flat top, curved sides, pointed bottom. Join it to the shoulder with an arm.
Step 7: Other arm and fist
From the right shoulder draw an arm bending down and out. End it in a round fist.
Tip The arm gets slimmer towards the wrist.
Step 8: Tall lance
Through the fist draw a tall thin pole, from the ground up to a pointed tip.
Step 9: Flag
Just under the tip draw a pointed flag flying out to the right.
Step 10: Hilltop ground
Start on the left edge of the sun. Draw a hilltop under the feet and stop on the right edge.
Step 11: Orange sunset
Colour the sun above the hill orange. Go around the knight, the lance and the flag.
Step 12: Green hill
Colour the hill under the feet green.
Step 13: Dark knight
Colour the whole knight black: helmet, feather, armour, legs, shield, lance and flag.
Tip A silhouette is a solid dark shape with no details inside.
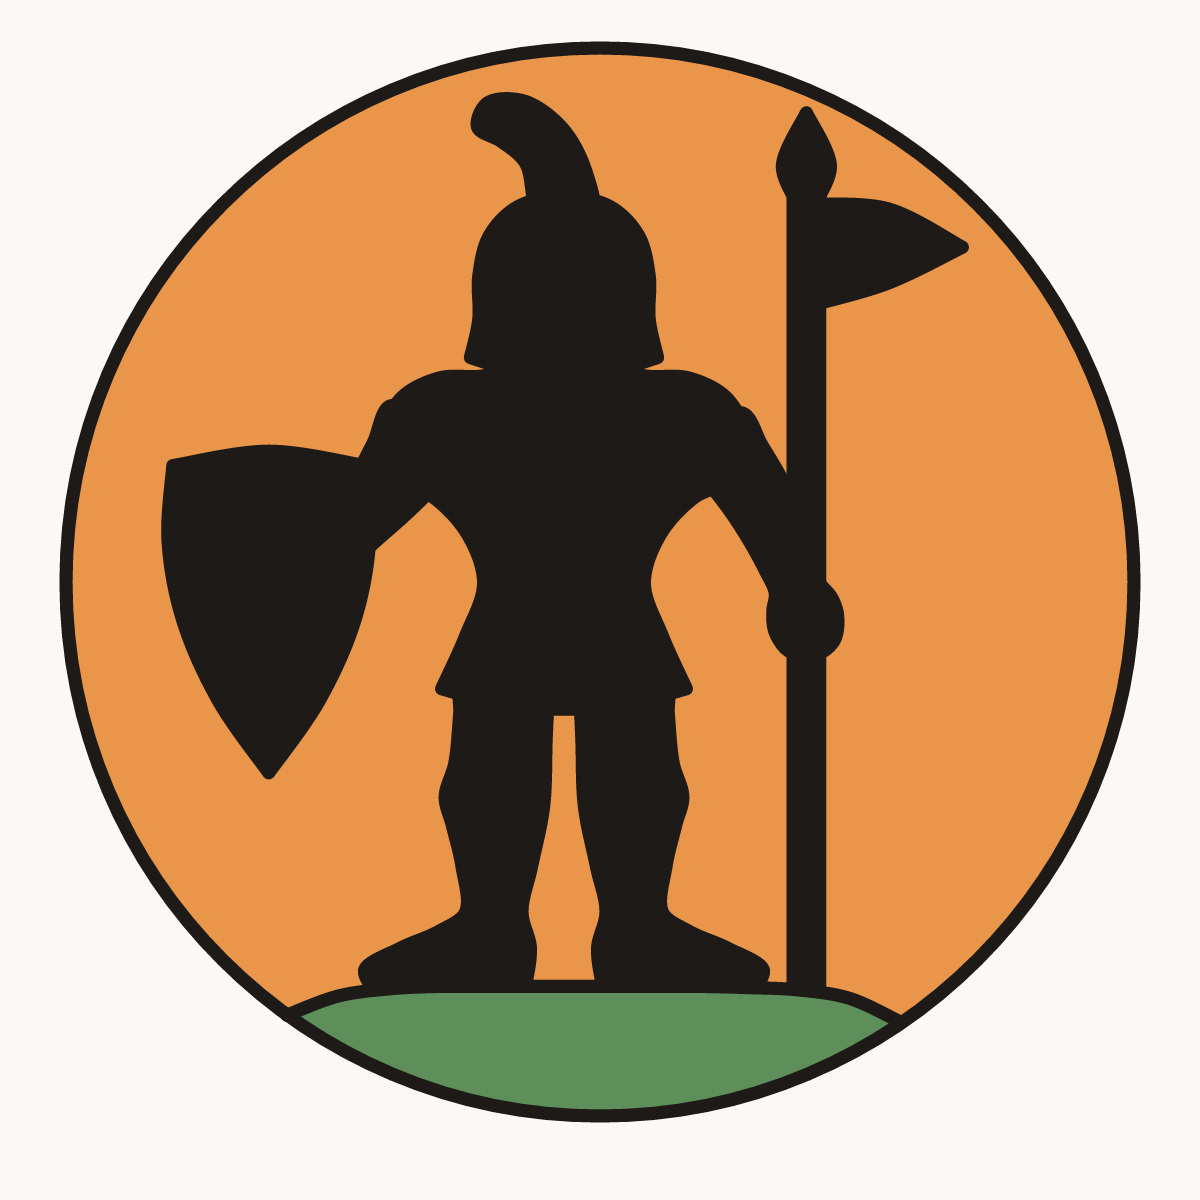
Your finished drawing
Follow the steps above and this is where you end up: a knight silhouette, drawn by you.
Every step in one picture