Watch it draw itself · tap to replay
How to Draw a Klipspringer
Draw a klipspringer in 11 easy steps, about 8 minutes. Free, with a printable worksheet.
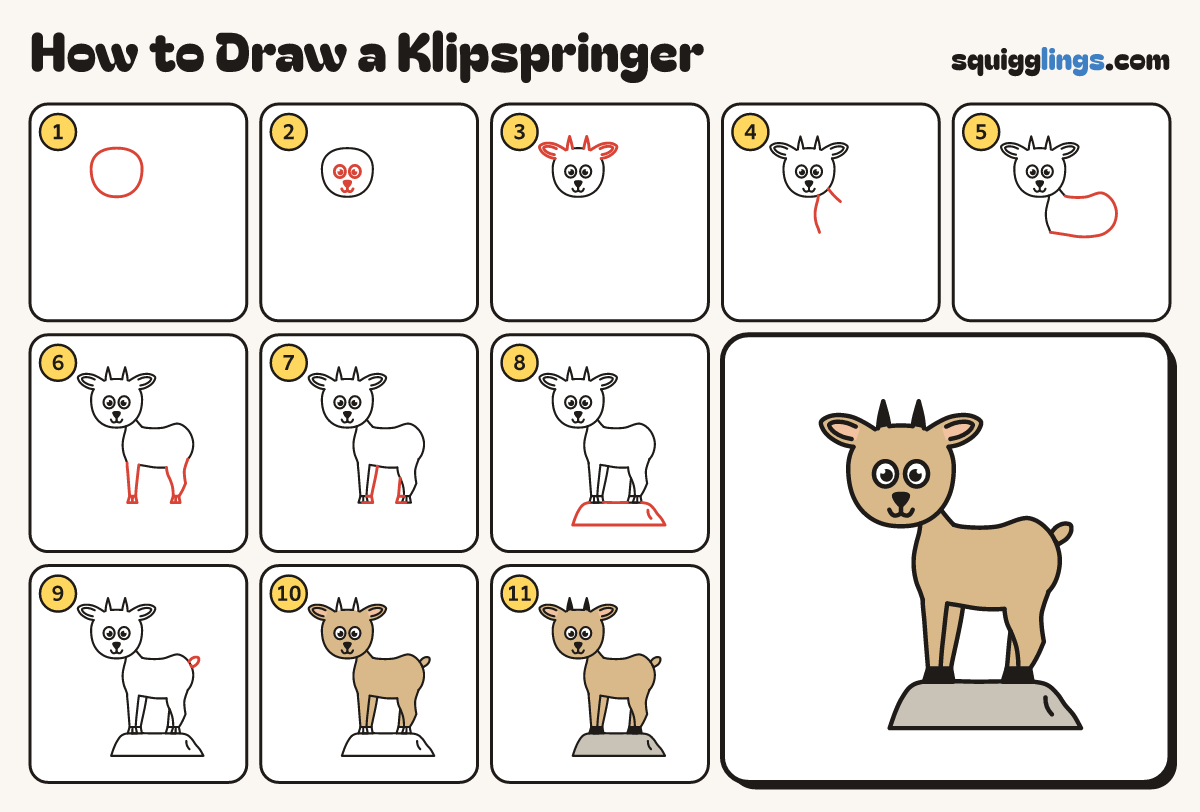
Each picture adds one red line. Draw that line, then scroll to the next picture. Rub out any dashed helper lines at the end. First up: the head.
Step 1: The head
Near the top left draw a big round head, a little wider than tall, with soft cheeks.
Tip Leave lots of room on the right for the body.
Step 2: Eyes and nose
Draw 2 big eyes across the middle. From a triangle nose draw a short line down into a w smile.
Tip Keep the smile above the chin. Nothing should touch the eyes.
Step 3: Horns and ears
Draw 2 short straight spike horns on top. Add a leaf ear on each top corner, a smaller leaf inside.
Tip Ears sit on the top corners, never on the sides of the face.
Step 4: The neck
Draw the neck: from behind the head down to the shoulder, and from under the right cheek to the chest.
Tip The back line is short and the front line is long.
Step 5: The body
From the neck draw a big soft bean body: a long back, a big round bottom and a tummy.
Tip A bean, not a loaf: the bottom is rounder than the chest.
Step 6: Two legs
Draw a front leg down from the chest to a hoof, and a bent back leg from the bottom.
Tip Legs get thinner above the little doorstop hooves.
Step 7: The far legs
Draw a thinner leg peeking out behind the front leg, and another in front of the back leg.
Tip Only draw the parts you can see.
Step 8: The rock
Under the hooves draw a big rounded rock, wider at the bottom, with one short crack inside.
Tip A klipspringer loves standing on top of a rock.
Step 9: The tail
On the top corner of the bottom draw a little leaf tail pointing up, like a small flag.
Step 10: Peach and tan
Colour the ear insides peach, then the head, ears, body, legs and tail tan around them.
Tip Keep the eyes white, and skip the hooves and horns for now.
Step 11: Grey rock, black hooves
Colour the rock stone grey, and the hooves and horns black. Your klipspringer is done!
Your finished drawing
Follow the steps above and this is where you end up: a klipspringer, drawn by you.
Every step in one picture