Watch it draw itself · tap to replay
How to Draw Kelp
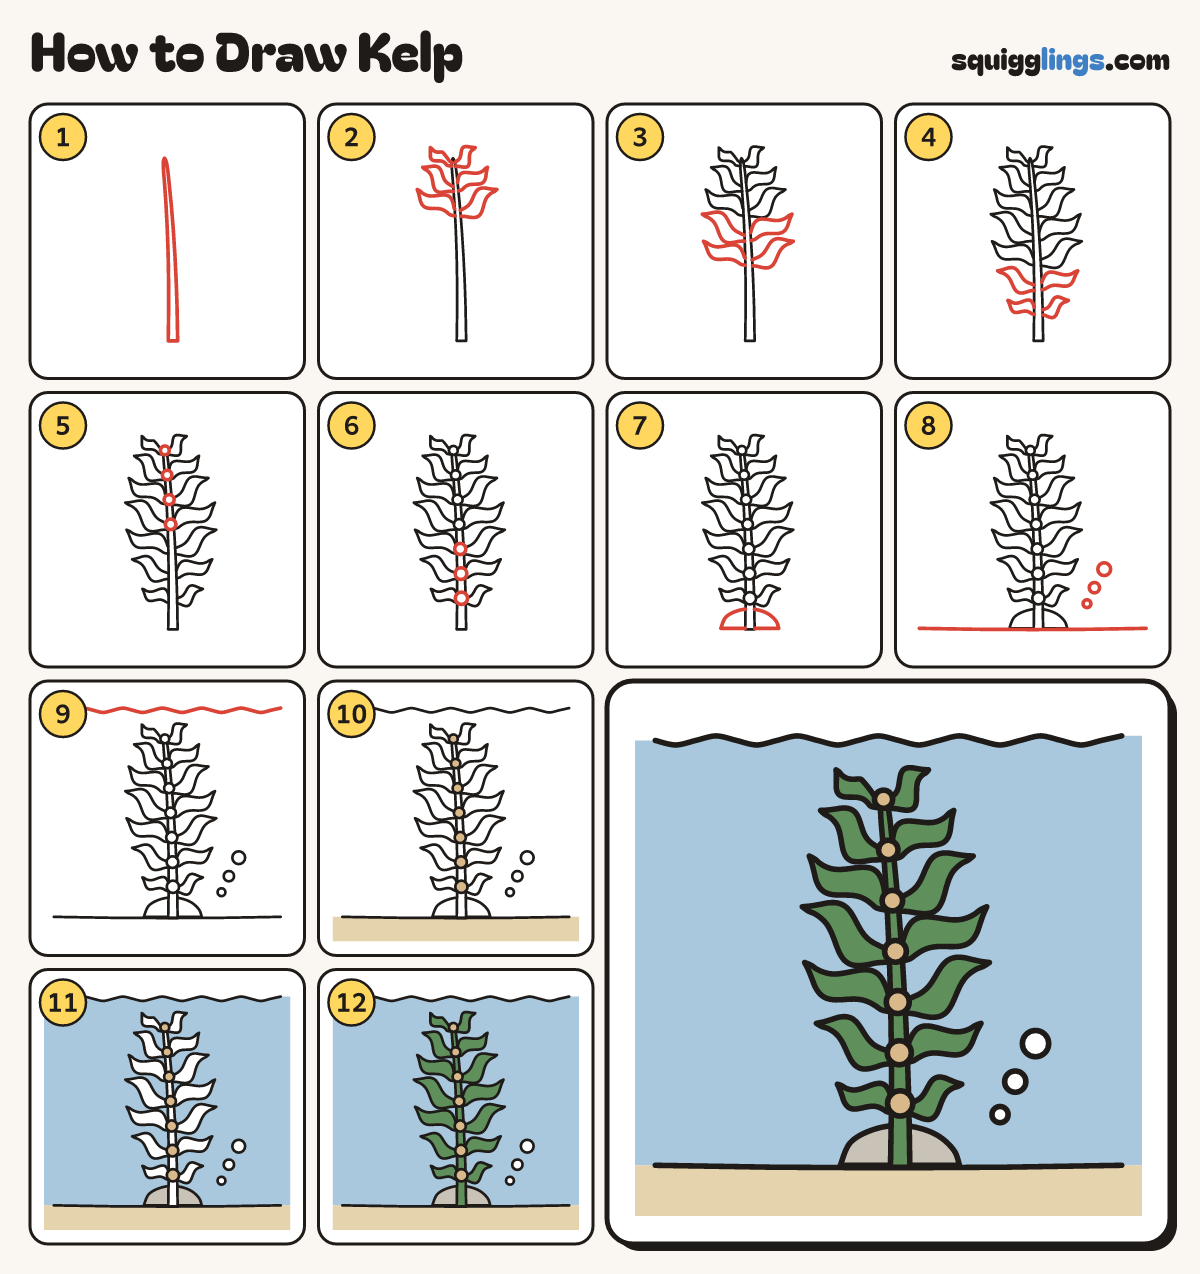
Draw kelp in 12 easy steps, about 9 minutes. Free, with a printable worksheet.
Each picture adds one red line. Draw that line, then scroll to the next picture. Rub out any dashed helper lines at the end. First up: the stalk.
Step 1: The stalk
Draw a tall stalk up the middle of the page, wide at the bottom and thin at its round top.
Tip Let it bow a little to the right, like a real stalk.
Step 2: Top blades
Near the top draw 3 pairs of long wavy blades, one each side, rippling like flags. Each pair gets bigger.
Step 3: Middle blades
Below them draw 2 more pairs of wavy blades, the biggest yet, reaching out further.
Step 4: Bottom blades
Draw the last 2 pairs of wavy blades near the bottom, getting smaller again.
Step 5: Top floats
On the stalk, where each of the top 4 pairs of blades grows, draw a small round float.
Tip Like little beads on a string.
Step 6: Bottom floats
Do the same for the bottom 3 pairs: a small round float on the stalk at each one.
Step 7: A rock
Start well left of the stalk's foot. Draw a low round rock around the foot, over to the other side.
Tip Wider than it is tall.
Step 8: Sea floor and bubbles
Draw a sea-floor line from the left edge to the right edge. Add 3 bubbles rising on the right.
Step 9: Water line
Above the blades, draw a wavy water line from the left edge to the right edge.
Tip That is the top of the sea.
Step 10: Sand and floats
Colour the floats tan, and the sea floor sandy, down to the bottom of the page.
Step 11: Grey rock, blue water
Colour the rock pale grey. Colour the water light blue around the kelp and rock, leaving the bubbles white.
Step 12: Green kelp
Colour the stalk and all the blades green, around the floats. Go over your lines. Your kelp is done!
Your finished drawing
Follow the steps above and this is where you end up: kelp, drawn by you.
Every step in one picture