Watch it draw itself · tap to replay
How to Draw a Eucalyptus Tree
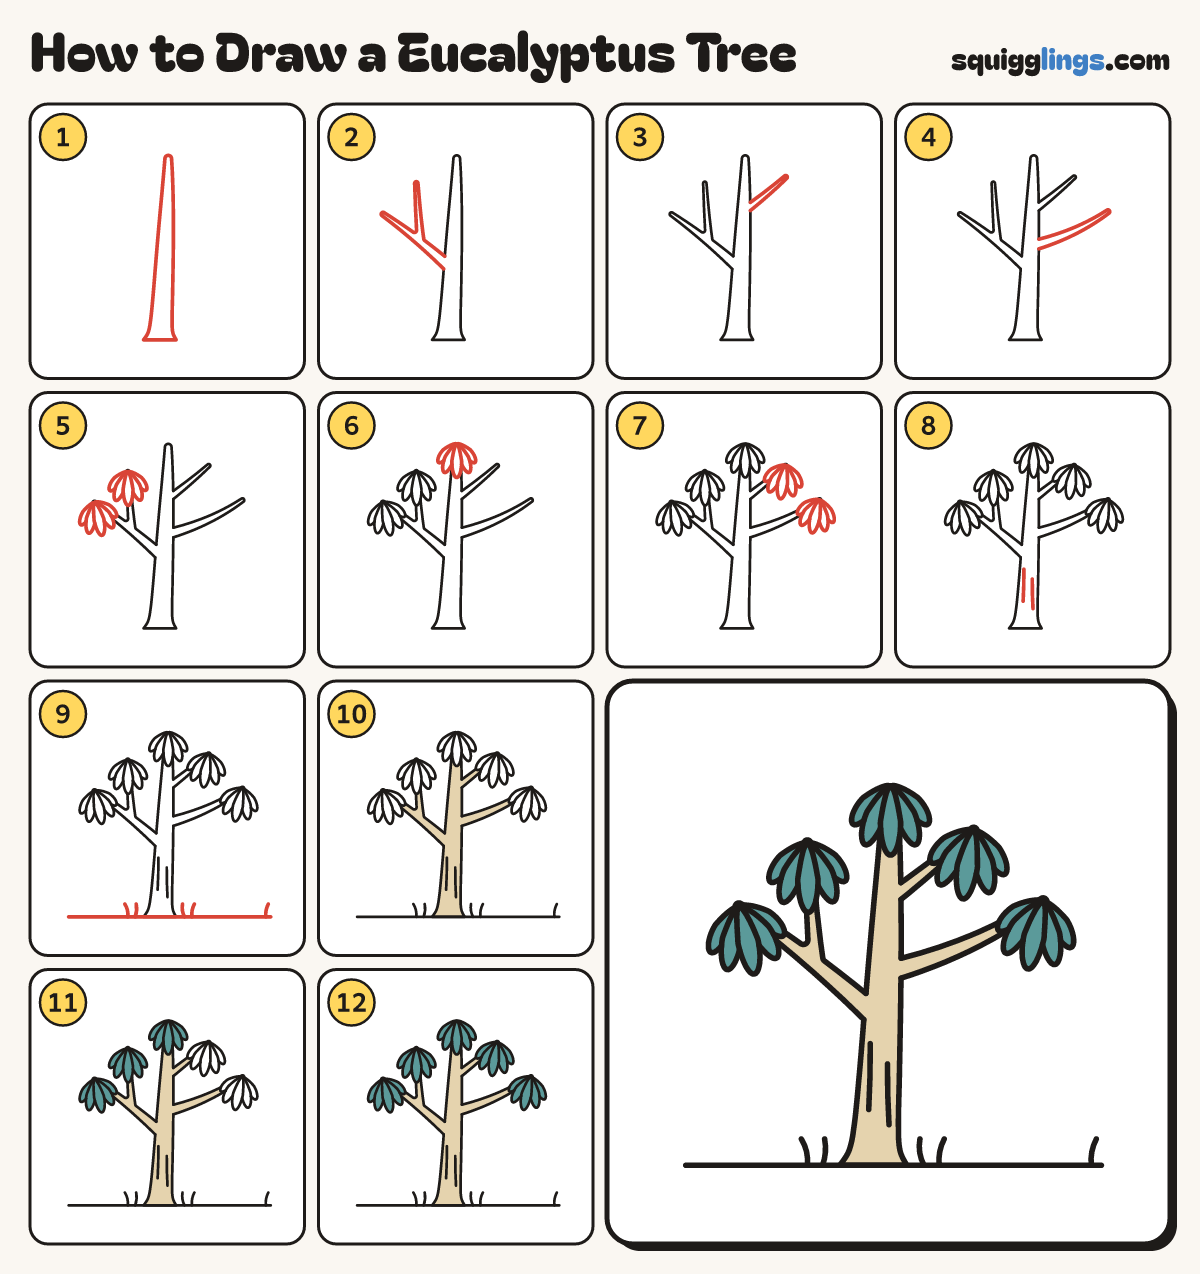
Draw a eucalyptus tree in 12 easy steps, about 9 minutes. Free, with a printable worksheet.
Each picture adds one red line. Draw that line, then scroll to the next picture. Rub out any dashed helper lines at the end. First up: the tall trunk.
Step 1: The tall trunk
From the ground draw a tall slim trunk up to a point near the top, wider at the bottom.
Step 2: A left branch
From the trunk's left side draw a thin branch out left that splits into 2 twigs, like a Y.
Tip Rub out the bit of trunk line where the branch joins on.
Step 3: A top twig
Near the top of the trunk draw a thin twig out to the right, getting thinner at the tip.
Step 4: A right branch
Halfway up, draw a longer branch out to the right, getting thinner at the tip.
Step 5: Leaves on the left
On each left twig tip draw a fan of 5 long droopy leaves with round ends, middle one in front.
Step 6: Leaves at the top
Draw the same fan of 5 droopy leaves on the very top tip, hanging down over the trunk.
Step 7: Leaves on the right
Draw 1 more fan of droopy leaves on the tip of each right twig.
Step 8: Bark streaks
Down the middle of the trunk draw 2 short curved streaks for the peeling bark, side by side.
Step 9: Ground and grass
Draw a ground line under the trunk from well left to well right. Add a few grass blades beside it.
Step 10: Sand trunk
Colour the trunk and every branch a pale sand colour.
Step 11: Teal leaves
Colour the left bunches and the top bunch of leaves a blue-green teal.
Step 12: The right bunches
Colour the right bunches teal too. Go over your lines and your eucalyptus is done!
Your finished drawing
Follow the steps above and this is where you end up: a eucalyptus tree, drawn by you.
Every step in one picture