Watch it draw itself · tap to replay
How to Draw a Kebab
Draw a kebab in 13 easy steps, about 10 minutes. Free, with a printable worksheet.
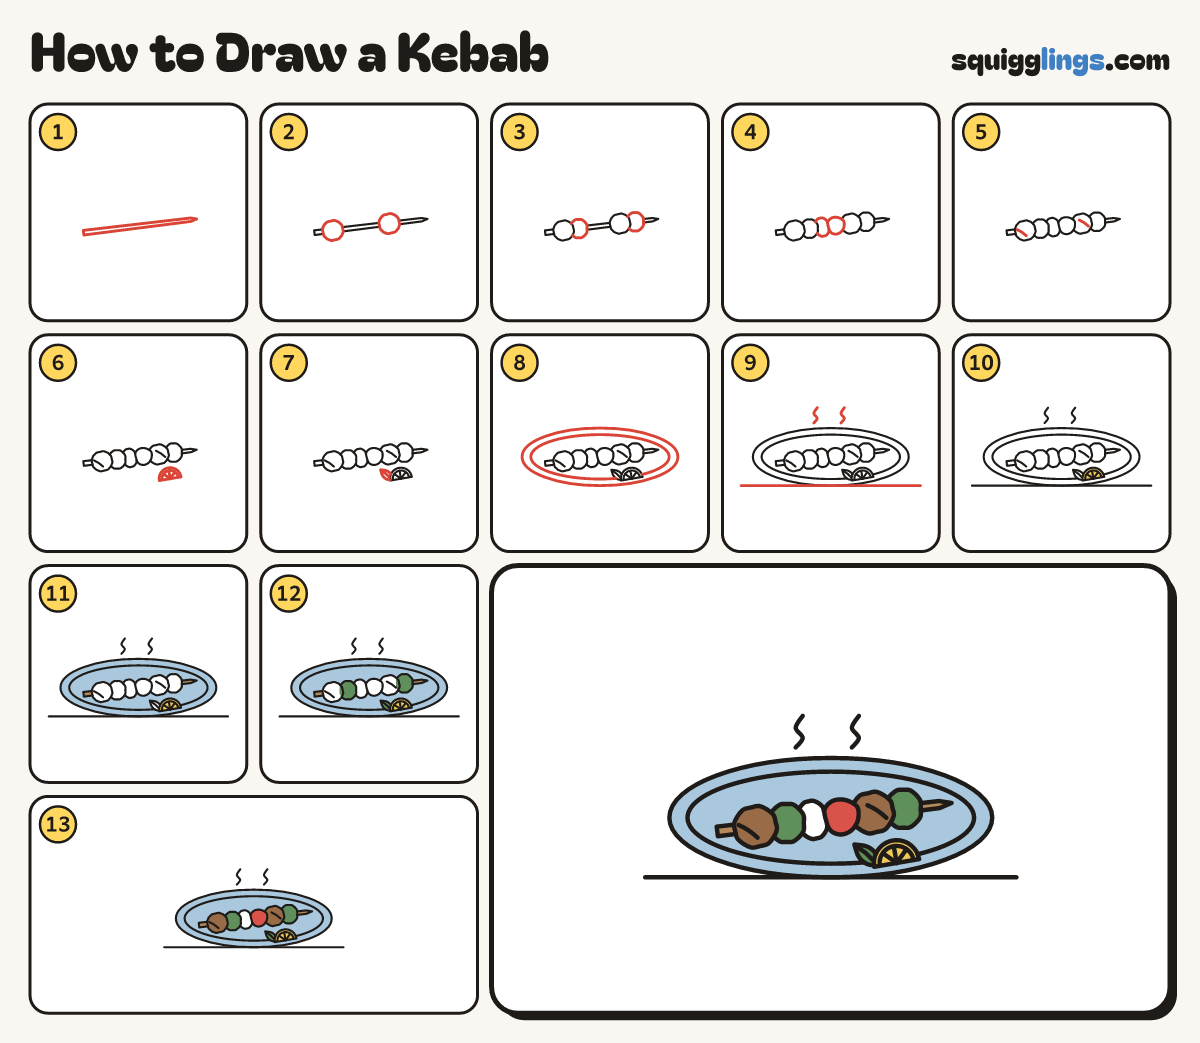
Each picture adds one red line. Draw that line, then scroll to the next picture. Rub out any dashed helper lines at the end. First up: the skewer.
Step 1: The skewer
Start at the left, below the middle. Draw a long thin stick up to the right, ending in a point.
Tip As long as your hand, a little thinner at the pointy end.
Step 2: Two meat chunks
On the stick, draw a chubby rounded square near the left end, and another past the middle, for the meat.
Step 3: Pepper chunks
Right of each meat chunk, draw a slightly smaller rounded square for a pepper chunk, tucked behind the meat.
Step 4: Onion and tomato
Between the first pepper and second meat, draw a narrow piece of onion and a round tomato.
Step 5: Grill marks
Draw a short slanted line on each meat chunk for a grill mark.
Step 6: A lemon wedge
Below the second meat and pepper, draw a half-round lemon wedge, flat side down, with 3 lines from the middle.
Step 7: Parsley
From the lemon's left side, draw a little pointed leaf tipping up and left. Add a middle line.
Step 8: A plate
Draw a big oval plate round the food. Add a rim oval, lifting your pencil at the lemon and leaf.
Step 9: Steam and table
Draw 2 wiggly steam lines rising above the plate. Draw a long table line under the plate, just touching it.
Step 10: Yellow lemon
Colour the lemon wedge yellow, and leave the onion white.
Step 11: Plate and skewer
Colour the plate sky blue around the food, then colour the skewer wood brown.
Step 12: Green leaf and peppers
Colour the parsley leaf and the pepper chunks dark green.
Step 13: Red tomato, brown meat
Colour the tomato red and the meat chunks brown, and your kebab is done!
Your finished drawing
Follow the steps above and this is where you end up: a kebab, drawn by you.
Every step in one picture