Watch it draw itself · tap to replay
How to Draw a Kawaii S’more
Draw a kawaii s’more in 12 easy steps, about 9 minutes. Free, with a printable worksheet.
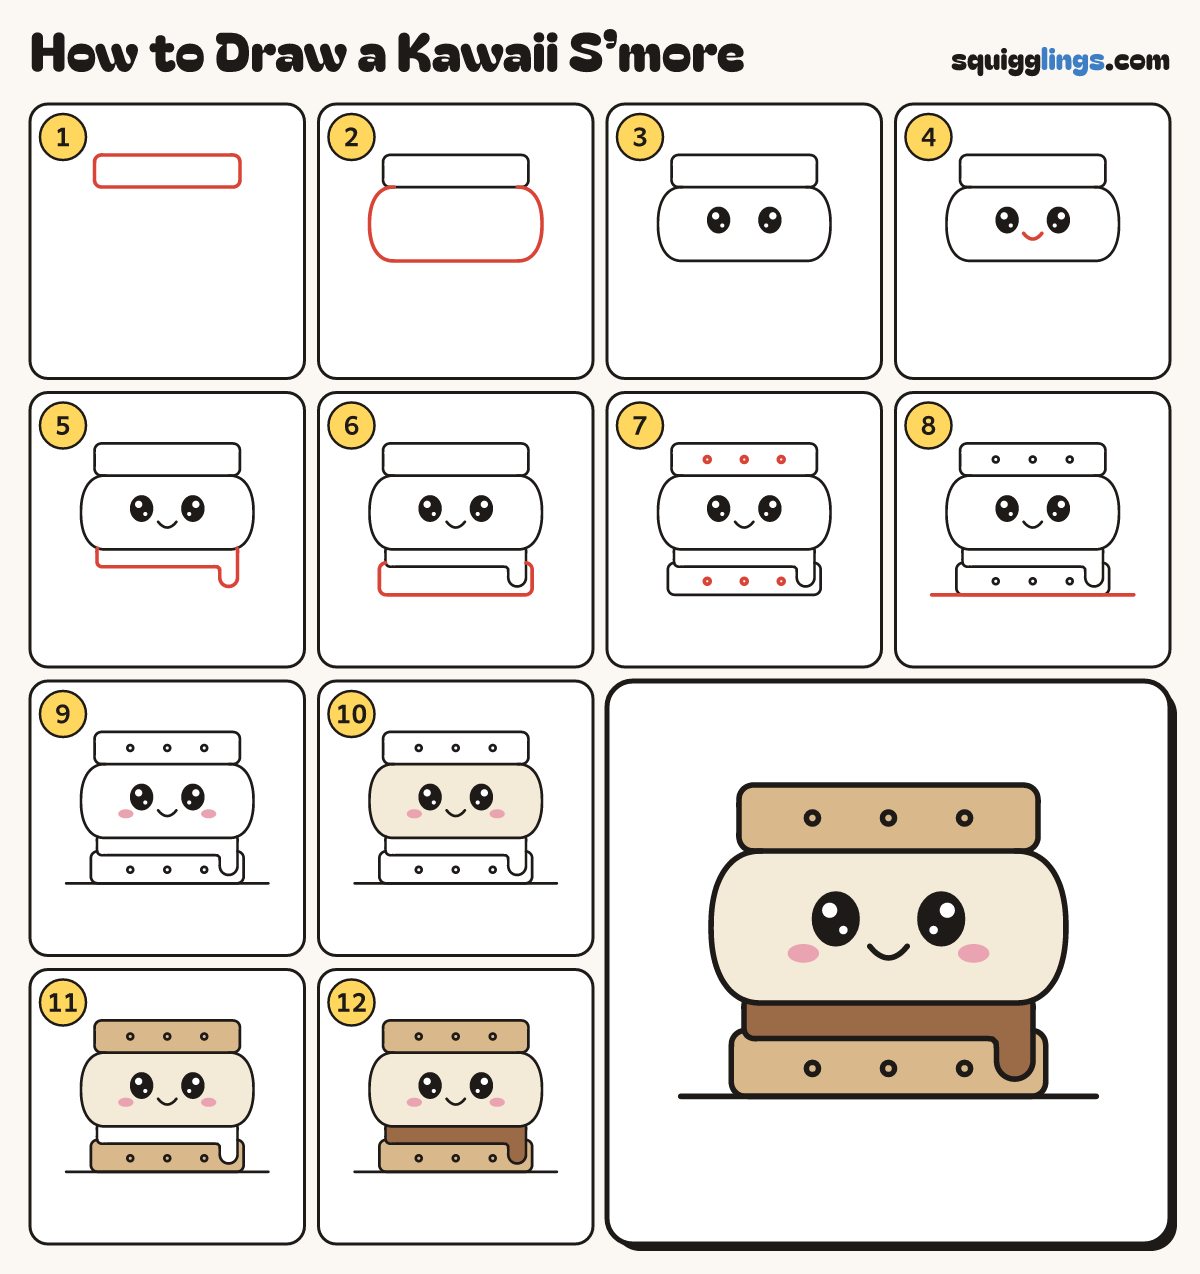
Each picture adds one red line. Draw that line, then scroll to the next picture. Rub out any dashed helper lines at the end. First up: top cracker.
Step 1: Top cracker
Near the top, draw a long flat cracker: a wide box with soft round corners.
Tip Leave lots of room underneath for the fillings.
Step 2: Puffy marshmallow
Start under the cracker near its left end. Draw a fat puffy pillow round to the right end.
Tip The round sides bulge out past the cracker.
Step 3: Big eyes
On the marshmallow, draw 2 big ovals, wide apart. Colour them black, leaving 2 white dots in each.
Tip Draw the white dots first, then colour around them.
Step 4: Small smile
Between the eyes, a little lower, draw a small U smile.
Step 5: Melting chocolate
Under the marshmallow, draw a thin slab of chocolate. Let one drip melt down from the right corner.
Tip Make the drip round at the bottom, like a tiny finger.
Step 6: Bottom cracker
Under the chocolate, draw another flat cracker, a little wider. It goes behind the drip.
Step 7: Cracker dots
Dot 3 tiny circles in a row on each cracker.
Tip That makes 6 dots in all.
Step 8: Ground line
Start at the left. Draw a flat line under the bottom cracker. Stop at the right.
Step 9: Pink cheeks
Colour a small pink oval under each eye, out towards the sides.
Tip Press lightly so the cheeks stay soft.
Step 10: Cream marshmallow
Colour the marshmallow cream, around the eyes and the pink cheeks.
Step 11: Tan crackers
Colour both crackers tan. Go around the chocolate and its drip.
Step 12: Brown chocolate
Colour the chocolate and its drip brown. Go over your lines. Your kawaii s'more is done!
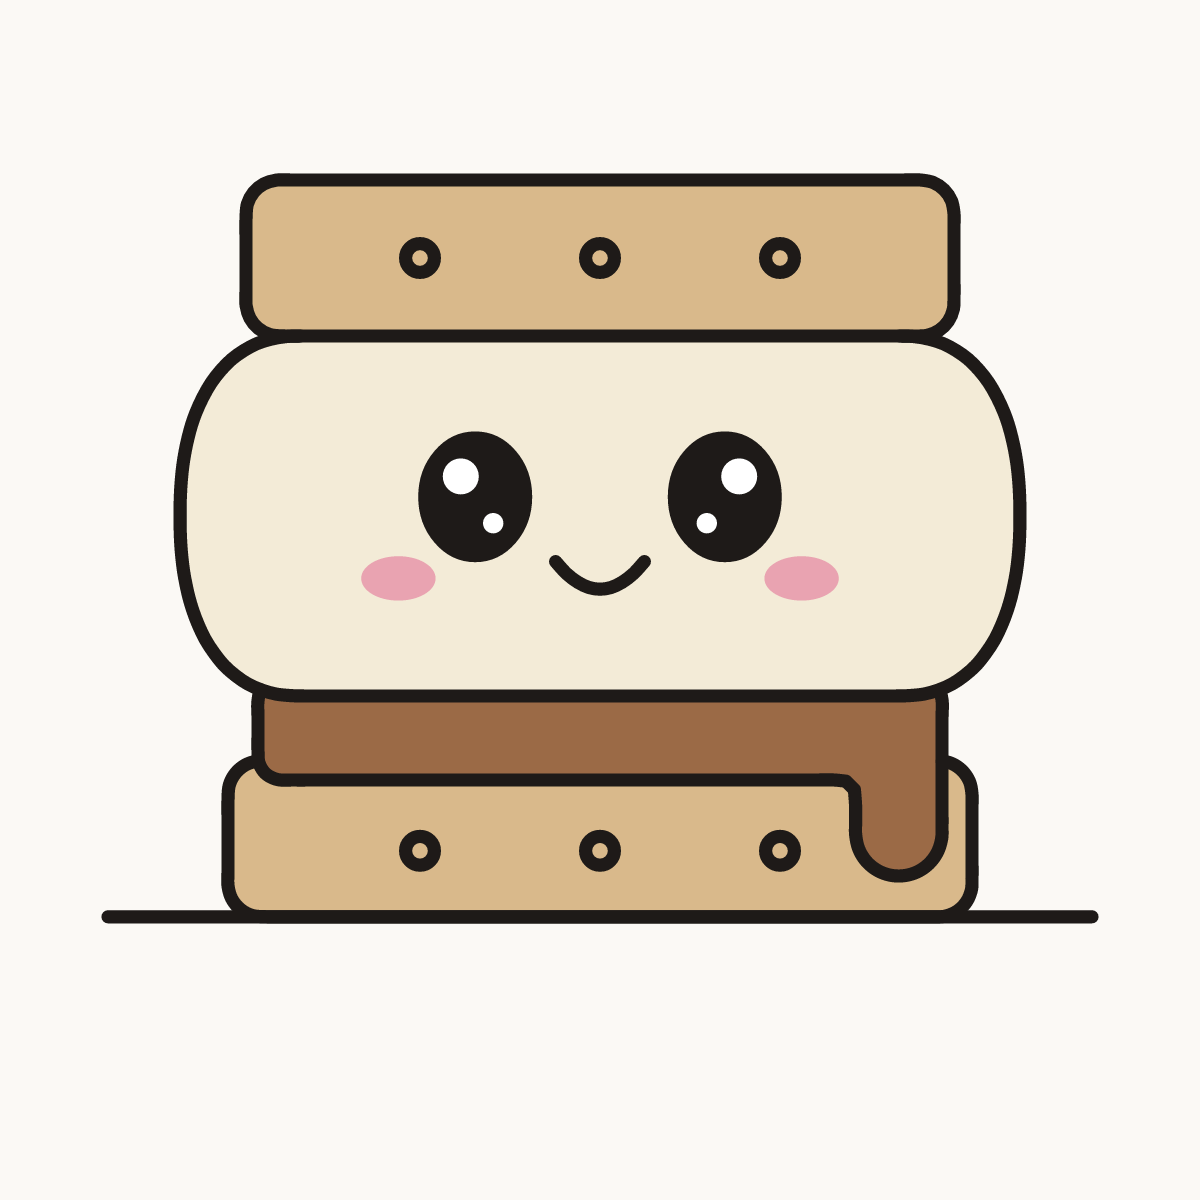
Your finished drawing
Follow the steps above and this is where you end up: a kawaii s’more, drawn by you.
Every step in one picture