Watch it draw itself · tap to replay
How to Draw a Kawaii Potato
Draw a kawaii potato in 11 easy steps, about 8 minutes. Free, with a printable worksheet.
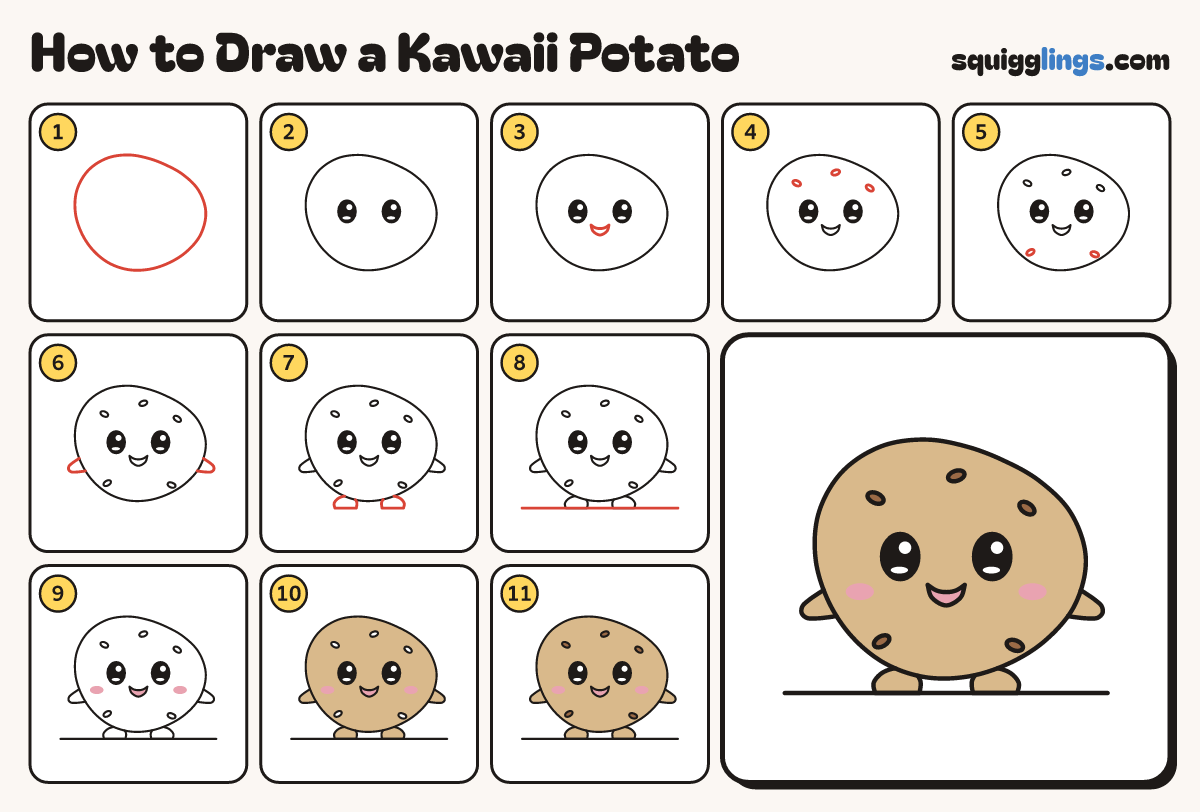
Each picture adds one red line. Draw that line, then scroll to the next picture. Rub out any dashed helper lines at the end. First up: lumpy potato.
Step 1: Lumpy potato
Draw a big lumpy oval lying on its side. Give it a few soft bumps.
Tip No potato is perfectly round, so wobbly is right.
Step 2: Sparkly eyes
In the middle draw 2 tall ovals, wide apart. Colour them black, leaving a white dot and glow in each.
Tip Draw the shines first, then colour around them.
Step 3: Happy mouth
Between the eyes, a little lower, draw a small smile. Hang a deeper U under it.
Step 4: Potato dimples
Dot 3 tiny ovals across the top of the potato, well above the eyes.
Tip Tilt each one a different way.
Step 5: Low dimples
Dot 1 more tiny oval low on each side, near the edge.
Tip Keep them small. These are the potato's eyes.
Step 6: Tiny arms
Start on each side of the potato. Draw a tiny arm sticking out, round at the end.
Step 7: Tiny feet
Under the potato draw 2 small round feet with flat bottoms.
Tip Point the toes out to the sides.
Step 8: Ground line
Start at the left. Draw a flat line under the feet. Stop at the right.
Step 9: Pink cheeks
Colour a small pink oval under the outside of each eye. Colour the mouth pink.
Tip Press lightly so the cheeks stay soft.
Step 10: Tan potato
Colour the potato, arms and feet tan, around the cheeks and the dimples.
Step 11: Brown dimples
Colour the 5 dimples dark brown. Your kawaii potato is done!
Your finished drawing
Follow the steps above and this is where you end up: a kawaii potato, drawn by you.
Every step in one picture