Watch it draw itself · tap to replay
How to Draw a Cucumber
Draw a cucumber in 10 easy steps, about 8 minutes. Free, with a printable worksheet.
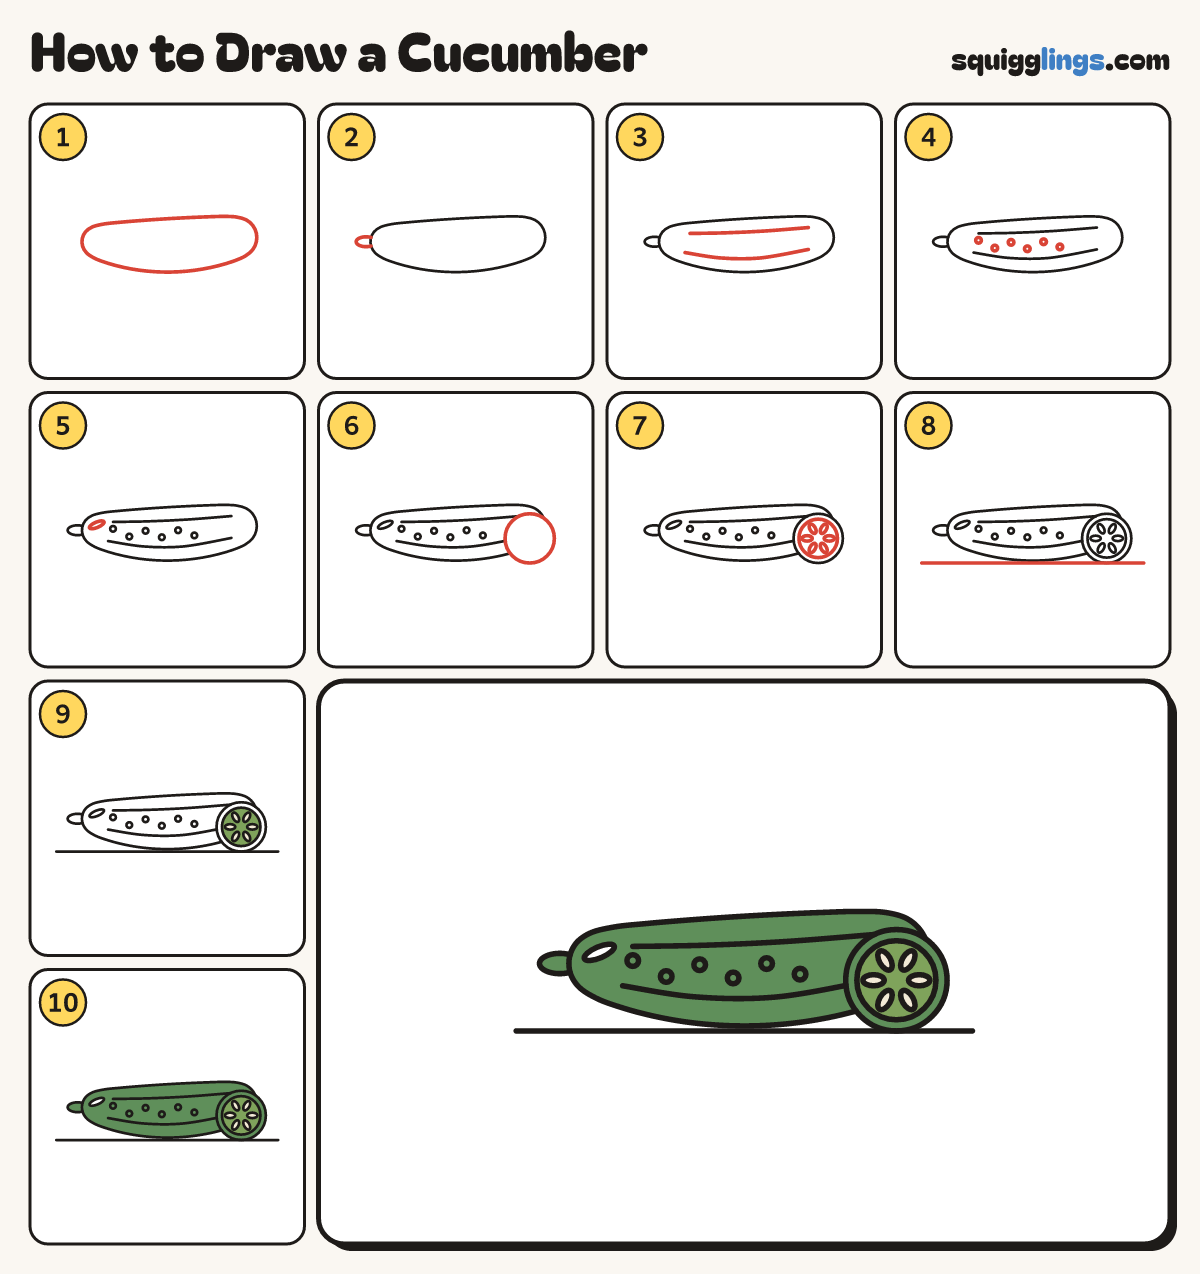
Each picture adds one red line. Draw that line, then scroll to the next picture. Rub out any dashed helper lines at the end. First up: the cucumber.
Step 1: The cucumber
Across the middle, draw a long fat sausage lying flat, round at both ends and fatter on the right.
Tip Let the top and the bottom curve out gently, so it looks soft and round.
Step 2: Stem end
Start on the left end. Draw a tiny round nub poking out and stop back on the cucumber.
Step 3: Long stripes
Draw 2 long gentle lines along the cucumber, one a finger above the middle and one below.
Step 4: Bumps
Between the stripes, dot 6 tiny circles in a zigzag along the cucumber, away from the right end.
Step 5: A shine
Along the upper left edge, draw a thin sliver for a shine, a finger inside the edge.
Step 6: A slice
In front of the right end, draw a round slice as big as your palm, covering part of the cucumber.
Tip The slice sits in front, so the cucumber hides behind it.
Step 7: Inside the slice
Draw a second circle a finger inside the slice. Dot 6 little seeds in a ring in the middle.
Step 8: The ground
Draw a long ground line under the cucumber and the slice, touching the bottom of both.
Step 9: Pale slice
Go over your lines. Colour the middle of the slice light green and the seeds cream.
Step 10: Green cucumber
Colour the cucumber, its nub and the rim of the slice green, around the pale middle. Leave the shine white.
Your finished drawing
Follow the steps above and this is where you end up: a cucumber, drawn by you.
Every step in one picture